 ThingzSafe
 English help manual
Android
Add stock and quantities
Record stock arriving and increase its quantity.
Where to start
Android: Home Site Area (optional) Thing Contents More actions Add quantity · find existing or add new
Add more of a Content
- Start typing the Content's name in Content name. ThingzSafe lists matching entries. You can also tap Scan barcode to find it by barcode.
- Choose the entry you want, or carry on with a new name.
- Tap Continue to details.
- In Quantity to add, enter how many to add. The screen shows the existing quantity and the new total.
- Change any other details if you need to, then tap Add Things.
Good to know: Details you change here apply to every unit, unless you tick Add as a separate entry to record the new ones on their own. Tick Print labels for added units to print labels for only the new items.
Good to know: Quantities must be more than zero and no more than 500 at a time. Only Contents can use part-units, such as 0.5.
When to use something else
- To take stock out, use Remove stock.
- To correct a count after checking, use Check actual quantities.
- To add more of a Thing that is not in Contents, tap Increase quantity · optional labels on the Thing. See Add and edit a Thing.
Need more help or have a suggestion? Contact us.
AI replacement valuations
AI replacement valuation finds prices for similar items and estimates delivery, so you can choose a replacement value for each item you own. It is a starting point for you to review. It is not a guaranteed selling price, and it is not an insurer’s assessment.
Before you start
- Give the item a clear title and category. Add the make, model or edition, ISBN or barcode, size and any useful notes. For a book, the author and edition can make a big difference.
- Choose the country where you would buy the replacement, and the currency you want. Check these rather than relying on your phone or browser language.
- Check the warranty date and your insurance settings. If the warranty is still active, ThingzSafe looks for the price of a new item. If not, it looks for a used one. If you have switched on New for old, it always looks for a new one.
- You need an internet connection and a connected Pro household. Fair usage limits apply.
Value one item on Android
- Open the Thing, Part or Content and choose Edit details.
- Beside Current value (each), tap AI. Check the identity details in the edit form first.
- Check Country and Currency, then tap Generate AI valuation.
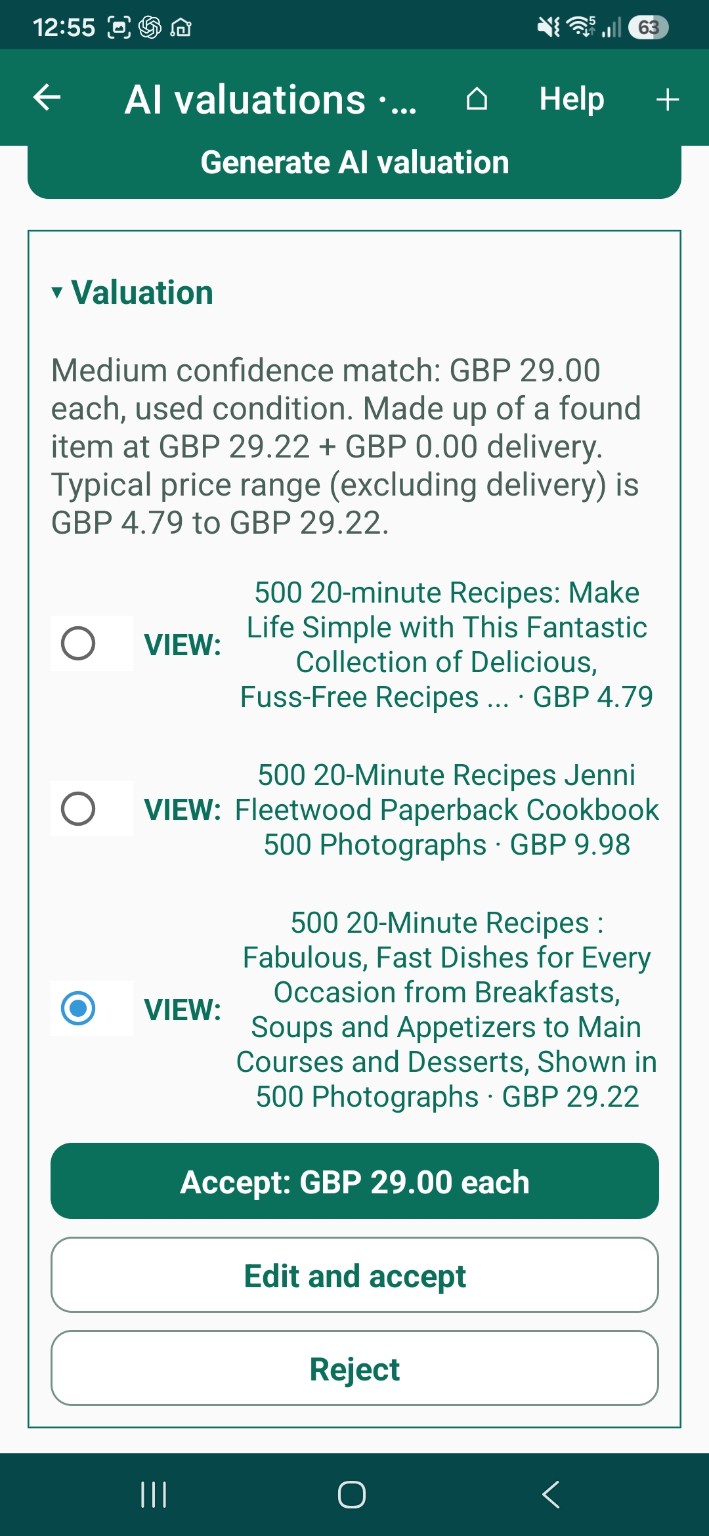
- Keep the valuation screen open while it works. Read the result, and open the VIEW links if you want to check a listing.
- Choose a price, then tap Accept or Edit and accept. The chosen value goes back to the edit form. Save the edit form to keep it.
The magnifying glass is a separate, ordinary web search. It does not create or accept an AI valuation.
Value several items together
On Android
Open AI valuations from Needs review, or from another supported item list. Tick only the items you want, then choose Generate. If you start from Needs review, only the items in that review list are included.
On the web
- Open Bulk Review Items.
- Tick the AI valuation column for each row you want. The box in the heading ticks or clears all of them.
- Choose Generate AI valuations for selected items · Pro. If you have unsaved changes in the grid, confirm the save first.
- In the valuation window, check Country and Currency, then choose Generate.
When it finishes, the list shows just the items from that run. Choose Show all items to go back to the full list, where it is offered.
Reading the result
- The proposed value is the replacement value for one item. Next to it you will see whether it is based on a new or used item, how confident the match is, the price found, delivery, and the usual price range without delivery.
- Up to three price choices show a low, a middle and a high example. ThingzSafe starts with the higher reasonable one. Choose another and the amount updates to include that listing’s delivery. Check the Accept amount before you accept.
- VIEW opens the original listing. Listings can change or end, show a different version, or have delivery limits. Check the exact model or edition, condition, quantity, currency and postage yourself.
- Confidence shows how well the listing seems to match your item. It is not a guarantee. The range shows the prices that were found. It is not a formal valuation certificate.
Country and delivery
ThingzSafe looks at sellers in your chosen country first. It uses overseas listings only when it cannot find reliable local ones. For overseas listings it allows extra for postage, at least three times the listed delivery cost, and it never assumes missing or zero postage is free.
Delivery is an estimate, especially for large items or international shipping. Check the destination and the seller’s delivery terms before you accept.
Accept, edit or reject
- Accept uses the amount shown for that proposal.
- Edit and accept lets you type your own reviewed replacement value, including delivery.
- Reject leaves the current value as it is.
- Mark item as reviewed when accepted also clears the item’s Needs review flag when you accept its value. It is separate from the box you ticked to choose the item.
- Accept selected reviewed proposals applies the proposals you have selected and closes the valuation screen. On the web, the values go back into the Bulk Review grid. The accept button also appears below the results, where shown.
Accepted results fold away so you can carry on down the list. Your existing values do not change until you accept. Values are per item, and your inventory totals take quantity into account.
If you started from a single item’s edit form, accepting returns the value to that form, so save the form to keep it. When you accept several items together, their values are saved straight away.
If it stops or goes wrong
- Cancel remaining stops any further items once the current one finishes. Results already found are kept for you to review. Cancel closes the whole process, and values you have already accepted stay saved.
- If the connection drops, follow the message on screen. A failed lookup may need a fresh try, but one that is still working can be recovered. Please do not keep pressing Generate just because a result has not appeared yet.
- If Android offers Retry after a display problem, it only shows the result again, without another AI lookup. Use Details or Copy details when you contact us.
- If nothing reliable is found, improve the title, category, make, model or edition, or type in a value yourself.
Using Alexa
with ThingzSafe
Find your belongings, check what is in a cupboard, and update your stock as you use it or restock it. All by voice.
Alexa voice commands use UK English. Translated examples explain how it works; they do not promise voice support in other languages.
Alexa voice control is included with Pro. This page explains how to use it.
- Getting started
- Things to say
- Quick mode
- If Alexa gets a name wrong
- Counting
- When something runs out
- If something goes wrong
- Privacy and safety
Getting started
Set up once. Talk any time.
You will need:
- A ThingzSafe Pro household
- Your inventory saved in the cloud, with an internet connection
- Your cupboards and storage places already set up in ThingzSafe
Link Alexa
Connect Alexa to your ThingzSafe household. Check you have chosen the right household.
Say the opening words
Begin with “Alexa, ask ThingzSafe to…”.
Say what you want
For example: “…add four tins of tomatoes to the kitchen cupboard.”
Never say a password or sign-in code aloud. You do not need to.
Sharing an Echo? Anyone who can use a connected shared Echo may be able to ask about your stock. Use read-only mode to prevent changes, or disconnect Alexa at any time.
Things you can say
Say it your way.
Alexa understands everyday wording such as add, put, remove, take out, how many and where.
Add supplies
Four tins are added to what is recorded.
Use something
One tin is taken off the total.
Finish a package
One packet or tube is removed. Alexa asks where it was if needed.
Correct the count
The total becomes five, once you confirm. It does not add five.
Check a quantity
Alexa reads out what is recorded.
Find something
Alexa tells you where matching items are recorded.
Move supplies
Two tins are moved from one place to the other.
Get help
Alexa gives you a few short examples.
Reverse a mistake
Alexa checks the last voice change and asks before reversing it.
One instruction at a time. Add the milk first, then remove the tomatoes as a separate instruction. For a longer list in one cupboard, use quick mode (below).
Adding something new
Say “Add toothpaste” and Alexa asks how many. If it is not yet recorded in that cupboard, Alexa offers to add it as a new item inside that cupboard, and checks the details with you first. To create new cupboards, Areas or Sites, use the app.
Quick mode
Restocking or counting a whole shelf?
Pick one cupboard or storage Thing, then say your items one after another. You only say the cupboard once.
Quick add
Start with one of these:
- “Add the following to the kitchen cupboard.”
- “Start list mode for the kitchen cupboard.”
- “Start quick add mode for the kitchen cupboard.”
Then say each item with its quantity, for example “tinned tomatoes four”, “five gherkins”, “six pork chops”. You can say the quantity before or after the name.
- Quick add increases what is recorded.
- Each clear entry is saved straight away, with no yes or no each time.
- If a name, place or amount is unclear, Alexa asks.
Quick stock check
Say “Start quick stock check mode for the kitchen cupboard” or “Start quick check mode for the kitchen cupboard”. Then say “gherkins two”, “tomatoes five”. Each number is what is there now, so it replaces the recorded count. It does not add to it.
Finishing
Say “Finish”, “Stop” or “Cancel” to leave quick mode. Entries already saved stay saved. Cancelling does not undo the whole list.
Tips. Wait for Alexa to finish speaking and start listening before your next entry, because it cannot follow two things said at once. Use full product names when several things might match. Singular and plural, such as meringue nest and meringue nests, should be treated as the same item when there is only one match.
If Alexa gets a name wrong
You do not have to be perfect.
If there is a likely match, Alexa checks with you before it changes anything.
If the suggestion is wrong, say “No”. Alexa asks what you meant. Nothing changes until the corrected instruction is confirmed.
If several items or places match, Alexa asks which one you mean. Add the Site or Area if it helps, for example “the kitchen cupboard at home”.
Teach Alexa your own names. You will be able to save a nickname, such as “barn cupboard” for “barn store”. Alexa always asks before it remembers a new name. Different products are never joined together just because they sound alike.
Changed your mind?
- Say “Actually, make that three” to change the amount before it is saved.
- Say “Cancel” to stop without changing anything.
- If you leave a question unanswered for too long, just start again. A late “Yes” will not complete an old request.
Counting
Be clear what you are counting.
Say what you are counting: four tins, two packets or one tube. Finishing one packet of teabags takes one packet off, not every teabag inside it.
- “Tins” and “cans” mean the same thing.
- Jars, pots and cans may be different things, so Alexa may ask which you mean.
- “Four tomatoes” and “four tins of tomatoes” are kept as separate entries, unless you choose otherwise.
- Weights and part quantities depend on the unit recorded for that item. Alexa asks if it cannot use the quantity you give.
When you count what is really there
Say “There are five…” or “Stock check five…” to replace the recorded count. Alexa reads back the old and new numbers, and asks you to confirm. It also notes when the stock was last checked.
Taking away more than you have
If you ask to remove more than is recorded, Alexa tells you what is recorded and asks what you want to do. It never quietly goes below zero. An item with an unknown quantity is not the same as an item with none left.
When something runs out
Empty does not mean forgotten.
Items stay in ThingzSafe when they reach zero, so you can find them and restock them later.
“I’ve run out of toothpaste” could mean you have finished one tube, or that you have none left anywhere. If it is unclear, Alexa asks.
Out-of-stock report. In the Android app and on the web, choose a Site, Area or storage place and see what is empty. An empty cupboard with spare stock upstairs is different from having none anywhere; the report shows the difference.
Shopping list. Pick items that have run out, add them to a ThingzSafe shopping list and share it. Ask Alexa what has run out, or add toothpaste to that list. Adding the same item twice does not create a duplicate.
Amazon’s own shopping list is not part of this feature. The ThingzSafe list is separate.
Finding belongings and borrowed items
Alexa looks through your Things and Contents. Sold and disposed items are left out. If something is on loan, Alexa tells you it is not available, and never uses borrowed stock when you remove or move items. If there are lots of matches, Alexa offers to read more.
If something goes wrong
Quick fixes.
Alexa cannot find the item
Use the name as it appears in ThingzSafe, and add the cupboard, Area or Site. You can also ask “Where do I have…?”.
Alexa suggests the wrong match
Say “No” and give the right name. Nothing changes just because Alexa made a suggestion.
The quantity is wrong
Count what is really there, then say “There are…” to set the right number.
I made a mistake by voice
Try “Undo that”. If it cannot be safely reversed, put it right with a stock check or in the app.
Someone else changed the stock
Alexa always works from the latest numbers and may ask you to confirm again. Undo never wipes out someone else’s change.
The connection dropped
Do not assume it failed, and do not say it again straight away. If Alexa could not confirm the result, check the quantity in ThingzSafe first.
Changes are blocked
Check that you are connected to the right household, that you have a Pro subscription, and that Alexa is not set to read-only.
Privacy and safety
What Alexa says, and what it keeps private.
- Alexa reads out names, places, quantities and whether something is available.
- It does not read out values, private notes or contact details.
- Every voice change appears in your change history.
- Alexa stops working if you disconnect it or your Pro plan ends. Your inventory is not deleted.
Need help, or have an idea?
Contact ThingzSafe. Tell us what you said, what Alexa replied and what you expected. Please do not include passwords or sign-in codes.
Developer API reference
The developer API is included with Household and Pro. It is for developers and technically confident users who want their own application or script to search inventory, calculate valuations, read supported attachments and make approved changes. If you only want to ask questions in everyday words, connect ChatGPT instead.
You can try everything in the web app first: open How to use API, run a search or valuation report, inspect the request and response and copy a working example.
- Quick start
- Request format
- Sites
- Areas
- Categories
- Things
- Valuations
- Attachments
- Create, edit, move
- Limits and errors
- MCP
API quick start and access tokens
Base URL and authentication
Use HTTPS at https://app.thingzsafe.com. Send a developer token in the request header:
Authorization: Bearer YOUR_TOKEN
Content-Type: application/json
Use a developer token created in the web app, not an Android/device sign-in token or an AI assistant OAuth token. Each token is tied to one household and its verified owner. Active Household or Pro cloud access is required.
Create a token
- Sign in to the web app as the household owner.
- Open How to use API.
- Enter a connection name and an expiry of 1–90 days. The default is 30 days.
- Select the required permissions and choose Create token.
- Copy the token while it is shown. It cannot be displayed again later. Store it in your application's secret configuration.
The initial selections are inventory reading and valuation reports. Inventory changes and file reading are separate optional selections. A household can have up to 20 active, unexpired developer tokens. Use Revoke to stop an unused token; creating a replacement does not automatically revoke the previous one.
| Scope code | Developer API | ChatGPT |
|---|---|---|
inventory.read |
Inventory and location/category lookup | Same |
reports.read |
Valuation reports | Same |
inventory.write |
Supported create/edit/move batches | Same |
files.read |
Selected attachment listing/reading; also requires inventory.read |
Same |
feedback.write |
Not issued by the developer-token screen in this release | Support report drafts/submission; also requires inventory.read |
Developer write routes require inventory.write; include inventory.read as well if your application looks up records before proposing changes. AI assistant write tools require both.
Try a read in PowerShell
The following prompts for the token locally without displaying it. It uses the existing Sites in your household and changes no inventory.
$token = [System.Net.NetworkCredential]::new('', (Read-Host 'Developer token' -AsSecureString)).Password
$headers = @{ Authorization = "Bearer $token" }
$body = @{ kind = 'Site'; offset = 0; limit = 100 } | ConvertTo-Json
Invoke-RestMethod -Method Post `
  -Uri 'https://app.thingzsafe.com/v1/developer/query' `
  -Headers $headers -ContentType 'application/json' -Body $body
Try a read with curl
Put your token in a local secret/environment variable named THINGZSAFE_TOKEN. Save the JSON below as sites.json:
{"kind":"Site","offset":0,"limit":100}
curl 'https://app.thingzsafe.com/v1/developer/query' \
  -H "Authorization: Bearer $THINGZSAFE_TOKEN" \
  -H 'Content-Type: application/json' \
  --data-binary @sites.json
On Windows PowerShell, use the PowerShell example above, or invoke curl.exe with Windows shell syntax. Never publish a real token in an example, screenshot or support conversation.
Shared request format, IDs and pagination
Endpoint map
| Method | Path | Purpose |
|---|---|---|
| POST | /v1/developer/query |
Sites, Areas, Categories, Things and valuation queries |
| POST | /v1/developer/attachments/list |
List attachments for selected Thing IDs |
| POST | /v1/developer/attachments/read |
Read one selected attachment or PDF page batch |
| POST | /v1/developer/batches/preview |
Preview create/edit/move changes |
| POST | /v1/developer/batches/execute |
Execute exactly one approved preview |
| GET | /v1/developer/batches/{batchId} |
Recover a preview or execution result using the same credential |
These are the developer-facing routes documented here. The web app's own authenticated management routes are not interchangeable with developer-token routes. In particular, a developer token cannot create or enlarge its own permissions.
Query fields
{
  "text": null,
  "siteId": null,
  "areaId": null,
  "categoryId": null,
  "kind": null,
  "relationship": null,
  "parentThingId": null,
  "includeDescendants": false,
  "missingValueOnly": false,
  "offset": 0,
  "limit": 100,
  "report": false
}
| Field | Meaning |
|---|---|
text |
Optional case-insensitive substring search; maximum 160 characters |
siteId, areaId, categoryId |
Optional IDs from previous lookups; omit or use null for no filter |
kind |
Site, Area or Category for lookup; omitted/null means Things |
relationship |
Any, Thing, Part or Content; omitted/null includes all relationships |
parentThingId |
Select direct children of that Thing, or descendants when requested |
includeDescendants |
With a parent ID, include nested descendants; the parent itself is excluded |
missingValueOnly |
Only records with neither an entered value nor an available estimate |
offset |
Zero-based start, 0–5,000 |
limit |
Page size, 1–200; default 100 |
report |
True for valuation totals; requires reports.read |
Do not combine a metadata kind lookup with hierarchy fields, or use a metadata kind with report:true. Use IDs, not location names, in the ID fields. Ambiguous names must be resolved before choosing an ID.
IDs may be compact 32-character GUID strings or standard hyphenated GUID strings. Keep returned IDs unchanged. All IDs in the examples below are fictional placeholders: look up and substitute your own.
| Example | Fictional ID |
|---|---|
| Site | 11111111-1111-4111-8111-111111111111 |
| Area | 22222222-2222-4222-8222-222222222222 |
| Category | 33333333-3333-4333-8333-333333333333 |
| Thing | 44444444-4444-4444-8444-444444444444 |
| Blob | 66666666-6666-4666-8666-666666666666 |
Follow every page
Read totalCount, returnedCount, hasMore and nextOffset. While hasMore is true, repeat the same filters using the returned next offset. Do not report a page's item count as the total count.
Results are live rather than a frozen export. If inventory changes during paging, re-run the query for a consistent fresh assessment.
Sites
Permission: inventory.read
Use the shared query endpoint to discover Site IDs. A Site is a top-level location, such as House or Barn.
{"kind":"Site","text":"House","offset":0,"limit":100}
Read each returned item's id, kind, name and revision. Other generic fields may be present and need not be used for a Site lookup. Follow pagination if there are more results.
Sites are read through this interface. To create, rename or delete a Site, ask your connected AI assistant (it shows a preview for your approval) or use the web or Android app. To retrieve Things under a Site, omit kind and filter by the chosen siteId.
Areas
Permission: inventory.read
An Area belongs to a Site, such as Kitchen in House. Look it up within its Site to avoid mixing identically named Areas from different Sites.
{
  "kind":"Area",
  "siteId":"11111111-1111-4111-8111-111111111111",
  "text":"Kitchen",
  "offset":0,
  "limit":100
}
Read the Area's returned id and siteId. To search Things in the Area, omit kind and supply its areaId; you may also supply its Site ID. If both filters are supplied, both must match. A mismatched pair returns no matching inventory rather than silently selecting another Area.
Areas are read through this interface. To create, rename or delete an Area, ask your connected AI assistant (it shows a preview for your approval) or use the web or Android app. An Area that still holds things cannot be deleted. In the web tester, changing Site refreshes the available Areas; an invalid old Area selection is cleared.
Categories
Permission: inventory.read
Categories classify Things independently of location. Find an existing Category before using its ID as a filter or assigning it in a supported create/edit batch.
{"kind":"Category","text":"Cameras","offset":0,"limit":100}
The lookup returns IDs for Categories already in the household. Resolve an ambiguous name rather than guessing. To search Things in that Category, omit kind and use categoryId.
This is a lookup interface. Category creation, schema/custom-field editing and deletion are not exposed. A Category lookup is not a complete export of all category settings or custom-field definitions.
Things, Parts and Contents
Permission: inventory.read
Search top-level Things
{
  "text":"camera",
  "categoryId":"33333333-3333-4333-8333-333333333333",
  "relationship":"Thing",
  "offset":0,
  "limit":100
}
The text search checks name, description, model, serial number and barcode using a case-insensitive substring match. It is not a semantic search and does not search attachment contents or notes. Combine filters only when every filter should apply.
Direct Contents of a Thing
{
  "parentThingId":"44444444-4444-4444-8444-444444444444",
  "relationship":"Content",
  "includeDescendants":false,
  "offset":0,
  "limit":100
}
For direct Parts, change relationship to Part. For all direct children, omit the relationship filter. Use includeDescendants:true to include nested descendants. A relationship filter still applies to each returned descendant. The parent itself is excluded.
relationship:"Thing" means top-level records only and excludes both Parts and Contents. Any, omitted or null includes all relationships. The model uses the singular Content in the request even though the user interface says Contents.
Important returned fields
| Field | Meaning |
|---|---|
id, revision |
Stable record ID and current revision |
name, kind |
Display name and record kind |
relationship |
Thing, Part or Content |
siteId, areaId, parentThingId |
Location/ownership references |
siteName, areaName, parentThingName |
Available display names |
categoryId |
Resolved Category ID, where available |
quantity |
Quantity represented by that record |
currentValue |
Entered value each, possibly null |
effectiveValue |
Entered value, otherwise the available purchase-price estimate |
estimated, valueSource |
Whether the effective value is estimated; source is entered, estimate or missing |
currency |
Currency used for that record |
status |
Raw stored status representation; no status-filter parameter is exposed |
createdAt, purchaseDate |
Available recorded dates; neither is an installation/fitting date |
This response is a defined projection, not the complete underlying Thing JSON. Notes, full custom fields, loan/rental/contact records and structured event histories are not returned by this query. Use the attachment endpoints to inspect supported attached content separately.
Valuations and missing values
Permission for reports: reports.read
Send the same relevant Thing filters with report:true. Omit kind.
{
  "areaId":"22222222-2222-4222-8222-222222222222",
  "relationship":"Thing",
  "report":true
}
A valuation report calculates across all matches on the server; you do not need to page through item lists to obtain its totals. A report's items is null, returnedCount is zero and hasMore is false, while totalCount still gives the matching-record count.
Illustrative response excerpt—not a full response:
{
  "totalCount":12,
  "returnedCount":0,
  "hasMore":false,
  "nextOffset":null,
  "summary":{
    "totalsByCurrency":{"GBP":1250.50},
    "missingValuations":2,
    "estimatedValuations":4,
    "enteredValuations":6
  },
  "items":null
}
Each effective value is multiplied by quantity. Currency totals remain separate. The counts describe records, not a sum of quantities.
An entered current value, including zero, takes precedence. Otherwise ThingzSafe may calculate an estimate from purchase price, purchase date, warranty/category rules and the household's new-for-old preference. Where the existing inventory rules permit it, undated Contents can have a purchase-price estimate; not every undated top-level Thing or Part has one. An estimate is not a fresh AI market valuation. This route does not call the Pro AI valuation service.
To list records with neither an entered nor an estimated value:
{"missingValueOnly":true,"offset":0,"limit":20}
By default, reports include all statuses and Parts/Contents. Specify relationship:"Thing" for top-level-only totals. The API does not apply all the web inventory valuation report's optional risk, exclusion or ownership filters, and it does not convert currencies.
Photos and documents
Permissions: inventory.read + files.read
List selected attachments
POST /v1/developer/attachments/list:
{
  "itemIds":["44444444-4444-4444-8444-444444444444"],
  "offset":0,
  "limit":50
}
Select 1–20 Thing IDs per request. The result is wrapped in isError, code, structuredContent and content. In structuredContent, inspect totalCount, returnedCount, hasMore, nextOffset and items.
Each file entry identifies its owning itemId, blobId, fileName, source, available mimeType and byte length, plus available. A file reference can exist even if its blob is unavailable. The same blob referenced repeatedly on one Thing is listed once; the same blob associated with two Things may appear for both.
Include the IDs of Parts/Contents separately when their attachments matter. A parent Thing alone does not implicitly include its children's files.
Read an attachment
POST /v1/developer/attachments/read:
{
  "itemId":"44444444-4444-4444-8444-444444444444",
  "blobId":"66666666-6666-4666-8666-666666666666",
  "page":1
}
Both IDs must come from the selected Thing and its file listing. The service checks the live relationship and household. It does not accept arbitrary storage URLs.
Illustrative response shape, with image data omitted:
{
  "isError":false,
  "code":null,
  "structuredContent":{
    "itemId":"44444444444444448444444444444444",
    "blobId":"66666666666646668666666666666666",
    "fileName":"Example receipt.pdf",
    "mimeType":"application/pdf",
    "pageCount":3,
    "firstPage":1,
    "returnedPages":2,
    "hasMore":true,
    "nextPage":3
  },
  "content":[
    {"type":"text","text":"Attachment metadata is supplied here."},
    {"type":"image","mimeType":"image/jpeg","data":"BASE64_JPEG_PAGE_1"},
    {"type":"image","mimeType":"image/jpeg","data":"BASE64_JPEG_PAGE_2"}
  ]
}
For this example, call again with page:3. PDF page numbering is one-based. Images and text documents use page 1 only.
Decode image blocks' base64 data as the stated MIME type. Text blocks contain extracted text. The returned images are prepared views, not an original-file download API. PDFs are rendered, so scanned documents can be inspected too. No public/SAS download URL is returned, and no AI analysis or receipt classification occurs on this API route.
Supported formats and omissions are listed in the ChatGPT files guide. In particular, DOCX is main-document text only, and XLSX/RTF are unsupported. Treat unavailable, unreadable, unsupported or partial reads as unexamined. Do not count them as negative evidence.
Create, edit and move Things
Use a two-stage flow: preview the exact proposal, show it to the user for approval, then execute the saved preview. Previewing does not change or lock the inventory while the user decides.
Each proposal needs a fresh requestId of 1–80 characters; a generated UUID is convenient. Use the same request ID and identical payload only for retries of that proposal. A developer batch is bound to the credential that created it. Use the same token for preview, execution and recovery.
Create top-level Things
POST /v1/developer/batches/preview:
{
  "requestId":"example-create-001",
  "action":"create",
  "siteId":"11111111-1111-4111-8111-111111111111",
  "areaId":"22222222-2222-4222-8222-222222222222",
  "categoryId":"33333333-3333-4333-8333-333333333333",
  "items":[{"name":"API test — delete later","quantity":1,"notes":"Created for API testing"}]
}
Use a real destination Site. The Area, if supplied, must belong to it. Omit Area to put the Thing directly in the Site. If Category is omitted, an existing Other category is used; if it is unavailable, choose an existing category explicitly. Creation is for top-level Things, not new Parts/Contents under a parent.
Edit existing Things
{
  "requestId":"example-edit-001",
  "action":"edit",
  "itemIds":["44444444-4444-4444-8444-444444444444"],
  "values":{"notes":"Checked through the API","needsReview":false}
}
The supplied values apply to every selected record. Omitted fields are preserved. An optional top-level categoryId can reassign the Category. Use a move action for location changes.
Supported values/create-item fields:
| Field group | Supported keys |
|---|---|
| Text | name, notes, make, model, barcode, position, size |
| Numbers | quantity, purchasePrice, currentValue |
| Dates | purchaseDate, warrantyEndDate, currentValueDate |
| Other | currentValueCurrency (three uppercase letters), needsReview (boolean) |
Name must be non-empty; ordinary text is limited to 200 characters and notes to 4,000. Quantity must be 0–1,000,000, with whole quantities for top-level Things and Parts; existing Contents may permit fractions. Money values must be non-negative and no greater than 1,000,000,000,000. Use ISO date strings such as 2026-10-25. Optional nullable fields can be cleared with null; quantity and currency cannot be null, and name cannot be empty/null.
This is not a general record-patching interface: do not send status, photo IDs, parent IDs, loan/disposal information or arbitrary custom fields. Existing unrelated data is preserved on supported edits.
Move Things and their owned children
{
  "requestId":"example-move-001",
  "action":"move",
  "itemIds":["44444444-4444-4444-8444-444444444444"],
  "siteId":"11111111-1111-4111-8111-111111111111",
  "areaId":"22222222-2222-4222-8222-222222222222"
}
A selected Thing moves with its owned Parts/Contents, including nested children. Inspect the full expanded preview: the 100-record batch limit includes affected descendants. Selecting both parent and child does not move the child twice. Moving a selected child makes it a top-level Thing at the destination; moving a parent retains the descendants' ownership links beneath it. This operation does not move stock into another Thing or split a quantity.
Review the response
A preview includes batchId, previewHash, status, expiresAt, action, affectedCount and changes. Each change includes an ID, expected revision, before and after details. A create has no before record.
Show all affected records and before/after details to the user. Resolve display names from the location/category lookups where needed. A preview expires after 15 minutes. Relevant changes to records or a moved ownership tree make execution fail; prepare a new preview and obtain approval again.
Execute the approved preview
POST /v1/developer/batches/execute:
{
  "batchId":"BATCH_ID_FROM_PREVIEW",
  "previewHash":"EXACT_HASH_FROM_PREVIEW",
  "confirm":true
}
The two placeholder strings must be replaced with the server's actual values. confirm:true is the calling application's assertion that approval was obtained; it is not independent proof of a human click. Your application must implement the review/approval step.
Execution is all-or-nothing. A successful result has status Executed, the action, affected count and record IDs/revisions. Changes join normal cloud sync and have integration Events. Devices will see them when they next sync.
Recover after a timeout
GET /v1/developer/batches/{batchId} with the same developer credential. If already Executed, use the saved result. Otherwise, retry the exact batch/hash while valid. Do not generate another create request merely because a response was lost. Re-executing a completed batch returns its original result. Old completed records may be cleaned up after 90 days; do not use them as indefinite job storage.
Limits, errors and unsupported operations
Current bounds
| Area | Limit |
|---|---|
| Shared household read allowance | 30 developer/MCP queries/reads per minute; retry handling can differ by route |
| Inventory evaluation | 5,000 source records and 8 MiB encrypted data |
| Inventory result page | 200 records maximum |
| Query request body | 4,096 bytes |
| Developer write request body | 65,536 bytes |
| Active inventory previews | 10 per household; 15-minute expiry |
| Inventory batch | Up to 100 affected Things including moved descendants; saved proposal up to 512 KiB |
| Committed write allowance | 1,000 Things and 10 MiB compact audit payload per 24-hour usage window, shared across credentials |
| Attachment request body / MCP request body | 16,384 bytes |
| Attachment selection/page | 20 selected Thing IDs; up to 50 file references per page |
| Attachment metadata processing | 10,000 relevant records / 16 MiB encrypted data; 5,000 selected file references |
| Source attachment | 20 MiB per read |
| Prepared image/PDF page | Maximum 1,800-pixel edge; up to 3 MiB encoded JPEG per image |
| Image source | Up to 40 million pixels |
| Up to 1,000 pages; at most two pages returned per read | |
| TXT/CSV/HTML | Up to 200,000 source bytes |
| DOCX extraction | Up to 100,000 text characters; no layout/embedded-image inspection |
| File processing concurrency | One download/render operation at a time per API process; retry busy responses |
| ChatGPT feedback | Ten committed reports per rolling 24 hours, plus shared request allowance; 15-minute draft expiry |
The shared minute allowance is used by inventory queries, attachment calls, new inventory previews and feedback preview/submit calls. Inventory execution and saved-batch recovery have their own checks; successful retries do not consume another committed-write allowance. Other HTTP rate limits also apply. Limits are not an entitlement to unlimited CPU, attachment analysis or ChatGPT usage. Treat explicit processing-limit errors as incomplete work rather than inventing totals.
Read failures correctly
Inventory query/write routes generally return a JSON code on application errors. Attachment routes use an isError/code wrapper as well as HTTP status. Inspect both the HTTP status and response body. MCP tools can return HTTP 200 with result.isError:true; inspect the tool result rather than assuming transport success means the operation succeeded.
| Status or code | Meaning / next step |
|---|---|
400 / InvalidQuery, validation codes |
Correct field names, types, IDs or bounds |
401 / InvalidCredential |
Missing, expired, wrong-type or revoked credential; check/reconnect without exposing it |
403 / ScopeRequired, WriteAccessRequired, AttachmentAccessRequired |
Required permission or active owner/household access is missing |
404 / BatchNotFound, ThingNotFound, AttachmentNotLinkedToThing, AttachmentUnavailable |
Check ownership/IDs and whether the resource still exists; do not guess another blob |
409 / PreviewStale, OwnershipTreeChanged |
Read current state, prepare a new preview and obtain approval again |
409 / PreviewHashMismatch, RequestIdReused |
Use the saved hash/exact original retry payload, or a fresh request ID for a genuinely new proposal |
410 / PreviewExpired, FeedbackPreviewExpired |
Unused preview expired; review a new draft before approval |
413 / BatchTooLarge, request-size failure |
Reduce the request or affected set |
422 / InventoryProcessingLimit, IntegrationInventoryLimit, attachment processing errors |
Work could not be completed within bounds; do not present a partial result as complete |
429 / HouseholdReadLimit, WriteAllowance, FeedbackDailyLimit |
Pause and retry within the relevant allowance; observe Retry-After where supplied |
503 / HouseholdBusy, CommitBusy, FeedbackBusyRetrySamePreview |
Short-lived contention: retry the same operation, not a new create proposal |
AttachmentRendererBusy |
Retry the same attachment/page later; for MCP, this is a tool-level error |
AttachmentContentInvalid, AttachmentUnreadable, AttachmentFormatUnsupported |
The attachment was not successfully inspected; report it as unexamined |
Error names are route-specific; an error body need not contain a human-readable message. Log the code and request context, but keep tokens and attachment payloads out of application logs.
Not exposed in this release
Site/Area/Category creation or deletion; Thing deletion; creating new Parts/Contents under a parent; attachment uploads or original-file downloads; contact queries; structured loan/rental/reservation queries or actions; fitted/installation history; Pro AI recognition/valuation actions; arbitrary status/custom-field changes; currency conversion; public access to the support log. Use the ordinary app/web features where available.
MCP tools and advanced connection details
Most developers should use the developer-token routes above. MCP is the separate interface used by the ChatGPT, Claude and Google Gemini connections; it uses OAuth rather than a developer token. All three use the same server address. ChatGPT uses client ID thingzsafe-chatgpt and Claude uses thingzsafe-claude. Gemini connects through the published ThingzSafe app, so it needs no client details.
| MCP tool | Purpose |
|---|---|
get_connection_profile |
Linked household and granted scopes |
list_inventory_locations |
Site/Area/Category lookup |
search_inventory |
Thing/Part/Content search |
inventory_valuation |
Valuation summary |
list_inventory_attachments |
Selected file metadata |
read_inventory_attachment |
Images, PDF pages or supported text |
preview_inventory_changes |
Saved create/edit/move proposal |
execute_inventory_changes |
Commit the approved inventory proposal |
get_inventory_change_batch |
Recover proposal/execution result |
preview_feedback_report |
Exact bug/change report draft; no submission |
submit_feedback_report |
Submit the approved support report |
MCP endpoint: https://app.thingzsafe.com/mcp. It supports stateless Streamable HTTP POST with negotiated protocol versions 2025-03-26 and 2025-06-18. Tool discovery is public; private tool calls require authorisation.
Discovery endpoints are /.well-known/oauth-protected-resource, /.well-known/oauth-protected-resource/mcp and /.well-known/oauth-authorization-server. The static public client ID is thingzsafe-chatgpt; token endpoint authentication is none, with mandatory PKCE S256. The default configured callback is https://chatgpt.com/connector_platform_oauth_redirect. This is not a promise that arbitrary third-party OAuth client IDs or redirect URLs can register themselves.
Read the tool schemas rather than copying developer query bodies unchanged: for example, inventory_valuation selects report behavior through the tool name and does not accept a report field. list_inventory_locations uses kind; search_inventory selects Things without a kind argument. Follow isError, scopes and continuation fields.
Support reports map Bug to a failed supported operation and Change to a feature request. Both report tools require inventory.read plus feedback.write. Show the complete comment, destination and account/household association before submission. Submit the exact previewId/previewToken with confirm:true. The sealed token is connection-bound and expires in 15 minutes if unused. There is no equivalent developer-token feedback endpoint in this release.
Never publish a real token in an example, screenshot or support conversation. If a token is exposed, revoke it in How to use API.
Android
Check an entire Area
Check the items in one Area against your records.
Where to start
Android: Home Site Area ✓ Stockcheck this Area
Check everything in an Area
- Open the Area, then tap ✓ Stockcheck this Area.
- Enter the real count for each Thing directly in the Area, and for each of their Contents. Enter 0 for anything missing.
- Tap Review and save counts.
- Check the differences shown, then tap Save.
What happens next: Only quantities that changed are updated. The stock check is recorded even if every count matched. A completed check clears the Area's Needs review flag.
Good to know: Parts are not counted in stock checks.
Need more help or have a suggestion? Contact us.
Android
Encrypted backup and restore
Keep a backup you can restore if needed.
Where to start
Android: Home Menu Account Backup, restore and export
Save a complete backup
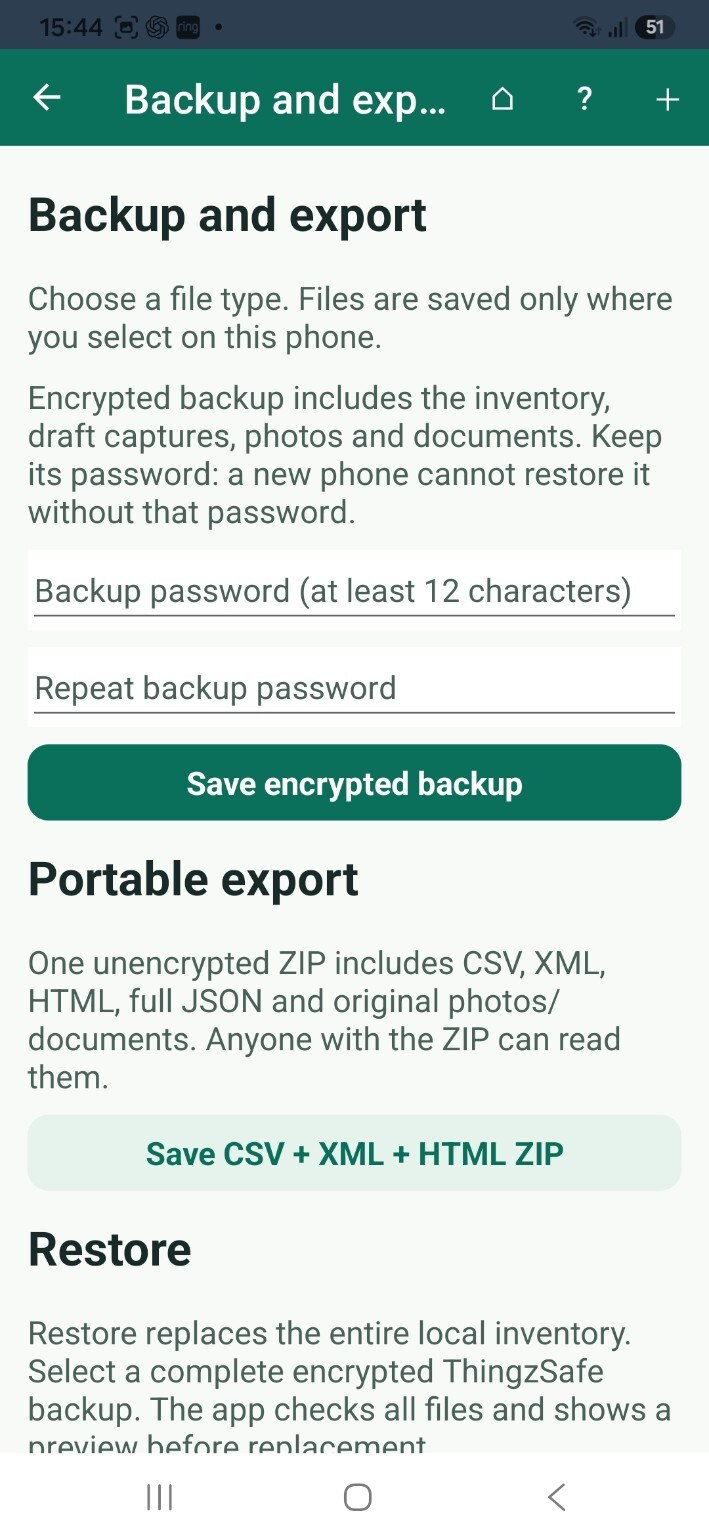
- Go to Menu Account Backup, restore and export.
- Type a password of at least 12 characters, then type it again.
- Tap Save encrypted backup and choose where to save the file.
What happens next: You get a .tsbackup file with your inventory, drafts, photos and documents.
Good to know: Keep the file and its password somewhere safe. If you forget the password, the backup cannot be opened.
Restore a backup
- Type the backup's password.
- Tap Choose backup to restore and pick the .tsbackup file.
- Check the preview of what it contains.
- Type RESTORE when asked, to confirm.
Good to know: Restoring replaces everything on this phone and disconnects it from household sync. It does not change the household's cloud copy. If the password is wrong, nothing changes. Check the spelling and capital letters, and try again.
Fix a phone that is linked to a household
Use Recover phone from household cloud instead. It downloads the household's current inventory and replaces this phone's copy only once everything has arrived. First sync and sort out any conflicts. If it is interrupted, it carries on next time.
Export to read or move your data
Save CSV + XML + HTML ZIP creates a file that is not encrypted, with your data in readable formats and the original photos. It is handy for moving data or reading it elsewhere.
Good to know: Anyone who has that ZIP file can read it. Store it carefully.
Need more help or have a suggestion? Contact us.
Android
Scan Contents barcodes
Find stock entries by scanning their barcodes.
Where to start
Android: Home Site Area (optional) Thing Contents More actions Quick barcode scan
Scan a barcode
- The scanner opens on its own. Point it at a barcode. It reads automatically, so you do not need to press a button.
- Wait while ThingzSafe looks the code up in your inventory and in its product catalogue.
- If you already have it, the app shows its name, location and quantity. Choose Increase existing quantity, Open existing Thing or Create separate Thing.
- If it is new, check the Product name, Size / pack size and Manufacturer / brand, and enter the Quantity.
- Tap Save · Scan next to save and scan the next one. Tap Done when you have finished.
Good to know: You can type the full barcode instead, including any separate first digit at the far left, then tap Look up code.
Plus and minus labels
If you have printed + or − stock labels, scan one here to add or remove one straight away. See Print barcode labels.
If something goes wrong
If the product is not found, ThingzSafe asks you to type its name, size and maker. If you are offline, the barcode is saved and you can enter the name later. See Troubleshooting and support.
Need more help or have a suggestion? Contact us.
Add lots of items
from a few photos
Photograph a room, shelf or collection. ThingzSafe turns what it can see into a list you check before anything is saved.
You stay in control. Nothing is added to your inventory until you have checked the suggestions and confirmed that you want to save them.
- Before you start
- 1. Open the place
- 2. Add photos
- 3. Process
- 4. Check
- 5. Repeats
- 6. Save
- Stock checks
- Your photos
- If something looks wrong
Before you start
What you need.
- ThingzSafe Pro on Android, with your phone connected to your Pro household
- An internet connection
- A manageable group of items. One bookshelf, a workbench or a section of a store is a good start.
- No OpenAI account, ChatGPT subscription or key. You do not need your own.
There are limits on how much you can use recognition. If you use up your allowance, you can carry on adding items in the usual way.
Quick reminder. A Site is a place such as Home or Farm. An Area is somewhere inside it, such as Garage or Barn. A Thing is an item you track. Its Contents are items stored inside it, such as books in a bookcase. Its Parts belong to it, such as the wheels on a trailer.
Step 1
Open the place you want to catalogue.
Open the Site or Area where the items belong, or open a Thing and its Parts, Contents or collection list. Choose Bulk AI recognition.
Starting in the right place helps ThingzSafe understand your photos, and puts the new entries where you expect them.
Step 2
Add your photos.
- Choose Add camera photos to take photos, or Add photos from device to pick photos already on your phone.
- Add up to ten photos. Take a wide shot first, then closer shots of shelves, titles or labels.
- Check the small previews. Open one to see it larger, or choose Remove photo if it is blurred or not useful.
- Before adding photos, choose what you are photographing, such as Books or Tools/workshop equipment. The field starts blank. If you tap a photo button without choosing a type, select the type first, then try again. Use General/mixed objects for a genuine mixture.
Tips for better results. Overlapping photos are fine. Keep things still between shots and make sure there is plenty of light. For books and albums, move close enough to read the lettering. A wide photo may show that books are there without showing their titles.
Step 3
Process the photos.
Read the note about sending photos for recognition, then tap Process photos. You will see progress while your photos are sent and checked. Bigger or busier batches take longer.
What is sent. Your selected photos, and relevant descriptions from your inventory, are sent to OpenAI to recognise items and suggest matches. Keep people, passwords and other private details out of your photos.
Step 4
Check the suggestions.
Look through the results before you save anything.
Name
Correct anything that is unclear or wrongly read.
Quantity
Check how many real items there are. Several photos of one chair still mean one chair.
Source photo
Choose View source photo to see what a suggestion came from.
Possible existing match
Check whether you already have it. A similar name is a hint, not proof.
Include
Leave ticked only what you want to add. New suggestions start ticked. Suggestions with a possible existing match start unticked.
Already recorded? Leave the suggestion unticked so you do not add it twice. If you really own another one, tick it. Saving creates a new, separate record. It does not replace your existing entry or add to its quantity.
The review screen
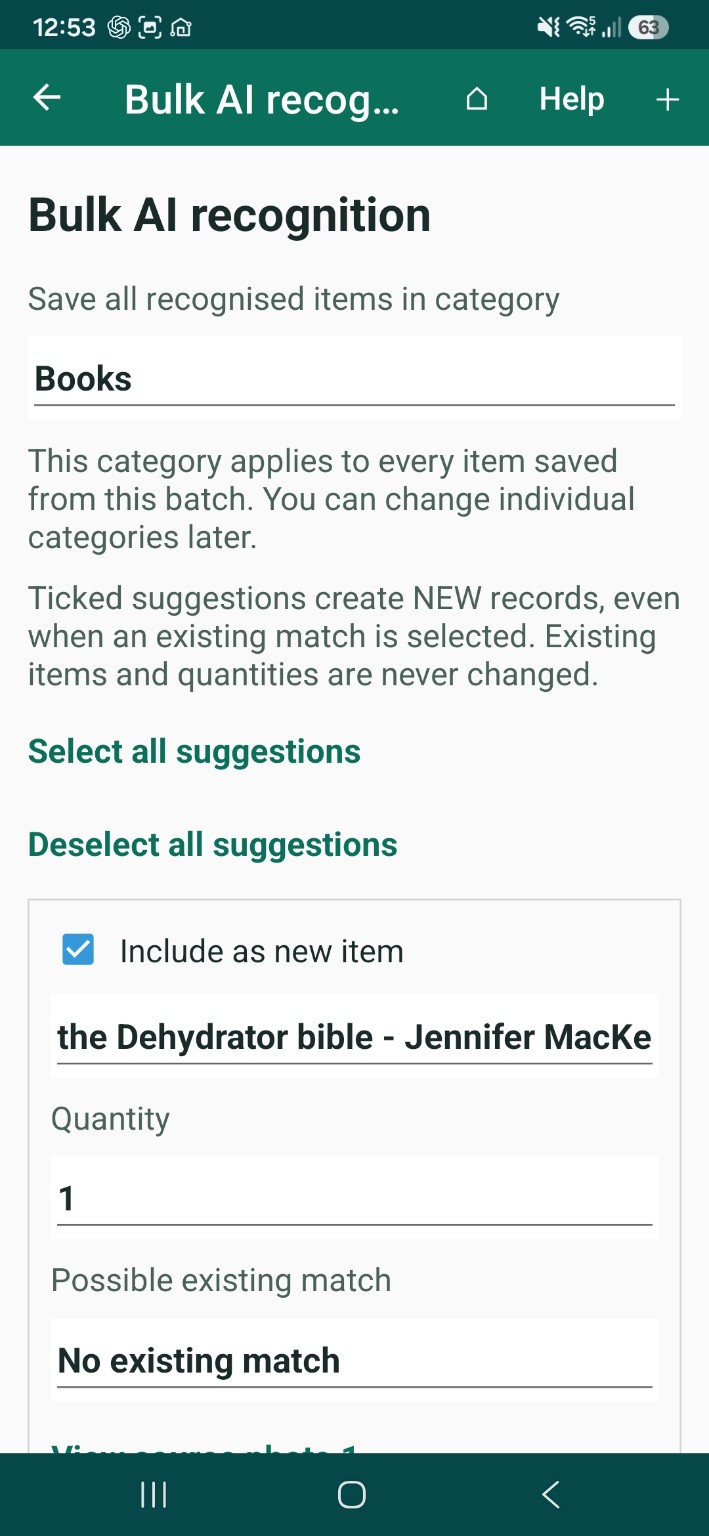
A tick means create a new record. Selecting a possible existing match does not merge the suggestion into it or increase its quantity. Leave already-recorded items unticked unless you intentionally want another separate record.
Check overlapping photos for duplicate suggestions. Two photographs of one book still represent one book. Selecting all also selects suggestions that may duplicate existing entries, so review them again.
Step 5
Repeats and identical items.
If two suggestions show the same object, untick the extra one. Two photos of one book still mean one book.
Own several identical items, such as four matching chairs? Keep one suggestion and set its quantity to the total. Names and quantities can be edited before you save.
Step 6
Choose a category and save.
- Choose a category for all new items in the batch. For a bookshelf this might be Books, and for a store of equipment, Tools. You can change individual ones later.
- The save category starts blank. Select it explicitly before saving: it applies to every new item in this batch. You can change individual item categories afterwards.
- If you started from a Site, check which Area the new entries will go into, where it is shown.
- Want a close-up photo for an item? Use Choose item photo crop where it is offered, and check the crop yourself.
- Choose Save selected new items, then confirm. The selected entries are added just like any other item.
Select all suggestions and Deselect all suggestions change the whole list at once. Check the possible existing matches again after using Select all.
Save photos with new items
When you tick Include as new item, Attach source photos to this new item is ticked too. Untick it if you do not want those photos attached. Photo controls appear only for selected new items.
Choose item photo crop lets you draw a box around an item. You can also adjust its horizontal position, vertical position, width and height with the controls. Choose Use this crop to keep that part of the photo.
Stock checks
Use photos when you count stock.
On the stock check screen, open the AI recognition option and photograph the items you are counting. Check the recognised quantities, and match each suggestion you select to an existing entry.
Choose Review stockcheck counts to send the counts back to the stock check screen. Make any corrections there before you save the stock check. Items not seen in the photos keep their current quantity, and are not set to zero.
Your photos
What happens to them?
- The recognition photos are temporary. They are removed from the server after processing. Unfinished or interrupted copies are normally cleared after 24 hours, when the service is running.
- Your phone removes the temporary photos once you have finished reviewing, unless you choose to keep them. A photo or crop you deliberately save with an item becomes an ordinary attachment in your inventory.
- OpenAI is set not to store responses. OpenAI may still keep data for up to 30 days to watch for misuse. Our normal storage backups may also keep recoverable copies for a time.
If something does not look right
Quick fixes.
Some items are missing
Add them by hand, or try a smaller group with closer, clearer photos.
The names are very general
The writing may be too small to read. Correct the name yourself instead of relying on a guess.
Processing failed
Your session is kept where possible. Check your connection and follow the retry options. If you need help, choose Copy error details and include them when you contact us.
I want to stop
Choose Discard session to remove the unsaved suggestions and the temporary photos.
Recognition can miss things or misread details. It cannot find what is hidden inside things, guarantee a full count or tell you what items are worth. If the recognition service is unavailable, the rest of your inventory works as normal.
Android
Capture photos for later review
Save photos now and finish the item details later.
Where to start
Android: Home Menu Organise Capture photos for review
Take photos now, finish later
Use this when you want to photograph something quickly and add the details afterwards. Each capture is saved as a draft in your Review queue.
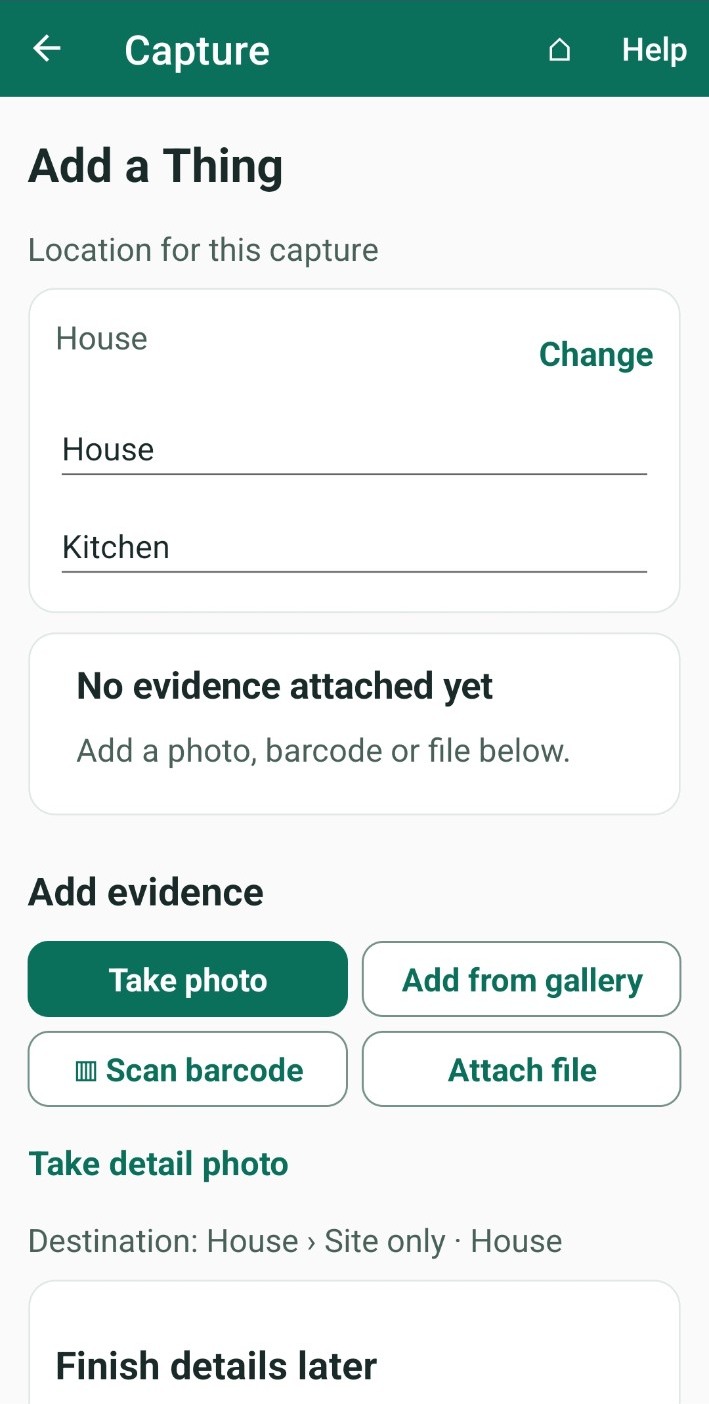
- Tap Change to choose the Site, and the Area if you use them.
- Tap Take photo to use the camera, then Use this photo. You can also tap Add from gallery or Attach file.
- Tap Take detail photo to add more photos of the same item, such as a label or damage.
- To mark which photo shows the item best, tap Main under it. To mark a photo of a label or barcode, tap Code.
- Tap ▥ Scan barcode if you want to scan a barcode as well.
- Save the capture:
- Save for review & add another: saves this capture and starts a new one.
- Save for review & finish: saves this capture and goes back to Home.
- Open review queue: opens the Review queue so you can complete it now.
What happens next: Your photos stay as drafts until you review them.
Good to know: Capturing one item at a time? Try Quick one-photo capture.
Need more help or have a suggestion? Contact us.
Android and web portal
Categories, colours and icons
Group similar items so they are easier to recognise.
Where to start
Android: Home Menu Organise Manage Categories
Web portal: Categories
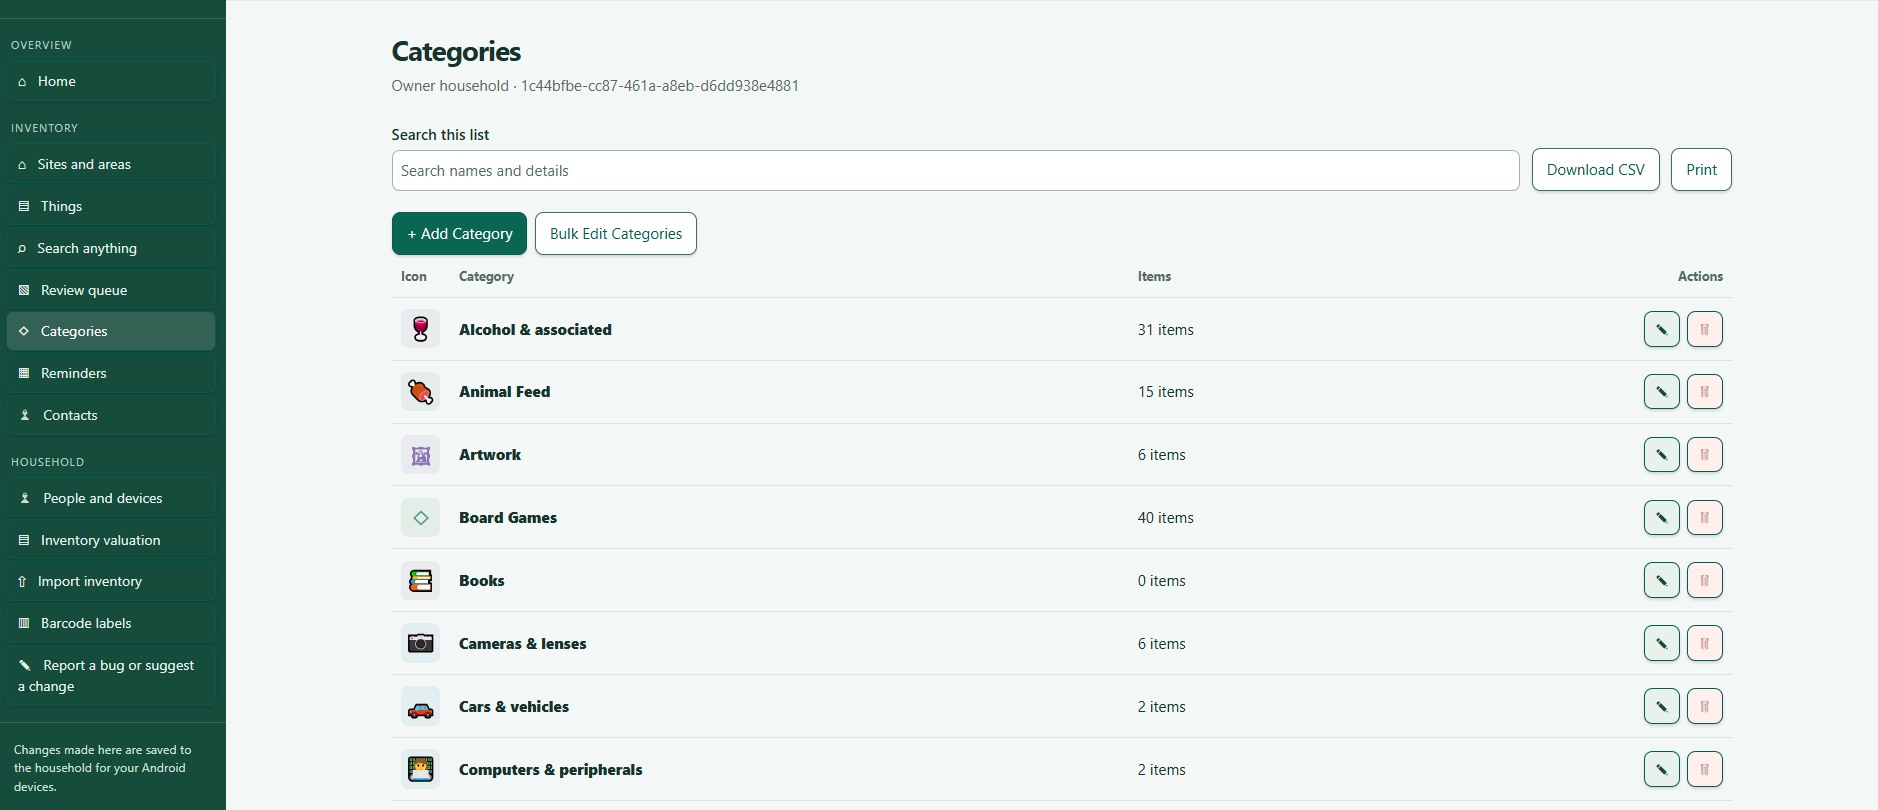
What are Categories?
- A Category groups similar Things, such as tools, furniture or livestock.
- A Category says what an item is. Sites and Areas say where it is.
Suggestions when you first set up
During setup, ThingzSafe suggests Categories to get you started, such as Books, Garden tools, Furniture, Kitchen appliances or Food.
- Keep the ones you need.
- Tap the pencil to change a suggestion, or the red bin to remove one.
- Tap + Add category to add your own.
- Your changes are saved when you tap Finish setup and open Home.
You can add or edit Categories at any time after setup.
Create or edit a Category
- Go to Menu Organise Manage Categories.
- Tap + Add category, or tap the pencil beside an existing Category.
- Enter a name, and a description if you like.
- Choose an icon. Use your keyboard to type one emoji, or pick one of the bundled icons.
- Choose a colour. Pick a swatch, or type a six-digit colour code such as #4C9875.
- Tick Things in this category can hold Contents if items are stored inside them, such as a freezer. Tick Things in this category can have Parts if they have fitted pieces, such as a car.
- Tap Save.
What happens next: Choose this Category whenever you add or edit a Thing.
Valuation and risk options
- Contents add to the Thing's total value: tick this if the value of what is inside should count towards the Thing.
- High risk: tick this to include these Things when you search for high-risk items.
- Not included in normal valuation: tick this for Things insured separately, such as cars.
- Minimum value after depreciation: the lowest estimated value, as a percentage of the purchase price. See Inventory valuation.
Good to know
- You cannot delete a Category while any Thing is using it. Change those Things to another Category first.
Custom fields (Pro)
With a Pro plan, tap Customise fields to rename, hide or reorder fields, or to add your own. See Pro category fields and prompts.
Pro category fields and prompts
Need more help or have a suggestion? Contact us.
Android and web portal
Pro category fields and prompts
With Pro, choose which information your category records.
Where to start
Android: Home Menu Organise Manage Categories Edit category Customise fields
Web portal: Categories Edit Category Fields and prompts
Fields and prompts
A field holds a value, such as a date or a quantity. A prompt is the name shown beside it. With a Pro plan you can rename these, hide the ones you don't need and add your own.
Plan: Pro. Without a Pro plan the app says it is needed and shows the plans. Your own settings are kept if your plan ends.
Rename, hide and reorder fields
- Open the Category and tap Customise fields.
- To rename a field, type a new Displayed name. Names can be 1 to 40 characters long. Tap Use standard label to go back to the original.
- To hide a field, untick Displayed?. Essential fields must stay displayed.
- Use Move up and Move down to change the order.
- Tap Save.
Good to know: Hidden values are kept. You can show the field again at any time.
Add your own fields
- Tap + Add column.
- Type its Displayed name and choose its Entry type.
- Choose whether it is mandatory or optional.
- Tap Save.
- The types are: whole number, decimal (two places), short text (up to 200 characters), long text (up to 4,000 characters), date and time.
- Standard fields cannot change type.
- A hidden mandatory field will not stop you from saving.
Where it applies
Your changes apply to Things, Parts and Contents in that Category: when you edit them, view their details and print them.
Good to know: Field names stay exactly as you typed them, whatever language the app is in.
Need more help or have a suggestion? Contact us.
Connect and use ChatGPT
This page says “ChatGPT” as the example. Claude and Google Gemini connect to ThingzSafe in the same way and work the same way once connected.
Before you start
- You are in a household with an active Household or Pro plan, as the owner or an invited member. Use your own ThingzSafe sign-in.
- Your phone has finished its first sync. ChatGPT reads your cloud household, not records that exist only on a phone.
- You have a ChatGPT account. It currently works with a free account, but OpenAI decides which plans can use plugins and custom connections, and may change this. If you cannot see the option, check your plan or ask your workspace administrator.
- Use ChatGPT on the web, on a computer, to set the connection up.
You never paste a ThingzSafe password, a developer token or an OpenAI API key into the conversation.
Don’t have ThingzSafe yet? Get it on Google Play.
Choose the connection method
Use the manual setup below. It works fully and takes a few steps. Availability of custom connections is controlled by OpenAI and your workspace.
Connect manually using the server address
- In ChatGPT, open the plugin or app management area and choose to add a custom MCP server. OpenAI currently calls this Plugins → + → Add custom MCP server. The labels may change.
- Name it ThingzSafe.
- Set the server URL to
https://app.thingzsafe.com/mcp - Choose OAuth authentication. If it asks for client details, use client ID
thingzsafe-chatgptand leave the client secret empty. - Create the connection. When prompted, sign in to ThingzSafe, choose your household and read the permissions requested.
- Tick any permission you want to allow (inventory changes, photos and documents, or reports), then allow the connection.
- In a conversation, type
@and choose ThingzSafe, then ask a question about your inventory.
If you already have a ThingzSafe connection, refresh its tools to pick up new features. Reconnect when a new permission is requested.
Permissions
| Permission | What it allows |
|---|---|
| Read inventory | Find Things and look up Sites, Areas and Categories |
| Read valuation reports | Calculate totals, including available purchase-price estimates |
| Create, edit and move inventory | Prepare and execute supported inventory changes after review |
| Read photos and documents | Retrieve selected Things' attachments into the conversation for inspection |
| Submit bug reports and feature requests | Prepare a support report and submit the approved text to ThingzSafe |
An existing connection does not gain new permissions automatically. File access does not imply inventory write access, and inventory write access does not imply permission to submit a support report.
Useful questions
- “What top-level Things are in the Kitchen? Exclude Parts and Contents.”
- “List the Contents of the fridge freezer in the Kitchen.”
- “Show the Parts recorded under my car.”
- “What are my workshop tools worth? Show estimated values and how many Things have no value.”
- “Find everything with ‘ladder’ in its name and tell me where each one is.”
- “Find my camera equipment, including Parts, and check its saved receipts.”
Give the Site and Area when a name could match several places. If more than one Thing or location matches, ChatGPT should ask you which one you mean.
Values and totals
An entered current value is used first. Where ThingzSafe can calculate a purchase-price estimate, that estimate counts as a value. A value of zero is also a known value. “No value” means neither an entered value nor an available estimate exists.
Totals multiply each value by quantity. Different currencies are kept separate; they are not converted into a single total. Tell ChatGPT whether you want top-level Things only or also Parts and Contents. The default search/report includes all statuses and child records, which may differ from a web report with additional filters selected.
Approve an inventory change
Ask, for example:
Preview changing the notes on “Garden ladder” to “Checked through ChatGPT”. Do not execute yet.
Check the exact Things and before/after details. If correct, tell ChatGPT to execute that preview. If not, request a corrected preview.
A preview holds no record locks and expires after 15 minutes. If the relevant inventory changes meanwhile, execution is rejected. Review a new preview before approving again. After a timeout, ask ChatGPT to check or retry the same batch; do not ask it to create the Thing again.
Disconnect
In the ThingzSafe web app, open How to use API, find the ChatGPT connection and choose Revoke. Revocation stops further authorised access. It does not undo inventory changes already committed, withdraw a submitted report or remove content already sent to a ChatGPT conversation.
ChatGPT and OpenAI are trademarks of OpenAI. Claude is a trademark of Anthropic and Gemini is a trademark of Google. ThingzSafe is an independent product and is not affiliated with or endorsed by OpenAI. ChatGPT can make mistakes, so check its answers and any proposed changes.
Use your inventory with ChatGPT, Claude, Gemini or the API
Both features are included with Household and Pro. Anyone in the household can connect ChatGPT, Claude or Google Gemini with their own sign-in. The household owner creates developer API tokens. Your household needs active cloud access, and your inventory must have synced to the cloud first.
ChatGPT
Ask questions in everyday words, check saved receipts and review proposed changes before they are applied.
Claude
The same questions, receipts checks and approved changes, from Anthropic’s Claude.
Google Gemini
Ask Gemini about your inventory using the ThingzSafe app in its list of connected apps.
Developer API
Send secure requests from your own application or script to search, value and (with your approval) change inventory.
Try it in the web app
Use How to use API to try searches and valuation reports and copy a working request.
Find a topic
Good to know
- ChatGPT, Claude and Google Gemini are separate services from OpenAI, Anthropic and Google. Their account access, connection availability and usage limits are set by those companies and your workspace.
- New to ThingzSafe? Get it on Google Play and set up your household first.
- You never give ThingzSafe an OpenAI API key, and you never paste a ThingzSafe token into a chat.
- ThingzSafe’s built-in AI photo recognition and replacement valuations are separate Pro features.
Check receipts, photos and documents
This page says “ChatGPT” as the example. Claude and Google Gemini connect to ThingzSafe in the same way and work the same way once connected.
Ask for a specific check
Find my camera equipment, including Parts and Contents. Inspect its saved photos and documents. Tell me which Things have a matching receipt, which documents appear mismatched, and which Things remain uncertain or unexamined. Read every PDF page. Do not change anything.
Photo/document reading requires its own permission. ChatGPT first identifies the Things, lists their attached files, then reads the selected content. An attachment on a Part or Content item belongs to that child record; selecting only its parent does not automatically inspect the children's files.
What can be read?
| Format | What ChatGPT receives |
|---|---|
| JPEG, PNG, WebP | An image prepared for inspection, with orientation corrected and a maximum 1,800-pixel edge |
| PDF, including scans | Page images, up to two pages per request; further pages are read using continuation |
| TXT, CSV, HTML | Text; HTML scripts/styles and markup are removed |
| DOCX | Main document text; page layout, headers/footers and embedded images are not inspected |
| XLSX, RTF and other unsupported formats | An explicit unsupported-format result |
Thing photos, document attachments, Event files and recognised embedded loan/disposal file references can be listed. This does not provide structured loan/rental queries.
Interpret the result
Ask ChatGPT to count Things with receipts, once per Thing, not the number of receipt files. A useful result separates:
- Confirmed receipt or proof-of-purchase matches.
- Purchase documents that appear to refer to a different item.
- No receipt found among all successfully inspected attachments, including Things with no saved attachments.
- Uncertain or unexamined Things, with the reason.
A filename containing “receipt” is a clue, not proof. A missing, unreadable, unsupported or oversized attachment is not evidence that no receipt exists. An unclear image may need you to open the original or provide a clearer copy. The attachment reader does not itself classify receipts or save its conclusions back to the inventory.
Large checks
ChatGPT may work through several batches. Lists and multi-page PDFs have continuation fields. If a limit is reached, it should explain which Things or pages remain and resume after the limit permits. It should not describe a partial inspection as complete.
File access sends the retrieved content to ChatGPT. Use the permission only for a household and files you want to analyse there.
Report bugs and request missing capabilities
This page says “ChatGPT” as the example. Claude and Google Gemini connect to ThingzSafe in the same way and work the same way once connected.
If your question needs information that the connection does not provide, ChatGPT can explain the limitation and offer to draft a feature request. A supported operation that fails may instead warrant a bug report. No matching records in a search does not, by itself, mean a feature is missing.
- Ask ChatGPT to prepare a report. Approve the separate report-submission permission if prompted.
- Read the complete report text, whether it is a Bug or Change request, and the destination: the ThingzSafe bugs and requests log, visible to support administrators.
- Ask for any corrections. Do not include passwords, access tokens or details you do not want support to receive.
- If satisfied, approve submission. ChatGPT should only say it was submitted after the server returns a report ID.
Previewing or declining a report does not submit it. An unused preview expires after 15 minutes. The report is associated with your ThingzSafe account and household. A conversation transcript, reply email or attachment is not added automatically. You should knowingly approve any inventory or other personal details included in the actual text.
After a timeout, retry the same preview so the original report ID can be recovered without a duplicate. Each household can submit up to ten ChatGPT reports in a rolling 24 hours. This feature submits feedback; it does not provide access to other users' reports or add the requested inventory capability immediately.
AI assistant connection troubleshooting
This page says “ChatGPT” as the example. Claude and Google Gemini connect to ThingzSafe in the same way and work the same way once connected.
ChatGPT says it cannot do something, but does not offer to send us a request.
Refresh the ThingzSafe connection's tools in ChatGPT, then start a new conversation with ThingzSafe selected. You can also ask directly: “Prepare a feature request for this. Do not submit it yet.” A report is something you ask ChatGPT for in the conversation. There is no separate button for it in ThingzSafe.
If report permission is missing, reconnect and explicitly approve Submit bug reports and feature requests. Inventory write permission alone does not grant report submission. After reconnecting, request a new draft, review the complete text and destination, and approve only if correct. Do not recreate an already submitted report just to test a retry; use its original preview.
A newly added tool is missing.
Refresh the plugin's tool list. Reconnecting alone and refreshing tool definitions are different operations. Start a new conversation if the previous one still appears to use old capabilities. Your ChatGPT account or workspace may also restrict custom connections or individual tools.
The API tester works but ChatGPT cannot use the connection.
The tester uses a developer token; ChatGPT uses its own OAuth connection. Check that ThingzSafe is selected in the conversation, the correct household was authorised and the connection has the necessary scopes. Do not paste the developer token into chat.
Photos or documents are unexamined.
Check file permission, the exact owning Thing, supported format, page continuation and limits. Open the original in ThingzSafe if the prepared view is unclear. Unexamined does not mean no receipt.
A preview or connection changed before approval.
Ask for a new preview and review it again. For an uncertain response after execution/submission, recover or retry the same original batch/report first, to avoid duplication.
Connect Claude to ThingzSafe
Connect Claude to your ThingzSafe inventory, then ask about your things, find their details and review changes before they are saved. This is included with Household and Pro.
Before you start
- Install ThingzSafe from Google Play on your Android phone or tablet.
- You need an active ThingzSafe Household or Pro plan, or to have joined someone’s household.
- Set up your household in the Android app and let it finish syncing. Your assistant works with the cloud inventory, not records that exist only on a phone.
- Have your usual ThingzSafe sign-in email address ready. Use the same address as in the app.
- Use a web browser on a computer for the first connection. You need a Claude account.
ThingzSafe does not include a paid subscription for any assistant. Any account requirements or charges from your chosen assistant are separate.
Connect Claude
- Open claude.ai and sign in.
- Open Customize in the left menu, then Connectors.
- Choose + Add, then Add custom connector. If you see Custom → Web, choose that.
- Name it ThingzSafe and enter this server address:
https://app.thingzsafe.com/mcp - Continue to the sign-in settings. Choose Sign in now and Use your own OAuth client. If you see an Advanced settings section, open it to find the client fields.
- Enter
thingzsafe-claudein Client ID. Leave Client secret blank. The client ID is a connection label, not a password. - Finish adding the connector, then choose Connect if prompted.
- On the ThingzSafe page, sign in if needed. Check the heading says Connect Claude, choose your household and review the permissions.
- Approve the connection to return to Claude.
If you use Claude through a work organisation, its administrator may need to add the connector before you can connect your own account. Claude’s menus and button names change from time to time, so follow the closest match if yours look slightly different.
Use the connection in a conversation
Start a new conversation. If ThingzSafe is not already switched on, open the + menu beside the message box, choose Connectors and turn on ThingzSafe. Then ask your first question.
Choose what the assistant can do
On the ThingzSafe permission screen, choose the household you want to connect, then read the permissions before you allow access.
- Read inventory: find your Things and their details.
- Read valuation reports: answer questions about the values already recorded.
- Make changes: prepare and apply changes you have approved.
- Read photos and documents: inspect supported files already saved in ThingzSafe.
- Send bug reports or suggestions: submit a report only after you have checked and approved its contents.
You may see only some of these. Changes, file access and sending reports each have their own permission. A read-only connection cannot make changes. If a later request needs more permission, you may be asked to connect again and approve it.
You sign in on ThingzSafe’s own page. Never type your ThingzSafe sign-in codes, passwords or access tokens into the conversation.
Try your first question
Start with something simple:
- “List my sites in ThingzSafe.”
- “Where is my cordless drill?”
- “Show my reminders for the next 20 days.”
- “Show the notes for the goat shed.”
If you have similar names in several places, include the location, for example “Find the drill in the workshop at Home.” If more than one thing matches, the assistant should ask which one you mean.
Check changes before saving
You can also ask for a change, such as “Add a note to the drill saying the battery was replaced today.”
- The assistant prepares a preview.
- Check the record, location and proposed details.
- If they are right, approve it. If not, ask for a correction first.
Nothing in your inventory changes just because a preview has been prepared. If a save seems to take a long time, ask the assistant to check whether the change completed before asking it to create the same thing again.
Work with your tables
Ask the assistant to explain or compare the information in your ThingzSafe tables, for example “Compare the number of goats with the feed bought each month.” Include the table name and location if needed.
With Pro, you can ask it to create a table from a spreadsheet, or from a table you paste into the conversation. Tell it which Site, Area or Thing the table belongs to, and check the column names, dates, numbers and preview before approving. Larger tables may need several smaller batches, each with your approval. Spreadsheet formatting and working formulas are not carried across.
Photos, receipts and documents
With the photos and documents permission, the assistant can inspect supported files already saved in ThingzSafe. Ask it to find the item and read the relevant document. A large document may need to be read in sections. See Check receipts, photos and documents for what can be read.
Adding a new attachment through this connection is not supported at present. Save it with the ThingzSafe Android or web app first, or use your household’s email receipts address.
What the connection can access
The connection uses the household you selected and the permissions you approved. It follows your ThingzSafe plan, so Pro features still need Pro. It never gives access to another household’s inventory.
Information returned to the assistant is handled under that provider’s account settings and privacy terms, as well as ThingzSafe’s. Choose what you ask it to read, particularly for personal documents. Claude can make mistakes, so check its answers and any proposed changes.
Disconnect from ThingzSafe
Sign in to the ThingzSafe web app, open How to use API and find AI connections. Choose Revoke beside the connection you want to stop.
Revoking stops its access to ThingzSafe. It does not delete your inventory or disconnect your other assistants, and it does not remove information already returned in earlier conversations.
If it does not connect
- No Connectors option: check the Customize menu. On a work account, ask your administrator whether custom connectors are allowed.
- Asked for a secret: check that you chose your own OAuth client, entered
thingzsafe-claudeand left the secret blank. Never use your ThingzSafe password here. - No household to choose: finish setting up or joining your household in the Android app, let it sync, and check you used the same email address.
- Empty or old results: check syncing has finished and the correct household is connected.
If it still fails, contact us with the message or error reference. Never send sign-in codes, passwords or tokens.
Do not have ThingzSafe yet? Get it free on Google Play. The free plan keeps your inventory on your phone. Household or Pro adds the cloud inventory these assistants use.
Android
Contacts and linked people
Keep supplier and other contact details with your inventory.
Where to start
Android: Home Menu Organise Manage Contacts + Add contact
What contacts are for
Contacts keep the details of a shop, supplier or engineer with your inventory. You can link them to a Thing or an event. They are saved on your phone and are included in your backups.
Add a contact
- Go to Menu Organise Manage Contacts.
- Tap + Add contact.
- Enter a Name, and choose a Type such as retailer, supplier or service engineer.
- Add a phone number, email, address and website if you have them.
- Tap Save contact.
Good to know: To copy details from your phone's own contacts, tap Choose from phone. The phone entry stays unchanged. Android may ask you to allow access to contacts first.
Link a contact to a Thing or event
- Open the Thing and tap Contacts.
- Tap Link existing contact, or + Add new contact.
- Choose the contact.
Good to know: To remove a link, tap Unlink. The contact stays saved.
Delete a contact
- Open the contact.
- Unlink it from any Things or events first.
- Scroll to the bottom and tap DELETE, then confirm.
Need more help or have a suggestion? Contact us.
Android
Contents and quick entry
Track items or supplies stored inside another item.
Where to start
Android: Home Site Area (optional) Thing Contents
What are Contents?
Contents are the individual items stored inside a Thing, such as books on a shelf, tins in a cupboard, building supplies in a workshop store, or CDs in a CD case.
Before you start
A Thing only has a Contents section if its Category allows it. To turn it on, edit the Category and tick Things in this category can hold Contents.
Add Contents
Choose the way that suits you:
- + Add Contents: opens a full form for one entry.
- Quick Entry list (under More actions): type several names and quantities in a list.
- Quick barcode scan (under More actions): scan barcodes to add or count. See Scan Contents barcodes.
- Photograph Content or Quick one-photo capture Contents (under More actions): take photos and finish the details later in the Review queue.
Good to know: Adding more of something you already have? Use Add quantity. See Add stock and quantities.
Use Quick Entry
- Under More actions, tap Quick Entry list.
- Type each name and quantity in a row. A new blank row appears when you need it.
- Use the small + and − to change a quantity. Tap the bin to remove a saved row. You are asked to confirm first.
- Tap Save entries.
Find or change Contents
- Type in Search these Contents to filter the list.
- Tap an entry to edit it or move it. See Move or split stock.
- Tap Stock check to count what is really there. See Check actual quantities.
- Tap the printer icon to print the Contents list. For labels, see Individual Content labels.
Delete a Content
- Open the parent Thing and tap Contents.
- Open the Content.
- Scroll to the bottom and tap DELETE.
- Confirm. This cannot be undone.
Good to know: You can also delete a saved row in Quick Entry. A Content that has Contents or Parts of its own must have those removed first.
What happens next: In a household, the deletion appears on other phones the next time they sync.
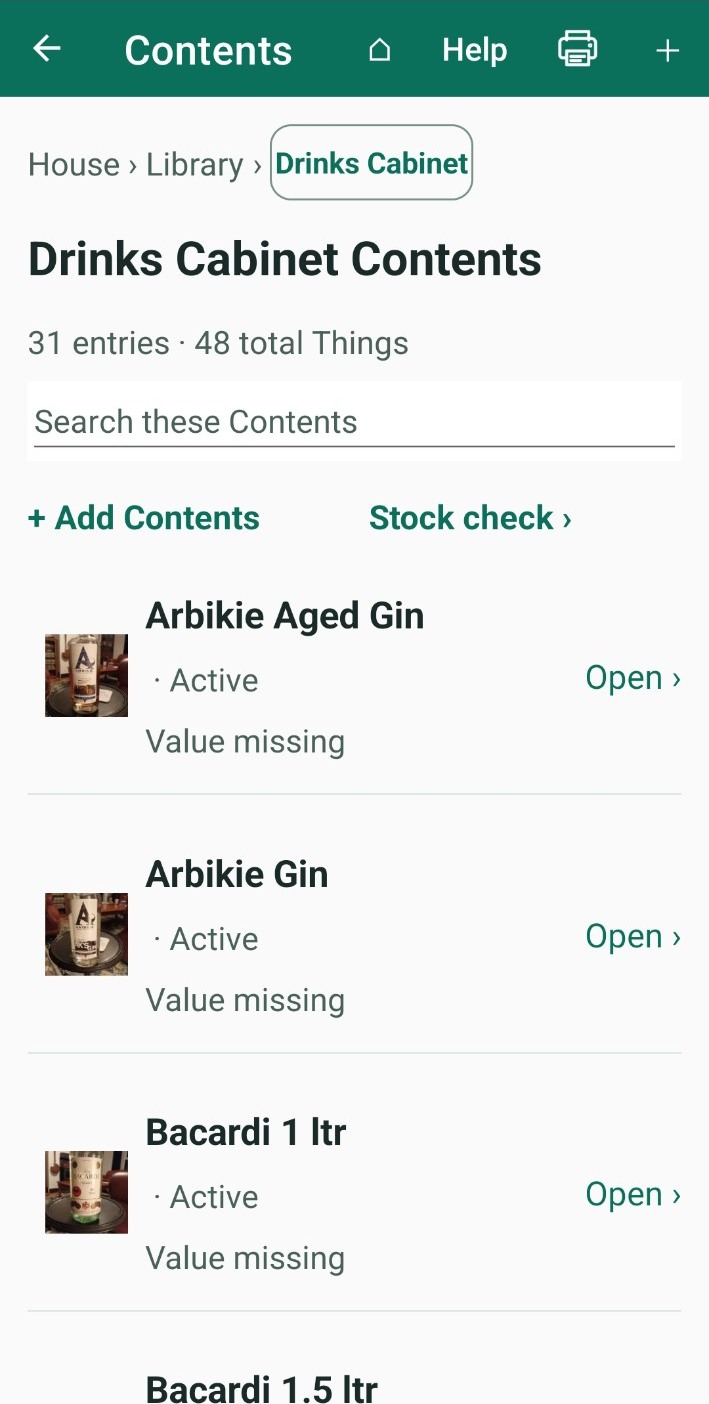
Need more help or have a suggestion? Contact us.
Android and web portal
Sale and disposal tracking
With Pro, record sales and other disposals.
Where to start
Android: Home Site Area (optional) Thing Edit details
Web portal: Things Thing Edit Thing
Record a sale or disposal
- Open the Thing.
- Change Status to Sold or Disposed.
- The matching details screen opens. Fill in what you know. Everything on it is optional.
- Tap Save.
Plan: Disposal tracking needs a Pro plan. If you do not have one, the app tells you and shows the plans.
Good to know: Once a Thing is Sold or Disposed, it stops appearing in your inventory lists and searches.
Sold
Record the sale date, the Sold amount, who bought it and any notes. Pick a saved contact, type a name, or add a new contact. Tick Paid? to record today as the paid date. You can change it.
Disposed
Record the date, the Disposal method, where it went or who took it, and notes. The date starts as today. You can change or clear it.
Photos and documents
Attach photos or documents, such as a receipt or a tip ticket. You can open, download or remove them later. Files are saved with the sale or disposal.
Disposal report
- Go to Menu Reports Disposal report. On the web portal, open Disposal report.
- Choose all dates or a date range, and optionally a Category and Site.
- Tap Create disposal report.
- Tap Print / export to print it or save a PDF.
Good to know: The report includes Things that were sold and Things that were disposed. It shows the name, status, purchase date and price, last value and date, and the sale or disposal details. Anything you did not enter is left blank.
If you change your mind
If you change a Thing back to Active, it leaves the disposal report, and the details you saved are kept in case you need them. Files are included in household sync and in encrypted backups.
Need more help or have a suggestion? Contact us.
Email orders and receipts into ThingzSafe
Forward an online order or a receipt to your household’s private email address. ThingzSafe reads it and suggests a Thing for you to check. Nothing is added to your inventory automatically. Suggestions wait in your Review queue until you check them and choose what to save.
Email receipts is included with Household and Pro, and you use it in the web app. Household gives you basic text reading (OCR). Pro adds AI to interpret the email and its attachments.
Before you start
- You need an active Household or Pro household.
- The household owner creates the receiving address, once, and manages which email addresses are allowed to send to it.
- Emails are accepted from registered email addresses: the verified sign-in addresses of people the owner has admitted to the household. An invitation that has not been accepted is not enough.
- Orders can be in the body of the email, or come with a PDF or photo of the receipt attached.
Step 1. Create your household’s receiving address
The household owner does this once.
- Sign in at app.thingzsafe.com and check you are in the right household.
- Open Email receipts in the menu on the left.
- Choose Create receiving address.
- Your household’s full address appears on the screen. Choose Copy address to copy it.
This address belongs to your household. It is not the email address you sign in with. Copy all of it, including everything after the @. You do not need to set up another email account or a separate mailbox. Always use the complete address shown in ThingzSafe.
Who can send to it?
Any registered email address can forward to it. That means the email address someone uses to sign in to ThingzSafe, once they have joined your household and verified it. The household owner admits and manages these addresses in People and devices. Emails from any other address are not accepted.
Step 2. Forward an order or receipt
- Open your usual email app, using a registered email address (your ThingzSafe sign-in address).
- Forward the order or receipt to the address you copied. Keep any attached PDF or photo of the receipt.
- Send it once, then wait a short while for it to be processed.
- Go back to Email receipts and choose Refresh. Then open your Review queue to see any suggestions.
What works best
- A clear PDF, or a clear, well-lit photo of the receipt.
- An order whose details are written in the email itself.
- The real file attached. A link to an online receipt does not work, because ThingzSafe does not open links to fetch purchases.
Size limits
- The whole email should be under 8 MB, with no more than 10 attachments. Email encoding makes files bigger, so keep them comfortably below that.
- Only the first five pages of a PDF are read.
- Normal file-safety checks and your household’s storage limits also apply. Some files can be rejected even if your email provider lets you send them.
Step 3. Check the suggestions and save
- Open Review queue and choose a suggestion.
- Compare its name, supplier, purchase date, quantity, currency and purchase price with the original. Correct anything that is missing or wrong, and read the notes.
- Choose the Site, Area and Category the screen asks for.
- Check the item is not already in your inventory. If the same purchase is forwarded in two emails, you will get two suggestions.
- Save only the items you want. Then open the saved Thing and check its details and the kept files under Photos & files.
An email is not proof that something was paid for or delivered. Order, invoice, due and purchase dates can all be different, so check the date before you accept it. A receipt total may also cover several items, delivery or tax, so it is not always filled in as one item’s purchase price.
What Household and Pro do
- Household gives you basic text reading. It reads the text in the email and in PDF or image attachments, using OCR (which reads the words in a picture) for images. It does not use AI to interpret the email.
- Pro does the same, then adds AI to interpret the email text and the attachments it accepts. It can suggest several products from one email.
With either plan, the original email and accepted attachments are kept privately as source material, and nothing is created or merged without you. Check all the details. Unknown or unclear details may be left blank or put in the notes for you to sort out.
The Email receipts screen
The screen explains how it works at the top, then shows your receiving address in full. The address buttons sit beside the address. Results from processing appear below.
| Button | What it does |
|---|---|
| Create receiving address | Creates a private address for this household. You only need to do this once. |
| Copy address | Copies the complete address so you can paste it into your email app. |
| Reset receiving address | Replaces the address. The old one stops working, so update any saved contacts or forwarding rules. |
| Refresh | Reloads the address and recent results. It does not send an email or start another import. |
| Download original email | Downloads the kept email as an .eml file that a compatible email app can open. |
| Retry | Asks ThingzSafe to try a failed message again, where that is safe. Read the reported problem first, because some failures need support. |
If something goes wrong
There is no receiving address
Check you are signed in as the household owner and that your plan includes Email receipts, then choose Create receiving address. If the feature is not available, it may not be switched on for your household yet.
I sent an email but no suggestion appears
Choose Refresh and read the processing result. Check you used the current address, and sent from a registered email address. Check the attachment size, type and number of PDF pages. If processing finished, look in the Review queue before you send again.
My email or address was rejected
Addresses that are not registered with the household, invitations not yet accepted and unverified email addresses cannot send receipts. A reset address also stops accepting emails. Use the current address and check People and devices. Your email provider accepting the message does not mean ThingzSafe accepted it.
Some attachments were rejected
Read the warnings. Other attachments in the same email may still be processed, so do not assume every file was read or kept. Try a clear PDF or image within the limits.
A detail or amount is wrong
Correct it in the review. Small print, blurry photos, handwriting and unusual layouts can reduce accuracy. Reading text from images currently expects English, whatever language the app is set to. Pro can interpret readable foreign-language text, but that does not guarantee accurate results from every language or image.
A message stays failed or unclear
Note the reference shown, the time you sent it and the status reported, then contact us. Please do not keep forwarding or retrying an unclear message, and never include passwords or sign-in codes.
Check the screen, not your inbox. Do not rely on a confirmation or rejection email. ThingzSafe avoids replying to unknown senders, and automatic reports may be switched off.
Android
Events and receipts
Keep a dated history of maintenance and other work.
Where to start
Android: Home Site Area (optional) Thing Events + Add event or receipt
What is the Events list?
Each Thing keeps a dated history. ThingzSafe adds entries by itself when you edit the Thing, change its quantity or move it. You can add your own too, such as a repair, a service or a receipt.
Add an event or receipt
- Open the Thing and tap Events.
- Tap + Add event or receipt.
- Check the date. It starts as today. Change it if the event happened earlier.
- In What happened?, describe it, for example "Annual service" or "Bought a new battery".
- Add a Contact if you like. Start typing a name to pick a saved contact, tap + Add a new contact, or leave a typed name as plain text.
- Add a photo or document if you have one: tap Photograph receipt or event, Choose existing photo or Choose document.
- Tap Save event.
Good to know: You need to describe what happened or attach a photo or file. Each file must be no larger than 20 MB. Tap Cancel to leave without saving.
Make it repeat as a reminder
Tick Repeat this event as a reminder to schedule the next one, for example another service in a year. It then appears in your Calendar and repeating reminders.
Look back at the history
Open the Thing and tap Events. Tap an event to see its photo, document and linked contacts. A document can be opened or downloaded.
Need more help or have a suggestion? Contact us.
Report a bug or suggest a change
Send a useful report
Open Report a bug or suggest a change in Android or the web app. Choose the report type, describe what happened and include steps to reproduce it. Say what you expected and what actually happened.
You can attach one image, up to 4 MB. Choose an image file and check it contains no private details. A screenshot is often more useful than a long description. Remove it or replace it before sending if needed.
Include an email address if you want a reply, where the form offers it. When available, the report includes app/platform information and your household ID so support can trace the relevant backend records. A household ID is not required for users without a household.
Errors and support references
Read the plain-language message and follow its suggested next step. Use Details or Copy details if offered, and include the support reference with your report. You do not need to interpret HTTP codes or internal processing stages.
Do not send passwords, sign-in codes or payment details. Do not include household data unrelated to the problem.
View the development board
The website development board shows published changes and requests. A report being logged does not guarantee a release date or that every suggestion will be implemented.
Connect Google Gemini to ThingzSafe
Connect Google Gemini to your ThingzSafe inventory, then ask about your things, find their details and review changes before they are saved. This is included with Household and Pro.
Before you start
- Install ThingzSafe from Google Play on your Android phone or tablet.
- You need an active ThingzSafe Household or Pro plan, or to have joined someone’s household.
- Set up your household in the Android app and let it finish syncing. Your assistant works with the cloud inventory, not records that exist only on a phone.
- Have your usual ThingzSafe sign-in email address ready. Use the same address as in the app.
- Use a web browser on a computer for the first connection. You need a Google account.
ThingzSafe does not include a paid subscription for any assistant. Any account requirements or charges from your chosen assistant are separate.
Connect Google Gemini
- Open gemini.google.com and sign in to your Google account.
- Open the connected-apps list. Depending on your Gemini layout, this is under Customise → Connectors or Settings & help → Connected apps.
- Find ThingzSafe in the available apps and choose it.
- Choose Connect and follow the sign-in prompts.
- On the ThingzSafe page, sign in with your usual ThingzSafe email address. Check the heading says Connect Gemini.
- Choose your household, read the permissions and approve the connection to return to Gemini.
You do not need to create a custom connection, enter a client ID or obtain a client secret. Just use the ThingzSafe entry in the available apps. Gemini’s menus and button names change from time to time, so follow the closest match if yours look slightly different.
Use the connection in a conversation
Start a new conversation and type @ThingzSafe. Choose ThingzSafe when it appears, then ask your question, for example “@ThingzSafe list my sites.”
If ThingzSafe does not appear, check the troubleshooting list below.
Choose what the assistant can do
On the ThingzSafe permission screen, choose the household you want to connect, then read the permissions before you allow access.
- Read inventory: find your Things and their details.
- Read valuation reports: answer questions about the values already recorded.
- Make changes: prepare and apply changes you have approved.
- Read photos and documents: inspect supported files already saved in ThingzSafe.
- Send bug reports or suggestions: submit a report only after you have checked and approved its contents.
You may see only some of these. Changes, file access and sending reports each have their own permission. A read-only connection cannot make changes. If a later request needs more permission, you may be asked to connect again and approve it.
You sign in on ThingzSafe’s own page. Never type your ThingzSafe sign-in codes, passwords or access tokens into the conversation.
Try your first question
Start with something simple:
- “List my sites in ThingzSafe.”
- “Where is my cordless drill?”
- “Show my reminders for the next 20 days.”
- “Show the notes for the goat shed.”
If you have similar names in several places, include the location, for example “Find the drill in the workshop at Home.” If more than one thing matches, the assistant should ask which one you mean.
Check changes before saving
You can also ask for a change, such as “Add a note to the drill saying the battery was replaced today.”
- The assistant prepares a preview.
- Check the record, location and proposed details.
- If they are right, approve it. If not, ask for a correction first.
Nothing in your inventory changes just because a preview has been prepared. If a save seems to take a long time, ask the assistant to check whether the change completed before asking it to create the same thing again.
Work with your tables
Ask the assistant to explain or compare the information in your ThingzSafe tables, for example “Compare the number of goats with the feed bought each month.” Include the table name and location if needed.
With Pro, you can ask it to create a table from a spreadsheet, or from a table you paste into the conversation. Tell it which Site, Area or Thing the table belongs to, and check the column names, dates, numbers and preview before approving. Larger tables may need several smaller batches, each with your approval. Spreadsheet formatting and working formulas are not carried across.
Photos, receipts and documents
With the photos and documents permission, the assistant can inspect supported files already saved in ThingzSafe. Ask it to find the item and read the relevant document. A large document may need to be read in sections. See Check receipts, photos and documents for what can be read.
Adding a new attachment through this connection is not supported at present. Save it with the ThingzSafe Android or web app first, or use your household’s email receipts address.
What the connection can access
The connection uses the household you selected and the permissions you approved. It follows your ThingzSafe plan, so Pro features still need Pro. It never gives access to another household’s inventory.
Information returned to the assistant is handled under that provider’s account settings and privacy terms, as well as ThingzSafe’s. Choose what you ask it to read, particularly for personal documents. Gemini can make mistakes, so check its answers and any proposed changes.
Disconnect from ThingzSafe
Sign in to the ThingzSafe web app, open How to use API and find AI connections. Choose Revoke beside the connection you want to stop.
Revoking stops its access to ThingzSafe. It does not delete your inventory or disconnect your other assistants, and it does not remove information already returned in earlier conversations.
If it does not connect
- Asked for a client ID or secret: you have opened the custom-connection form. Go back and find the ThingzSafe app in the available apps instead.
- ThingzSafe is missing: check the connected-apps list, then contact us if it is still unavailable.
- Access has expired: use the connection’s sign-in or reconnect option and review the ThingzSafe permissions again.
- No household to choose: finish setting up or joining your household in the Android app, let it sync, and check you used the same email address.
- Empty or old results: check syncing has finished and the correct household is connected.
If it still fails, contact us with the message or error reference. Never send sign-in codes, passwords or tokens.
Do not have ThingzSafe yet? Get it free on Google Play. The free plan keeps your inventory on your phone. Household or Pro adds the cloud inventory these assistants use.
Android
Your first inventory
Set up your locations and add your first item.
Where to start
Android: install ThingzSafe and open it. On the welcome screen, tap NEW STANDALONE USER to start your own private inventory, or JOIN A HOUSEHOLD if you were sent an invitation.
Set up the app
Setup has three screens. You can go back and forth between them to change your mind. Nothing is saved until the last screen. If you close the app part-way through, setup picks up where you left off.
Screen 1: you
- Type your first name if you like. ThingzSafe uses it for greetings and to record who did what.
- Choose whether to turn on Require device unlock. If you do, you unlock the app with your phone's fingerprint, face or passcode. If you don't, the app opens straight to Home.
- Tap Continue to sites.
Good to know: To use the lock, your phone needs a screen lock already set up. If it has none, the app asks you to set one up or to turn the lock choice off.
Screen 2: Sites and Areas
- Look at the suggested Sites and Areas, such as House, Garage and Kitchen.
- Tap Edit site and areas to rename a Site or Area, or to remove one.
- Tap + Add site to add your own. To add several, separate the names with commas.
- Tap Continue to categories. You must keep at least one Site.
Screen 3: Categories
- Look at the suggested Categories. A Category is a type of Thing, such as Furniture or Books.
- Tap the pencil to change one, or the red bin to remove one. Tap + Add category to add your own. You must keep at least one Category.
- Tap Finish setup and open Home.
What happens next: Your choices are saved and the app opens at Home.
Join a household instead
If someone invited you to their household, tap JOIN A HOUSEHOLD on the welcome screen. You need the email address the invitation was sent to and the invitation code from the email. See Create or join a household.
Add your first Thing
- On Home, tap a Site. If you use Areas, open an Area as well.
- Tap + Add Thing here (in a Site) or + Add Thing manually (in an Area) to type the details. Or tap Capture here to take photos instead.
- Give the Thing a name you will recognise, and choose a Category.
- Add what you know, such as the quantity, its position, and purchase details.
- Tap Save.
What happens next: If you used Capture here, your photos are saved as a draft in the Review queue. It does not become a complete Thing until you review it.
A useful structure
- A freezer in your kitchen: the Site is House, the Area is Kitchen, the Thing is Freezer, and the food inside is its Contents.
- A tractor in a barn: the Site is Barn. You don't need an Area.
- Use Position to say exactly where something is, such as "top shelf" or "left-hand cupboard". You can type anything you like.
Need more help or have a suggestion? Contact us.
Android
Finding your way around
Find your inventory, search and open the app tools.
Where to start
Android: Home
Browse your inventory
Search
Use the search box at the top of Home to find Things, app actions and help topics. Type at least 3 characters, then wait 2 seconds or tap Done. Clear the box to go back to your Sites. For more, see Find a Thing.
Add something new
Tap + Scan or add a Thing to scan a barcode, take photos, or type details. See Add and edit a Thing.
Check what needs attention
- Review now opens saved captures and records that need checking. See Review your captures.
- Upcoming & overdue lists reminders that are due soon or late. Tap View all events to see them all. See Calendar and repeating reminders.
Get help on any screen
- Tap Help at the top of the screen. A short guide to that screen appears.
- Tap Close to hide the guide.
- Tap More help to open the full guide on the ThingzSafe website.
Good to know: You can also open the website guide from Menu App Help.
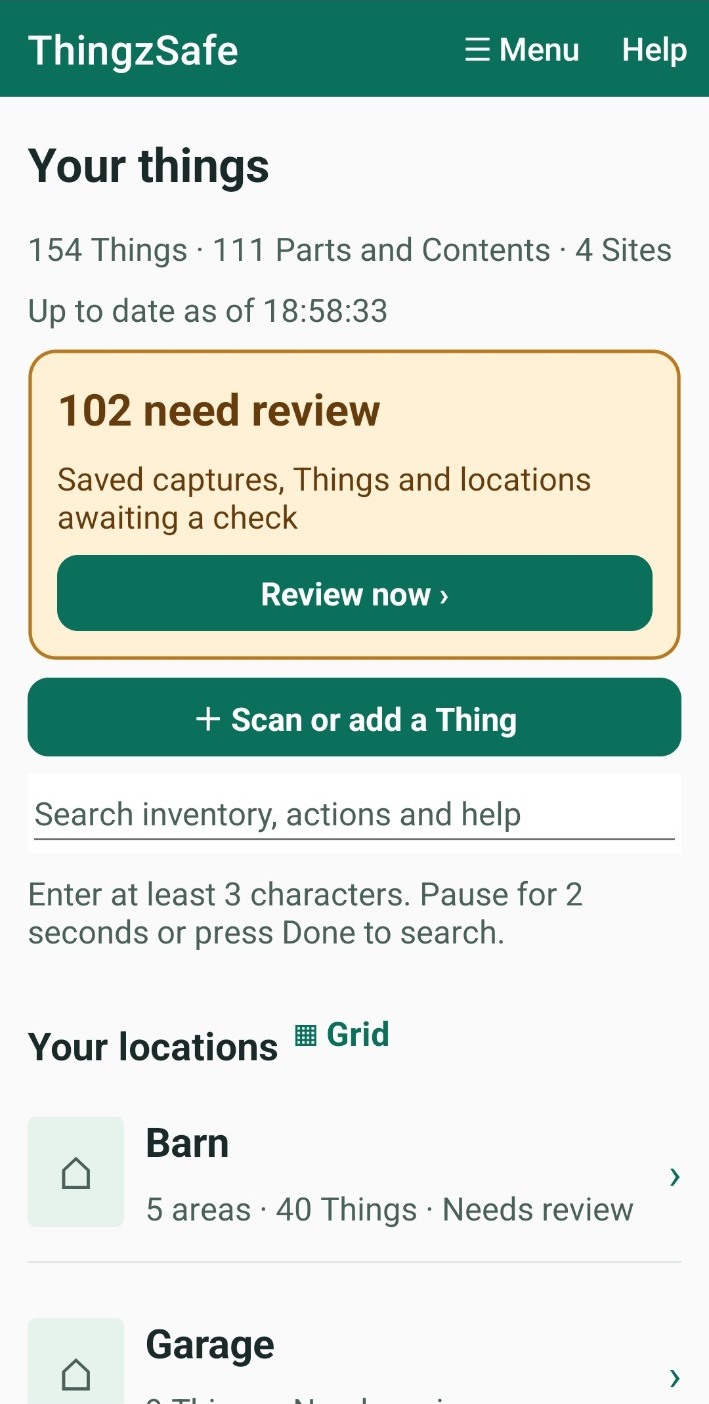
Need more help or have a suggestion? Contact us.
Android
Create or join a household
Share an inventory with your household across devices.
Where to start
Android: Home Menu Account Household cloud and sync
What is a household?
A household is the group of people (two or more) who share one inventory on their own phones. The person who pays for the plan owns the household and invites the others. People who are invited do not pay.
Create your household (owner)
- Go to Menu Account Household cloud and sync.
- Buy a Household or Pro plan in Google Play. See Plans, purchases and cancellation.
- When the payment is confirmed, tap Create my household.
- Sign in with the email address you want to use. Use the same one each time.
- When asked, choose whether to upload the inventory already on this phone.
- Keep the screen open until it says syncing has finished.
Good to know: If the purchase is cancelled or fails, your Free inventory stays safely on the phone. If setup is interrupted after paying, your purchase is safe. Check your connection and tap Retry household setup.
Invite someone (owner)
- In Household cloud and sync, find Your household.
- Tap Invite someone and enter the email address they will use to sign in.
- Tap Create invitation.
What happens next: ThingzSafe emails them an invitation. Tell them to look for it and to check their Spam or Junk folder. The code works for seven days and only with that email address. If it goes astray, cancel it and send a new one.
Join a household (invited person)
- Install ThingzSafe from Google Play.
- Open it. On the welcome screen tap JOIN A HOUSEHOLD, or finish setup without adding anything and go to Menu Account Household cloud and sync.
- Choose Join an existing household.
- Enter the Invited email address and the Invitation code from the email, then tap Validate invitation & join.
Good to know: Do not add Things or change the suggested Sites and Areas before you join. Joining replaces what is on this phone with the household's inventory. It does not combine them. Back up anything you need first. You do not need to buy a plan to join.
Check that everything is up to date
- Sync status shows whether the household is up to date, anything waiting, and the last five sync results.
- Tap Sync now to update straight away.
- Sync only on Wi-Fi is on by default. If there is no Wi-Fi, your changes wait and send later. Turn it off if you want to use mobile data.
- Changes you make offline are sent when the phone is back online.
Sign in to an existing account
Tap Sign in to existing account and use the email address you set up before. Signing in alone does not give you access to a household. You need a paid plan of your own, or an invitation.
Connect a new phone
Sign in with the same email address, then choose Restore / overwrite all from cloud. This replaces the inventory on that phone only. Back up anything you want to keep first. See Encrypted backup and restore.
Change your sign-in email
Your verified email address is what ties your account together. Before you change it, sign in with the current one and contact ThingzSafe support, so your account stays linked. Do not create a second account or accept a new invitation instead.
Good to know: If the invitation went to the wrong address and you have not joined yet, ask the owner to cancel it and send a new one.
If two people changed the same thing
Home shows Sync conflicts need review. Open it, and for each one choose Keep this phone's version or Use household version, then tap Confirm and Sync now.
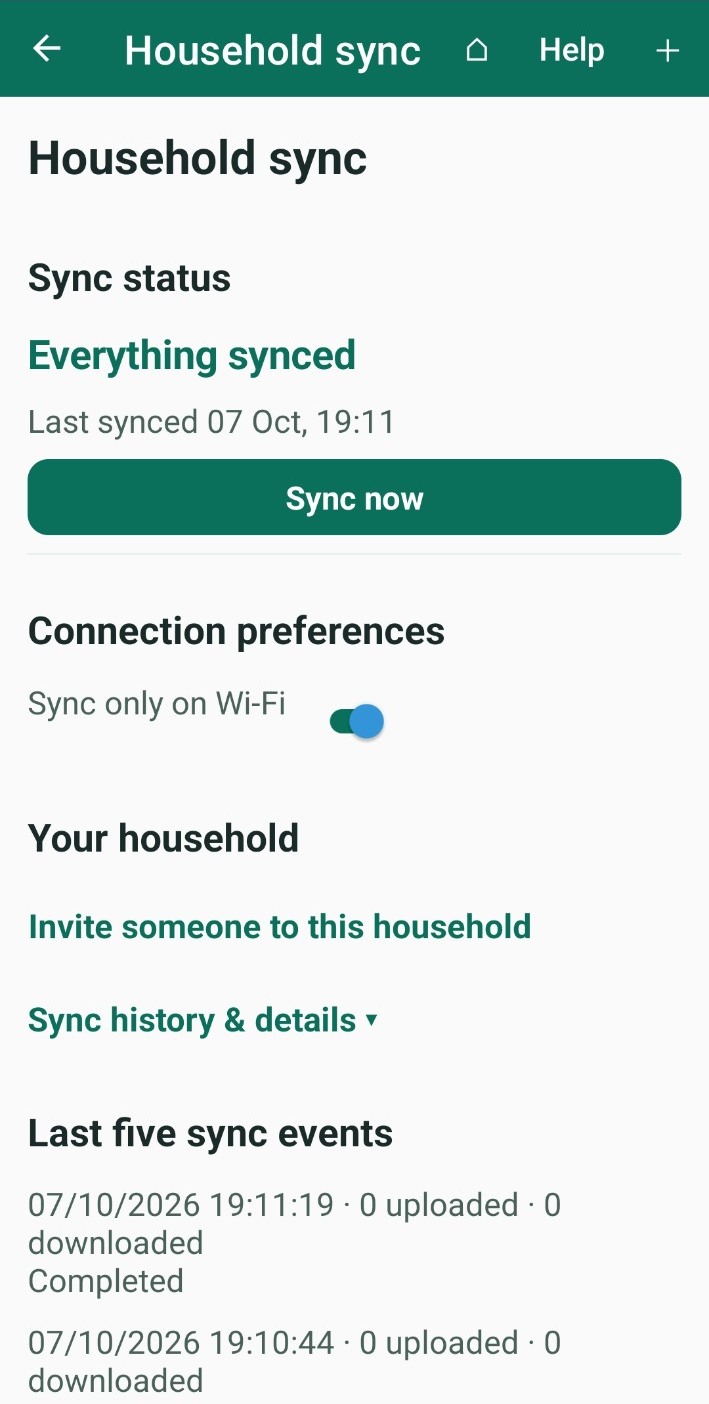
Need more help or have a suggestion? Contact us.
Android
Introduction to ThingzSafe
Find out what ThingzSafe can help you organise.
Where to start
Android: the first time you open the app, tap INTRODUCTION TO THINGZSAFE. At any time, go to Menu App Help.

What ThingzSafe is for
ThingzSafe helps you keep a clear record of what you own, such as your home contents, tools or stock. It is useful for insurance claims and for knowing what your belongings are worth. See Inventory valuation.
Your inventory is stored securely on your phone, in encrypted form.
For each item you can record where it is, what it is worth, its photos and documents, and its history. Everything about an item is kept together in one place.
A place for everything
A Site is a whole place, such as your home, garage, workplace or storage unit.
Areas divide a Site into sections, such as a room, cupboard or shed. Areas are optional, so you can use a Site without them.
What is a Thing?
A Thing is any item you want to keep track of, such as a car, computer, cupboard or bookcase. Each Thing holds its location, photos, documents and history together.
What are Parts?
Parts are pieces that belong to a Thing and that you track separately. Each Part has its own photos and history.
For a car, Parts could be the wheels or the exhaust, which you might replace. For a computer, they could be components you might upgrade.
What are Contents?
Contents are the individual items stored inside a Thing, such as books on a shelf, tins in a cupboard, building supplies in a workshop store, or CDs in a CD case.
Good to know: A Part is fitted to a Thing and belongs with it. Contents are stored inside a Thing and can be taken out.
Add, organise and find
- Add a Thing by typing its details, scanning its barcode, or taking photos to finish later.
- Photos you take are saved as drafts. They wait in your Review queue until you add the details.
- Search your inventory whenever you need to find something.
- Print barcode labels and set Calendar and repeating reminders to keep each item's details together.
What is a household?
A household is the group of people (two or more) who share one inventory on their own phones. For example, a couple keeping a home inventory, or three people sharing the tools and stock in a garage.
With a Household plan, changes made by anyone in your household appear on everyone's phone automatically. See Create or join a household.
Use it your way
- Free keeps your inventory on your Android phone only. It is not shared with anyone.
- Household adds sharing with the other people in your household, and the web portal so you can use your inventory on a computer.
- Pro includes everything in Household, plus loans, disposal tracking and custom category fields.
You can see every feature in the app. If your plan does not include one, the app tells you and shows you the plan options. For details, see Plans, purchases and cancellation.
Need more help or have a suggestion? Contact us.
Android
Print barcode labels
Print identifiers to find your items by scanning.
Where to start
Android: Home Menu Reports Print barcode label sheet
You can also open a Thing and tap Labels, or find it in Menu App App settings.
Why print labels?
Some things have no barcode, such as jars of homemade jam. Print your own barcode labels and stick them on. You can then scan them later, instead of remembering what you called each one.
Print labels for several items
- Go to Menu Reports Print barcode label sheet.
- Tap Choose entries and tick the Things, Parts or Contents to print.
- In Paper / label template, choose plain A4 or one of the label sheets listed.
- If you are using a sheet that is partly used, set Start on row and Start on column to the first free label.
- Add a Batch (optional) number or date if you like. Tap Use today's date for Batch to fill in today's date.
- Tap Preview selected labels, check them, then tap Print / Save as PDF.
Good to know: If you print the same Thing again, it gets the same barcode as before.
Print labels for one Thing
- Open the Thing and tap Labels.
- Enter how many identical labels you want.
- Choose the paper and starting position, then preview and print.
Good to know: Printing labels does not change the quantity you have.
Printing tips
- Choose the same paper size in your print settings as you chose in the app.
- Turn off scaling and extra margins, so the labels line up.
- Print a trial copy on plain paper first and hold it against your label sheet.
- You can print up to 500 labels at a time.
- The small Avery 5167 labels use a QR code instead of a barcode, because they are too small for one.
Plus and minus labels for Contents
Tick Also print + and − quantity labels for selected Contents to print labels that change the stock when you scan them from the Contents screen. See Scan Contents barcodes.
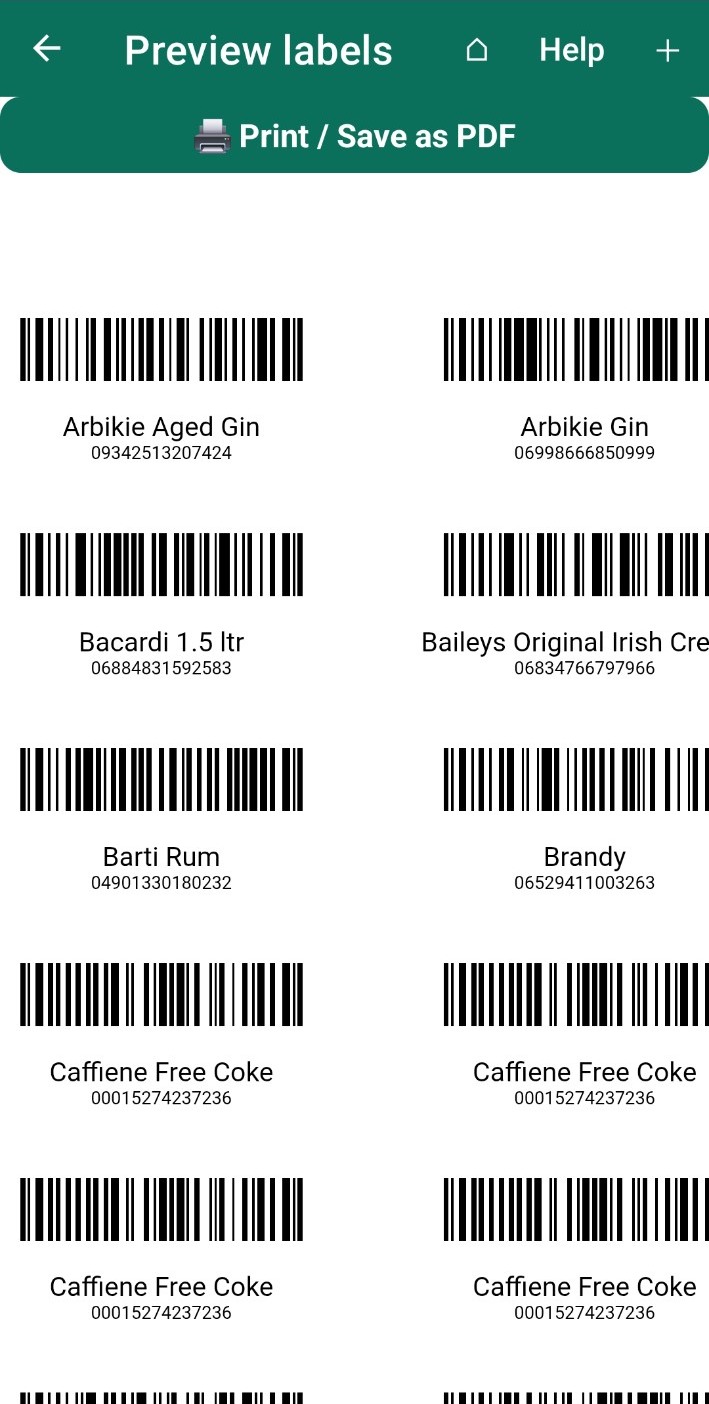
Need more help or have a suggestion? Contact us.
Android and web portal
Loans and rentals
With Pro, track borrowers, bookings and returns.
Where to start
Android: Home Site Area (optional) Thing Loans and rentals
Web portal: Things Thing Loans and rentals
Loan or rent something out
Use this to keep track of who has your things, when they are due back, and any rental you charge.
Plan: Loans and rentals need a Pro plan. Without one, the app says so and shows the plans.
- Open the Thing.
- Tap Loan / rent out. You will find it beside Move to another location. You can also open Loans and rentals. Changing the Thing's status to On loan opens the same screen.
- Enter the quantity, and who is borrowing or renting it.
- Choose a saved contact from the suggestions, or tap Add new contact.
- Add the expected return date if you know it.
- Tap Save.
Good to know: On the web portal, Loans and rentals is the last tab on a Thing.
Dates and rentals
- An expected return date is optional. Without one, the quantity stays unavailable until it is returned. It is not counted as overdue, and the reports mark it as having no expected return date.
- Tick Rental to add the rental amount, whether it has been paid, and the paid date.
Book something for later
- Tick Reserved.
- Enter the collection date and the expected return date.
- Tap Save.
What happens next: The Thing is not marked On loan until you tap Hand over / start loan.
Good to know: ThingzSafe checks the quantity is free for every day of the booking, including the return day. The next booking can start the day after. A late loan keeps its quantity until it comes back. To cancel a booking, tap Cancel reservation.
Reuse the last rental
If the Thing has been rented before, buttons such as Use last rental amount and Use last rental duration appear. Tap one to copy that value into the new rental. The duration sets a return date counted from the new start date.
Return a loan or rental
- Open the Thing and tap Return loan / rental.
- Choose the loan.
- Enter the Quantity returned, the Actual return date and any Return notes. You can add photos or documents too.
- Tap Save.
What happens next: If only some were returned, the rest stay on loan. When everything is back, the loan moves to Previous loans.
Good to know: If you change a Thing's status back to Active, the app asks whether it is a return from the person who had it.
Loan and rental report
- Go to Menu Reports Loan/rental report. On the web portal, open Loan/rental report.
- Choose all dates or a date range, a Category and a Site.
- Choose All loans, Current loans, Overdue loans, Returned loans or Reservations.
- Tap Create report, then Print or Download CSV.
Good to know: The date filter uses the loan start date.
Print a handover sheet
From a loan, tap Print loan/rental sheet. It makes a one-page sheet with the Thing and rental details, its main photo if there is one, and spaces for borrower and owner signatures and the date. Long notes are shortened to fit.
Before you sell, dispose of or delete
- Return or cancel any outstanding loans and bookings first.
- Loan history and attachments are shared with your household and included in encrypted backups.
- Loan fields cannot be customised.
History and calendar
- Current and previous loans are listed in date order. The total rental amount includes unpaid amounts. Cancelled bookings are left out.
- Collections and expected returns appear in your Calendar and repeating reminders. A loan with no expected return date has no return reminder. Returning or cancelling a loan removes its reminders.
- On the web portal, choose Month or Year in the loan calendar to see bookings. Hover over a date, or select it, to see the details.
Need more help or have a suggestion? Contact us.
Android
Move or split stock
Move items or quantities to another location.
Where to start
Android: Home Site Area (optional) Thing Move to another location
Move an item
- Open the Thing, Part or Content you want to move.
- Tap Move to another location.
- Enter the Quantity to move. To move everything, enter the full quantity.
- For a Part or Content, choose whether it will be a Part or a Content at the new place.
- Choose the destination Site and Area. A Part or Content also needs a Thing to go into, and that Thing must be able to hold it.
- Tap Move to confirm.
What happens next: A full move keeps the item's photos, files and history. Both places are updated.
Move only some of them
If you move less than the full quantity, the app splits them. The moved ones become a separate entry at the new place. The original keeps its photos, files and values.
Good to know: If the new place already has the same item, ThingzSafe asks what to do. Choose a matching entry to add to it, or Keep a separate entry.
If the Thing has Contents or Parts
A Thing that has Contents or Parts must move whole, so they stay together. The app asks you to Move the whole Thing.
Need more help or have a suggestion? Contact us.
News and how-to articles
Sign up when you want to hear from us
No spam, sales pitches or marketing. The list is for ThingzSafe feature news, release updates and how-to articles. You can unsubscribe using the link in any update.
On Android, open Main menu → App and choose the news signup. The web app and website offer the same signup link. Joining the list is optional and separate from your ThingzSafe account or plan.
Sign up for ThingzSafe updates
Sender hosts the signup form and manages the email list. Enter the email address you want updates sent to. Complete any confirmation email the form sends.
Android
Track Parts
Record components that belong to a larger item.
Where to start
Android: Home Site Area (optional) Thing Parts
What are Parts?
Parts are pieces that belong to a Thing and that you track separately. Each Part has its own photos and history.
For a car, Parts could be the wheels or the exhaust, which you might replace. For a computer, they could be components you might upgrade.
Before you start
A Thing only has a Parts section if its Category allows it. To turn it on, edit the Category and tick Things in this category can have Parts.
Good to know: Not sure whether something is a Part or Contents? A Part is fitted to a Thing and belongs with it. Contents are stored inside a Thing and can be taken out.
Add a Part
- Open the Thing and tap Parts.
- Tap + Add Part to type the details. Or tap Photograph Part to take photos and finish the details later in the Review queue.
- Fill in the details, in the same way as for a Thing.
- Tap Save.
Open or change a Part
- Tap a Part to open it.
- Tap Done to go back to the Thing it belongs to.
- A Part's cost is kept separate from the Thing's normal valuation. See Inventory valuation.
Need more help or have a suggestion? Contact us.
Android
Photos, documents and downloads
Keep photos and documents with the item they describe.
Where to start
Android: Home Site Area (optional) Thing Photos & files
Add a photo or document
- Open the Thing.
- Tap Photos & files.
- Tap + Add photo or document.
- Choose to take a photo, pick one from your gallery, or attach a file.
Good to know: Photos can be JPG, PNG or WebP. Documents can be PDF, DOCX, XLSX, CSV, TXT or RTF. Each file must be no larger than 20 MB.
Manage your photos and documents
- Photos and documents are listed in rows. Long file names are shortened to fit the screen.
- Tap a photo to open it full screen. See Zoom a photo.
- Tap a document to open it in another app on your phone.
- Tap the three-dot menu beside a file to see what you can do with it, including making it the main photo, downloading it, or deleting it.
- You are always asked to confirm before anything is deleted.
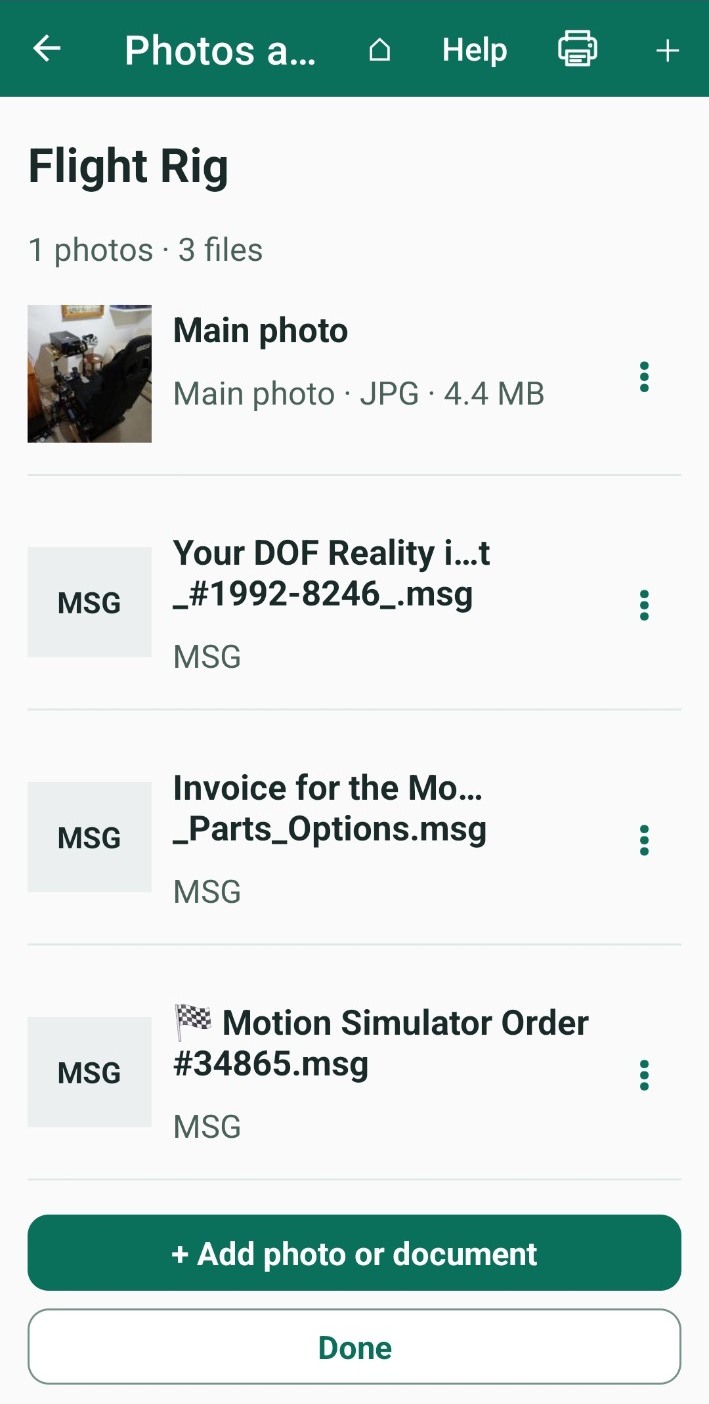
Need more help or have a suggestion? Contact us.
Plans, purchases and cancellation
What each plan includes
Free: unlimited local Android inventory with locations, Things, Parts, Contents, photos, reminders, labels and backups. No cloud account is needed.
Household: all Free features plus household sync, sharing with invited people, the web app, bulk editing and imports, email receipts with basic text reading, connections for ChatGPT, Claude and Google Gemini, and developer API access. Only the household owner pays; invited members do not need a separate subscription.
Pro: all Household features plus category customisation, sale/disposal records, loans, rentals and reservations, Alexa voice control, Android bulk AI recognition and AI replacement valuations on Android and web, AI reading of emailed receipts and data tables with scheduled readings.
Buy and activate
In Android, open Menu and the Account section to view plans and household setup. Google Play shows the current price, billing period, local taxes and renewal terms before purchase.
Use the ThingzSafe identity you intend to keep. After purchase, leave the app open while household setup and the first sync finish. If interrupted, use the setup retry or Restore purchases rather than buying again.
The web app is for an already provisioned Household or Pro account. Create or join the household through Android first.
Join an invited household
You do not need to buy your own subscription. Install ThingzSafe, then use household setup to join with the invited email address and invitation code. Back up any local inventory before joining or restoring, because a replacement operation can replace the inventory on that phone.
Restore, manage or cancel
Restore purchases checks the Google Play account that made the purchase. Use the same ThingzSafe sign-in identity for the household. On a new phone, use the cloud restore workflow carefully.
Manage renewal or cancel through Google Play subscriptions. Cancellation stops future renewal; current access follows the subscription terms. Local Free tools remain available. Keep an encrypted backup or export before paid access ends.
For sign-in or purchase problems, contact support with the reference shown. Never send passwords, sign-in codes or payment-card details.
Android
Print and save PDF reports
Print item details or save them as a PDF.
Where to start
Android: Home Site Area (optional) Thing Print / export
Print a Thing report
- Open the Thing.
- Tap Print / export.
- Tick the sections to include: photos, details and warranty, Contents, Parts, Events and calendar, and the names of attached documents. All start ticked.
- Tap Print / Save as PDF.
- Choose a printer, or choose Save as PDF, in the Android print screen.
Good to know: The report lists document names only. The documents themselves are not included.
Other things you can print
- Search results: they use the same filters as your search. See Find a Thing.
- The Contents list and your reminders: tap the printer icon on those screens.
- Barcode labels: see Print barcode labels.
- Reports from the Menu: Menu Reports Print inventory report.
Need more help or have a suggestion? Contact us.
Android
Add a list for later review
Make a quick list of items to complete later.
Where to start
Android: Home + Scan or add a Thing ☷ Add multiple Things
Add several names at once
Use this to list lots of items quickly, without photos or details. Each name becomes a draft Thing in your Review queue.
- Choose the Site and, if you use them, an Area.
- In Things to add (separate entries with commas), type each name with a comma between them. For example: books, board games, DVDs.
- Tap Add to Review queue.
- Open the Review queue to complete each draft.
Good to know: Names that are already in the Review queue are skipped.
What happens next: In the Review queue, add photos, a Category and any details that identify the item. See Review your captures.
Need more help or have a suggestion? Contact us.
Android
Quick one-photo capture
Capture one item at a time for later review.
Where to start
Android: Home + Scan or add a Thing 📷 Quick one-photo capture
You can also tap Quick one-photo capture here in a Site or Area.
Take a photo of one item
- Choose a Site and, if you use them, an Area.
- Choose a Photo shape. Do this before you take the photo. See below.
- Point the camera at the item so it fits inside the frame. The visible frame is what gets saved.
- Take the photo and check it. Tap Retake if you want another go.
- Save the photo:
- Save & add another: saves this photo and gets the camera ready for the next item.
- Save & done: saves this photo and finishes.
What happens next: Each photo is saved as a draft in the Review queue, where you add its name and details. See Review your captures.
Choose a photo shape
- Standard (4:3): the usual photo shape, good for most items.
- Square (1:1): a square photo.
- Wide (16:9): a wide frame, good for flat, wide items such as board games.
- Thin (16:4): a very narrow frame, good for slim items such as books and DVDs.
Good to know: The saved photo keeps the shape you chose and is never stretched.
More options
- Tap Scan barcode to read a barcode and look up the product details.
- Tap Take detail photo to add another photo of the same item.
- Tap Review queue to open the drafts you have saved.
Need more help or have a suggestion? Contact us.
Android
Calendar and repeating reminders
Schedule tasks and keep track of their completion.
Where to start
Android: Home Menu Organise Reminders
What reminders do
Reminders keep track of dates that matter, such as a service, an inspection or a warranty ending. Each one belongs to a Thing.
Add a reminder
- Go to Menu Organise Reminders.
- Tap + Add reminder and choose the Thing it is for.
- Type an Event name, for example "Annual service".
- Choose the Date. It can be in the past or the future.
- Add Details, a Repeat interval and a linked contact if you want to.
- Tap Save calendar event.
Good to know: You can add a reminder from a Thing too. It then shows all of that Thing's reminders, including finished ones.
Mark a reminder done
- Open the reminder.
- Tap Mark this occurrence done, then Mark done.
- If you like, tap Add log to record the work done and its cost in the Thing's Events. Or tap Later.
What happens next: A repeating reminder moves on to its next date. The finished one stays in the list of previous completions.
Change or delete a reminder
- Open the reminder and tap Edit calendar event to change it.
- To delete one, open it and delete it, then confirm.
- A warranty reminder is changed in the Thing instead: open the Thing, tap Edit details and change Warranty / guarantee ends.
- Tap View Thing to open the Thing a reminder belongs to.
Choose which reminders you see
The Reminders screen shows overdue reminders and ones due soon. Tap Change window to set how many days ahead to show, from 0 to 365.
Good to know: When you open the app, it warns you once about anything overdue or due within that window. You can also set the number in Menu App App settings.
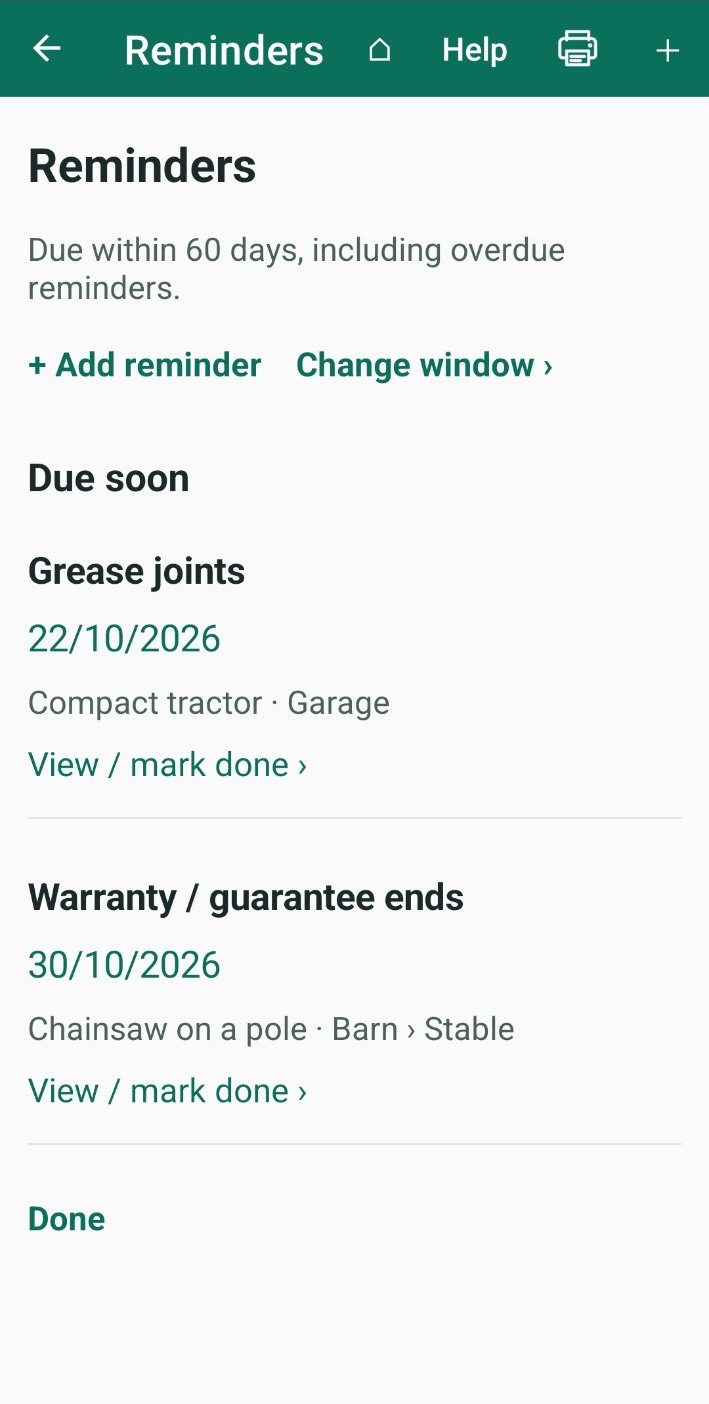
Need more help or have a suggestion? Contact us.
Android
Remove stock
Record stock used and reduce its quantity.
Where to start
Android: Home Site Area (optional) Thing Decrease quantity · additional options
Remove some of an item
- Open the Thing or Content.
- Tap Decrease quantity · additional options.
- In Quantity to remove, enter how many to take out. The screen shows the quantity that remains.
- Tap Remove Things, then Remove to confirm.
What happens next: The quantity goes down by that amount, and the change is added to the item's history.
Good to know: You cannot remove more than you have. If the quantity reaches zero, the record stays, so you keep its photos and history. Tap Cancel to leave the quantity as it was.
A quicker way for one at a time
On the Thing, tap − Decrease to take one away, or + Increase to add one.
Need more help or have a suggestion? Contact us.
Android
Review your captures
Turn unfinished captures into useful inventory records.
Where to start
Android: Home Menu Organise Review queue
You can also tap Review now on Home.
What is the Review queue?
When you capture photos or add a list, ThingzSafe saves each item as a draft. The Review queue is where your drafts wait until you complete them and add them to your inventory.
The queue has two parts: Captures (your drafts) and Inventory (Things, Sites and Areas marked Needs review). Tap either name to jump to it.
Complete a draft
- Tap Review capture on a draft.
- Tap a photo to see it full screen. You can zoom in to check details.
- Choose the Main photo: the one that best shows the item.
- Type the name, and choose the Category and other details.
- Tap Save Thing.
Good to know: Tick Needs review to save your changes but keep the Thing in the Review queue.
Let the app read a barcode or label
- Find barcode in photos: ThingzSafe looks for a barcode in your photos, starting with the one marked Code. Check the number before you save.
- Read product label: ThingzSafe reads the text on a label photo and fills in empty fields for you. Check the suggestions before you save.
Plan: Reading product labels is available on Household and Pro.
Good to know: Mark a photo as Code for a barcode, or Label for a product label. Use a close, sharp photo for best results.
If you already have it
If a code matches a Thing you already own, ThingzSafe shows it. Choose Increase existing quantity, Open existing Thing or Create separate Thing.
Delete a draft
- Open the draft.
- Scroll to the bottom and tap DELETE.
- Confirm. The capture, with its photos and files, is deleted.
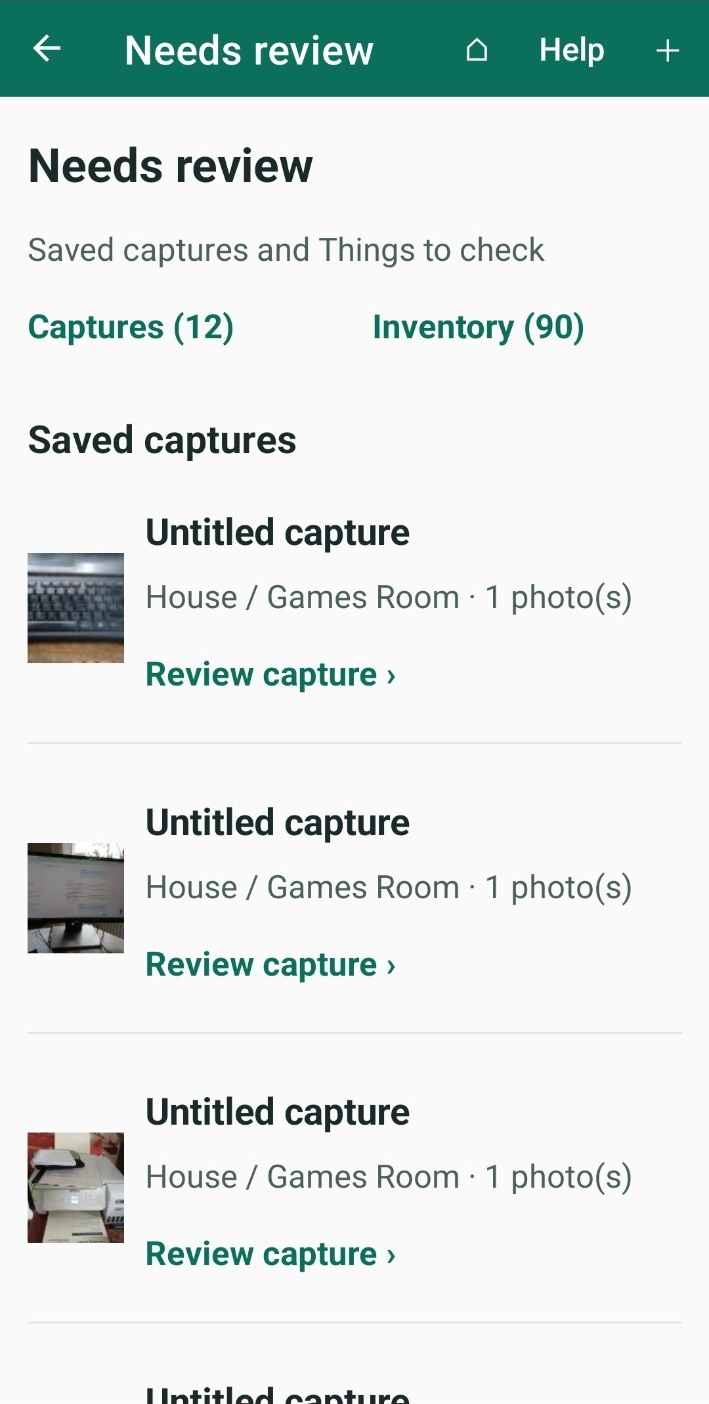
Need more help or have a suggestion? Contact us.
Android
Scan a barcode or QR code
Find or add an item using its barcode or QR code.
Where to start
Android: Home + Scan or add a Thing ▤ Scan barcode or QR
Scan a code
- The scanner opens on its own. Hold your phone steady so the code is in view. You do not need to press a button.
- Where your phone allows it, the scanner focuses and zooms by itself.
- If it cannot read the code, type the barcode or serial number instead.
- If you already own the item, ThingzSafe shows each matching Thing with its name, photo, location and quantity.
What happens next
- If there is a match, it opens straight away.
- If there is no match, ThingzSafe asks Create a Thing with this scanned code? Tap Create Thing to add it, or Cancel.
- If you scanned while adding or editing a Thing, tap Use this code to put the code on that Thing, or Cancel to leave the form unchanged.
If something goes wrong
If the scanner cannot read a code, make sure the camera is allowed, add more light and hold the code steady. You can always type the code instead. See Troubleshooting and support.
Need more help or have a suggestion? Contact us.
Android
Find a Thing
Find an item without remembering where you put it.
Where to start
Android: Home Search inventory, actions and help
For more options, tap More search filters.
Search your inventory
- On Home, tap the search box.
- Type at least 3 characters.
- Wait 2 seconds, or tap Done.
- Tap a result to open it. Results show matching Things and where they are.
To go back to your Sites, clear the search box.
Good to know: Search also finds app actions and help topics, not only your Things.
Narrow your results
Tap More search filters to narrow your results. You can:
- Choose a Site or a Category.
- Tick High risk only.
- Choose a Status. It starts as Owned, which shows Active and On loan Things and hides Sold and Disposed ones. Choose All to see every status.
- Tick Include Event text to search the notes in your event history too.
Good to know: You can print the results. The printout uses the same filters.
Need more help or have a suggestion? Contact us.
Android
Settings, reminders and app lock
Adjust app preferences to suit the way you work.
Where to start
Android: Home Menu App App settings
Open the settings
- On Home, tap Menu.
- Open App, then tap App settings.
Your name
Type your first name and tap Save first name. ThingzSafe uses it for greetings and to record who made each change.
Reminder days
Enter how many days ahead you want to be reminded of events, from 0 to 365, and tap Save reminder days. Overdue events are always included.
Lock the app
Turn on Require fingerprint/face or device passcode to ask for your phone's unlock each time the app opens. Android asks you to unlock first. It needs a screen lock set up on your phone. Your inventory is encrypted whether or not the lock is on.
Other settings
- Language: choose the language for the app. Your own entries stay as you typed them.
- Add suggested sites and areas: puts back the starter examples. Only shown if some are missing.
- New for old valuation: uses the purchase price as the estimate when you have not entered a current value. See Inventory valuation.
- Send back error reports: saves a report on the phone if the app has a problem. You choose when to send it.
- Shortcuts to Manage sites and areas, Manage categories, Manage contacts, Print barcode label sheet, Backup, restore and export, and Household cloud and sync.
Good to know
Only first name and reminder days need their Save buttons. Other switches save as soon as you change them.
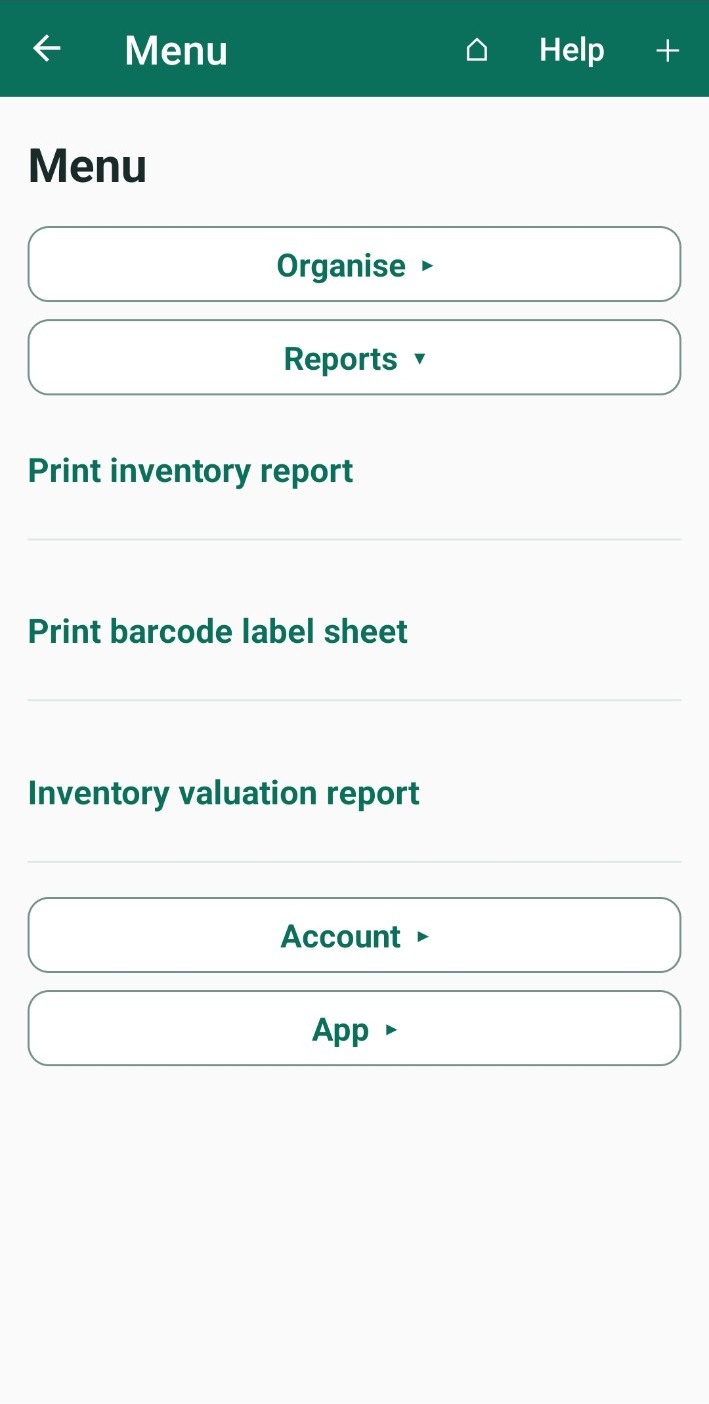
Need more help or have a suggestion? Contact us.
Android and web portal
Sites and Areas
Organise items by the places where you keep them.
Where to start
Android: Home Menu Organise Manage Sites and Areas
Web portal: Sites and areas
What are Sites and Areas?
- A Site is a whole place, such as your house, workplace or storage unit.
- An Area is a room or section inside a Site, such as a kitchen, workshop or loft.
- A Thing can sit directly in a Site or in one of its Areas. Areas are optional.
- Position is a note you type to say exactly where a Thing is, such as "top shelf".
Suggestions when you first set up
During setup, ThingzSafe suggests some Sites and Areas to get you started. The Sites are House, Work, Garage, Barn and Garden. The Areas include Kitchen, Living room, Office, Gym and Main bedroom.
Keep, rename or remove any suggestion, and add your own. Keep at least one Site.
Good to know: If you removed the suggestions and want them back, go to Menu App App settings and tap Add suggested sites and areas. Your own Sites and Areas stay as they are.
Add a Site
- Go to Menu Organise Manage Sites and Areas.
- Tap + Add site.
- Type a name. To add several, separate the names with commas.
- Confirm.
Good to know: If you type a name that already exists, it is skipped.
Add an Area
- Open the Site.
- Tap + Add area.
- Type a name for the room or section. To add several, separate the names with commas.
- Confirm.
Rename a Site or Area
- Open the Site or Area.
- Tap Edit details.
- Type the new name and confirm.
Mark a Site or Area to check later
On a Site or Area, tap Mark Site and all Areas to be reviewed (or Mark Area to be reviewed) to flag it. It then shows Needs review. When you have checked it, tap Mark Area reviewed (or Mark Site and all Areas reviewed).
Delete an Area or Site
- Move or delete everything inside it first. An Area must have no Things. A Site must have no Areas and no Things.
- Open the Site or Area.
- Scroll to the bottom and tap DELETE.
- Confirm.
Good to know: You can only delete an empty Site or Area. The app tells you if something is still inside.
Need more help or have a suggestion? Contact us.
Android
Check actual quantities
Compare saved quantities with what is actually there.
Where to start
Android: Home Site Area (optional) Thing Contents Stock check
What a stock check does
A stock check compares the quantities saved in ThingzSafe with what is really there. You can count by hand or by scanning barcodes. When you finish, ThingzSafe updates the quantities that changed and records the check date.
Count what is actually there
First choose how to count, under Counting mode:
- Rebuild from zero: every quantity starts at 0. Add each item as you count it, using the + button or by scanning. Use this for a full recount.
- Confirm expected stock: every quantity starts at the saved amount. Use this to check what you have, and change only what is wrong.
- Open the Thing, tap Contents, then tap Stock check.
- Choose a counting mode and count each item.
- Tap Review differences.
- Check the list of changes.
- Tap Apply.
What happens next: Quantities that changed are updated, and the check date is saved. The stock check is recorded even if nothing changed.
Count by scanning
- Tap Quick barcode scan.
- Scan each item. A known barcode adds one to its count. Tap Scan next barcode to keep going.
- Tap Return to actuals when you want to close the scanner. Your counts stay on screen.
- If a barcode is not in this stock check, ThingzSafe asks for a description. Enter one and tap Add, or tap Skip.
- Tap Review differences, then Apply.
Good to know
- For everyday arrivals and use, add or remove stock instead. A stock check is for correcting the balance.
- To check a whole room at once, see Check an entire Area.
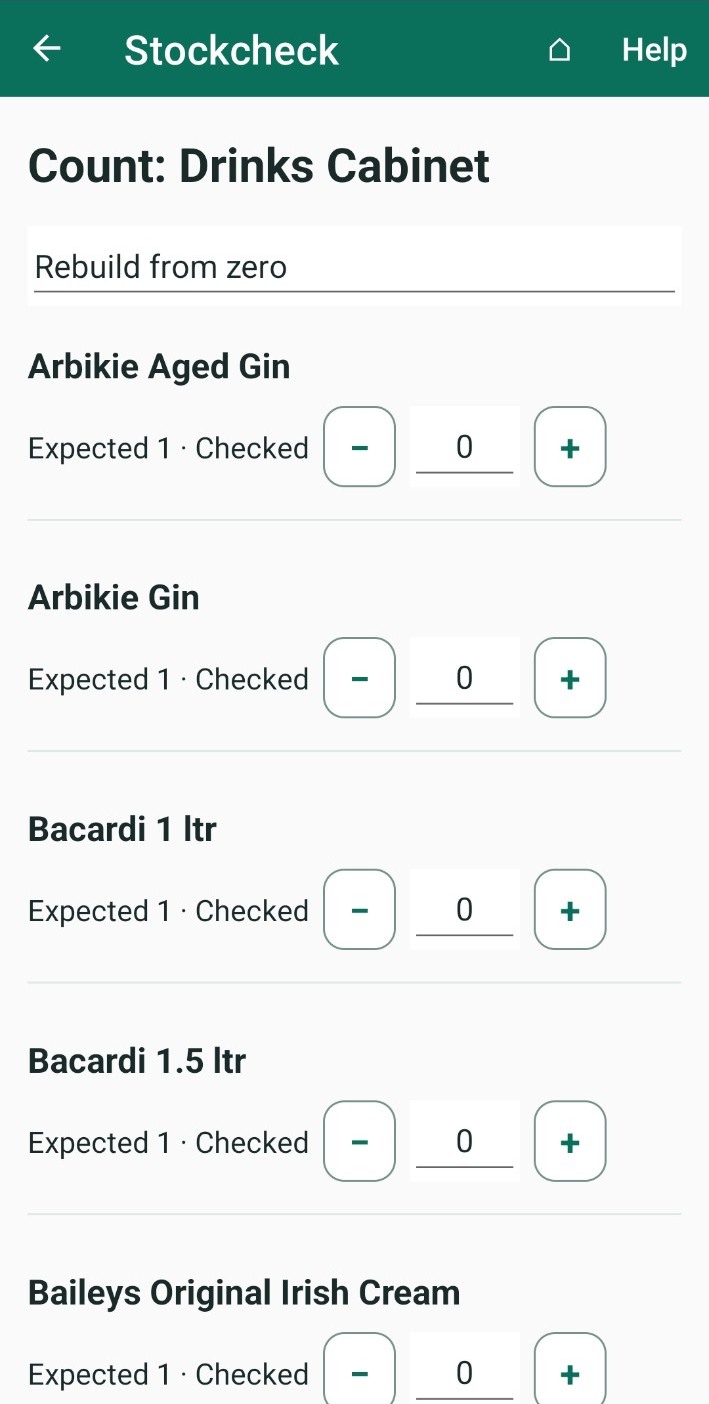
Need more help or have a suggestion? Contact us.
Tables and scheduled readings
Tables let you keep a record of things that change over time: livestock numbers, feed bought, mileage, machine hours or running costs. Each table belongs to one Site, Area or Thing, including its Parts and Contents. You fill it in by hand, or you can have ThingzSafe add a dated row for you every day, month, quarter or year, and remind you when a reading is due.
Tables are a Pro feature. You can use them on Android and in the web app.
A quick example
You keep chickens. You make a table called Monthly chicken records on your Barn Thing, with three columns: Month (a date), Chickens (a number) and Feed bought (a cost). Each month a new row appears, with the month already filled in. You add the figures and save the row, and you have a running record you can sort, export or ask ChatGPT, Claude or Gemini about.
Open Tables
- On Android: open the Site, Area or Thing, then choose Tables · Pro. You will find it after Notes.
- On the web: open the record and choose the Tables tab, after Notes. For Sites and Areas the tabs are under the title.
For help while you are working, use the usual Help button at the top of the app.
Create your first table
- Choose Add table. The designer opens with one column and one empty row.
- Type a Table name, such as Monthly chicken records.
- Select the Column 1 ▾ heading. In Column settings, give the column a name and choose its type. Number columns offer an optional unit and a choice of what the number means. A Choice column asks for its list of choices. Choose Save to go back to the grid.
- Use the Insert column button beside the column headings to add another column, and the Insert row button beneath the grid to add another row.
- If you like, type your first readings straight into the grid.
- Choose the main Save when the table is ready. Until you do, your columns, schedule and draft rows stay in the designer and are not saved.
Column settings also have buttons to move a column left or right, or Delete it. A table must keep at least one column. Removing a column asks you to confirm, and takes effect when you save the layout.
To change a table later, choose Table Layout to change columns. Within the layout editor, select a column heading to change that column. Saved readings show as a preview while you edit the layout. To change the readings themselves, save the layout first, then edit the rows.
Choose the right column type
| Type | Use it for |
|---|---|
| Text | A short description or observation. |
| Number | Counts, weights, mileage or hours. Add units such as kg or miles. |
| Date | A date you type or pick from the calendar. |
| Choice | A list of choices you supply, separated by commas. |
| Checkbox | A yes or no value. |
| Currency | A cost or payment. Put the currency, such as GBP, in Unit (optional). |
What does your number mean?
For a number column, say what the figures represent. This helps reports read them correctly.
- Current count records how many you have right now; earlier entries stay in your history. This is a snapshot, such as the number of chickens today.
- Amount to add up is something you add up over a period, such as feed bought or money spent.
- Meter reading is a running total, such as tractor hours.
A blank cell means nothing has been entered. That is different from zero.
Start from another table
If another Thing, Site or Area already has the layout you want, you can copy it.
- When adding a table, choose Based on another table….
- Search for the record that has the layout, select it, then select its table. On the web, choose Save in that window to load it into the designer.
- Check the copied grid, then choose the main Save to create your new table.
This copies the columns into a new table of its own. It does not copy any readings or reminders, and its schedule starts as Manual. If you have already entered an unsaved layout or readings, you are asked before they are replaced.
Have dated rows added for you
For a record you keep regularly, ThingzSafe can add a new row on each due date and remind you to fill it in.
- Add a column and choose Date as its type.
- Select the Auto Schedule button above the grid to open Recording schedule.
- Choose how often, and which date column to fill. Enter or choose the first date, and check the time zone.
- Choose Save to go back to the designer, then the main Save to apply your layout and schedule.
| Schedule | When rows are dated |
|---|---|
| Daily | Every day. |
| Monthly | The first of each month. |
| Quarterly | 1 January, 1 April, 1 July and 1 October. |
| Yearly | 1 January. |
The first date must fit the schedule you chose. Only one date column can drive a table’s schedule. Any other date columns stay manual.
How the rows appear
- Our cloud service creates each row as its date becomes due, normally on its next background check. Your phone must sync before the new row shows there.
- If dates were missed, it catches up in batches of up to 31 dates per table. It sets one grouped reminder per table, not one for every missed reading.
- Changing a schedule keeps your earlier rows. Choosing Manual stops new automatic rows, but any readings already waiting still need completing.
- If you delete a scheduled row, it is not created again.
Fill in a scheduled row
- Open the reminder. It takes you to Tables.
- Choose the table, then Edit row on the row that is due.
- Enter a value and choose Save. There is no separate completion checkbox.
Once your devices sync, a completed row no longer counts as pending. The reminder closes when every scheduled reading is complete. Saving any value clears that row’s notification. Zero and an explicitly selected No count as values; the automatically filled schedule date does not. Blank rows stay pending.
Read and edit a table
- Sort: select a column heading to sort. Select it again to reverse the order. To edit columns, choose Table Layout (Pro).
- See more: scroll sideways for more columns. On the web the grid scrolls on its own and keeps the headings in view. Use Next rows for more pages. Android also has Previous rows.
- Add: the Insert row button beneath the grid adds a row. To insert a column, first choose Table Layout.
- Change a reading: choose Edit row.
- Delete: Delete row removes one reading. Delete table removes the whole table and all its readings on every device. Delete a table before you delete the Site, Area or Thing that owns it.
Each row syncs separately. If another device has changed a row or its columns before you save, use the usual conflict and reopen steps instead of overwriting their work. If a save fails, your draft stays open so you can try again.
If you leave the designer without saving, the web asks whether to discard your draft. On Android, Cancel asks you to confirm only if there are changes to discard, and the normal Back action leaves without saving. Neither keeps a draft to resume later.
You can only change a column’s type if its existing values still fit. Removing a column that has data asks you to confirm, so export first if you want a copy.
Ask an AI assistant about your readings
Once ChatGPT, Claude or Google Gemini is connected to ThingzSafe, you can ask things like:
- “Compare chicken numbers with feed purchased each month.”
- “Add one to this month’s chick count.”
- “Add a row for tomorrow with the lamb count at seven.”
Say which Thing and table you mean if more than one could match. Your assistant shows the change it plans to make and asks for your approval first. “Add one” is different from “set the count to one”, and an empty number must be filled in before it can be increased. Tables do not add any new Alexa voice commands.
Export and reporting
Choose Export CSV to save or share the table for a spreadsheet. The column headings include the units you entered. An authorised reporting API also provides table definitions and rows, a page at a time. A ready-made Power BI connector is not included.
Plans and your data
- Creating tables, editing them and scheduled rows all need Pro.
- If you move down to an active Household plan, your existing tables can still be read and exported.
- If all paid cloud access ends, the normal cloud-access rules apply. Data already downloaded to Android stays on the device.
- For now, a household can have up to 50 columns in a table, 100 tables and 19,000 rows in total. The usual record-size and sync limits also apply.
If something looks wrong
A scheduled row has not appeared
Rows are created by our cloud service on its next background check, and your phone has to sync before it shows them. Check your connection and choose to sync, then look again.
My changes were not kept
Changes to columns, the schedule and draft rows are only saved when you choose the main Save. If the save failed, the draft stays open so you can try again.
I cannot create or edit a table
Creating and editing need a Pro plan. On a Household plan you can still read and export existing tables.
A column will not change type or be removed
The new type must suit the values already in the column. Removing a column that holds data needs confirming. Export first if you want to keep a copy.
Layout and sorting
Choose Table Layout to change columns, or Auto Schedule to set when new dated rows appear. Insert-column and insert-row buttons use a small table with a right or down arrow. Insert column is available only in the layout editor. When viewing your data, select a column heading to sort; select it again to reverse the order. Saving an edited row keeps its table open.
Unit (optional) tells you what a number measures, such as kg, litres, hours or miles. Leave it blank if the column name makes that clear.
Find a table quickly
Search for a table’s name in the app. For example, search for goats to find your Goats table. Search for table or tables to see all tables you can access. Choose a result to open it on the Thing, Site or Area it belongs to.
The first table opens when you choose the Tables tab. Select another table by name. Click a column heading to sort; an arrow appears only on the column currently used for sorting.
Android
Add and edit a Thing
Record an item, its location and useful details.
Where to start
Android: Home + Scan or add a Thing + Add a Thing manually
You can also open a Site or an Area and tap + Add Thing here or + Add Thing manually.
What is a Thing?
A Thing is any item you want to keep track of, such as a car, computer, cupboard or bookcase. Each Thing holds its location, photos, documents and history together.
Add a Thing
- Choose the Site, and the Area if you use them.
- Type a name, and choose a Category.
- Fill in the details you know. You do not need to complete everything. See the list below.
- Check Status. It starts as Active, which is right for most things.
- Tick Needs review if you want to finish the details later. The Thing is saved and added to your Review queue.
- Tap Save.
Good to know: Tap Cancel to throw away your changes. On screens with a house icon, the house saves your changes and takes you to Home.
Details you can add
- Quantity: how many you have.
- Position: exactly where it is, such as "top shelf". Type anything you like.
- Make / manufacturer, Model and Size / pack size: for example 400 g, 1 litre or 6 pack.
- Serial No. / Barcode / ISBN: tap Scan barcode / ISBN to fill it in by scanning.
- Purchased from, Purchase date, Purchase price and current value: see Values and warranty below.
- Website URL and Notes: anything else worth keeping.
Good to know: Prices are for one item. For several items, ThingzSafe multiplies by the quantity to give the total.
What the Status means
- Active: you own it and have it.
- On loan: you still own it, but someone else has it until it is returned. See Loans and rentals.
- Sold or Disposed: these record what finally happened to it. The Thing stops appearing in your inventory lists and searches. You can note who bought it and for how much, or where it was taken. See Sale and disposal tracking.
Scan a barcode
Tap Scan barcode / ISBN if the item has a barcode. ThingzSafe checks your own inventory and an online database of barcoded products, such as groceries, to suggest details.
Plan: On Household and Pro, ThingzSafe also checks the barcode catalogue, which holds barcodes that are not in the main online database.
Add more of something you already own
If you scan or enter a code for something you already have, ThingzSafe shows it with its quantity and asks what to do. Choose one:
- Increase existing quantity: you have another identical one. For example, a drill with a quantity of 2 means you have two drills.
- Open existing Thing: look at the Thing you already have.
- Create separate Thing: record it as its own Thing instead.
You can also add more at any time:
- Open the Thing.
- Tap Increase quantity · optional labels.
- Enter the number in Quantity to add.
- Check the result shown. For example, if you have 2 drills and add 1, the result is 3.
- Tap Add Things.
Good to know: Any details you change here apply to every unit of that Thing, unless you tick Add as a separate entry. Tick Print labels for added units to print labels for only the items you just added.
Values and warranty
- Enter Purchase price and the current value for one item. ThingzSafe works out the total from the quantity.
- To get an idea of what something is worth now, tap Search online for a current value. It opens a web search using the Make and Model you entered. It does not fill in a price for you, so type in the value you decide on.
Plan: Online price lookup is available on Household and Pro.
To add a warranty:
- Choose the purchase date first.
- Open the Warranty / guarantee ends calendar. It opens one year after your purchase date, so you can adjust from there.
- Pick the end date, then tap Save. ThingzSafe creates a reminder in your calendar, or updates the existing one.
Edit a Thing
- Open the Thing from your list.
- Tap Edit details.
- Change any of the details.
- Tap Save.
Good to know: To change the quantity quickly, use + Increase and − Decrease on the Thing. To move it, tap Move to another location. See Move or split stock.
Delete a Thing
- If the Thing still has Contents, move or delete those first. If it is on loan, return the loan first.
- Open the Thing.
- Scroll to the bottom and tap DELETE.
- Confirm. This cannot be undone.
What happens next: Reminders and events linked to the Thing are removed too. In a household, everyone else's phone updates the next time it syncs.
Delete a photo or file
- Open the Thing and tap Photos & files.
- Tap the three-dot menu beside the photo or document, then choose Delete.
- Confirm.
What happens next: The file is removed from the Thing and from this phone. In a household, it is also removed from the shared cloud, and from other phones the next time they sync.
Good to know: Copies you saved outside the app, such as downloads, exports or backups, are not removed. Delete those yourself.
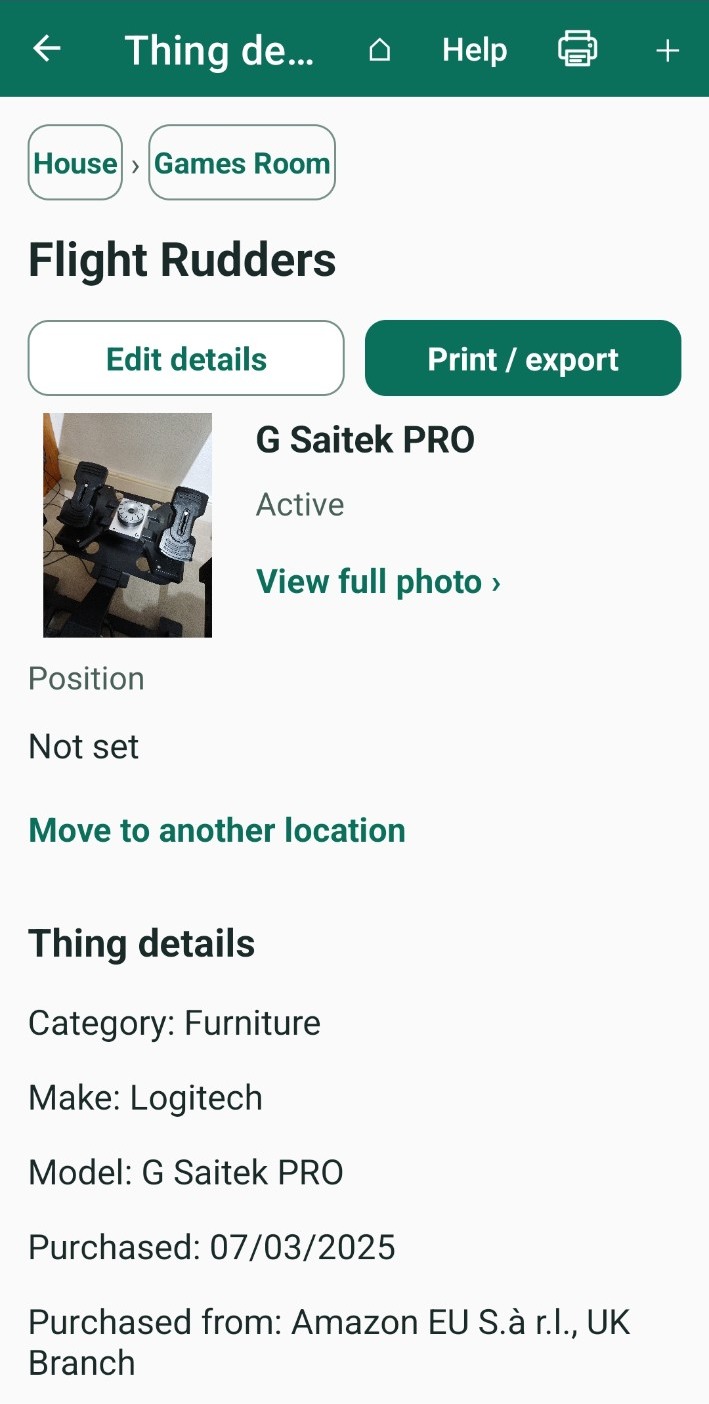
Need more help or have a suggestion? Contact us.
Find a replacement value with Pro
From Edit, use the AI button beside Current value (each). Check the title, category, make and model before generating. Review the source prices, accept a proposal and save the edit form. Read the AI valuation guide.
Android
Troubleshooting and support
Find the next step when something does not work.
Where to start
Android: Home Menu App Report a bug or suggest a change
Find ThingzSafe on Google Play
Open the Google Play link on the ThingzSafe website and install the app published by ThingzSafe.
The scanner cannot read a code
- Allow camera access in your phone's settings.
- Add more light and hold the code steady.
- Type the code instead. Include any separate first digit at the far left.
- If the product is not in the catalogue, type its name yourself.
A photo or document will not open
- Check that it has finished syncing. In a household, a new file may take a moment to arrive.
- Check that your phone has an app that can open that kind of file.
- Download the original file and try again.
Backup password rejected
- Check the spelling and the capital letters, and that you picked the right backup file.
- A forgotten backup password cannot be recovered.
- If your only copy is on this phone, do not uninstall the app.
The app closed by itself
Open it again. ThingzSafe may offer to send a report. Read it first, then tap Email report. Nothing is sent unless you send it. See Menu App App settings to switch error reports on or off.
Send useful details
- Go to Menu App Report a bug or suggest a change, or use the Contact form on the website.
- Tell us the app version, your phone or browser, what you were doing, and what happened.
- Remove personal details from any screenshots.
Need more help or have a suggestion? Contact us.
AI recognition says the location needs syncing
That location has not finished syncing to the household cloud. Open Household sync, let it finish and then try recognition again. Check you are using the intended household and location. If sync itself is unavailable, your local changes stay on the phone; follow the sync message and try later.
If recognition or valuations reach a fair usage limit, follow the message. If it seems wrong, contact ThingzSafe Support with its support code. You can continue normal manual entry.
Android
Individual Content labels
Print labels for selected Contents and quantities.
Where to start
Android: Home Site Area (optional) Thing Contents More actions Print labels for the thing’s contents
Print a label for each item
- In Contents, tap More actions, then Print labels for the thing’s contents.
- Use + and − beside each Content to set how many labels it needs.
- Choose the paper or label size and where to start on the sheet.
- Tap Save quantities and preview labels. If the quantities changed, you are asked to confirm before the app saves them.
- Check the preview, then print. See Print barcode labels for printing tips.
Good to know: Each quantity must be a whole number from 0 to 500, with up to 500 labels in one print job. You need at least one Content with a quantity above zero.
Need more help or have a suggestion? Contact us.
Android and web portal
Inventory valuation
Review recorded values and identify missing information.
Where to start
Android: Home Menu Reports Inventory valuation report
Web portal: Inventory valuation
What the report shows
The valuation report adds up what your belongings are worth, which is useful for insurance. It also shows which items are missing the information needed to give them a value.
Create a report
- Go to Menu Reports Inventory valuation report.
- Under Report scope, choose everything, one Site, or one Area.
- Tick any options you need. See below.
- Choose how to sort the report and the Output format: a printable landscape report, or a CSV file.
- Tap Create valuation report.
Options and filters
- Include high-risk Things only.
- Include Things normally not included in valuation, such as cars that are insured separately.
- Show individual Contents and Show Parts and their separate costs. Parts are shown but not added to the total.
- Only Things missing valuation details: finds Things with no value, or a value with no date.
- Things at minimum calculated value: finds Things whose estimate has dropped to the Category minimum.
- Out of warranty; valuation over a year old or undated: finds values that may be out of date.
Good to know: If you tick more than one filter, the report shows Things that match any of them. Leave them all off to see everything.
How values are chosen
- A current value that you enter always wins over an estimate.
- If you have not entered one, ThingzSafe estimates a value from the purchase price, the age of the item, its warranty and the Category minimum.
- Things without enough information are labelled Needs valuation.
- Prices are for one item. Totals are worked out from the quantity.
- Turn on New for old valuation in Menu App App settings to use the purchase price as the replacement estimate when no current value is entered. It does not look up the current shop price.
Contents, Parts and exclusions
- A Category can add the value of Contents to the Thing that holds them. Parts costs are kept out of the normal total.
- Some Categories, such as cars, are normally left out. You can include them with the report options.
- The report shows how many Things were left out and what they are known to be worth. Check the scope, so a subtotal is not mistaken for the value of everything you own.
Need more help or have a suggestion? Contact us.
AI lookup and the inventory report
The inventory report totals the values in your records, including its configured estimate rules. Pro’s AI replacement lookup is a separate tool that searches comparable prices. It updates a recorded current value only after you accept a proposal. Learn about AI replacement valuations.
AI valuations in the web review grid
Select the rows
- Open Bulk Review Items and tick the AI valuation column for the rows you want. The header checkbox selects or clears all rows.
- Click Generate AI valuations for selected items · Pro. Save pending grid edits when asked, so renamed items use their updated details.
- Check the country and currency in the valuation window, then Generate. Keep the window open while it processes.
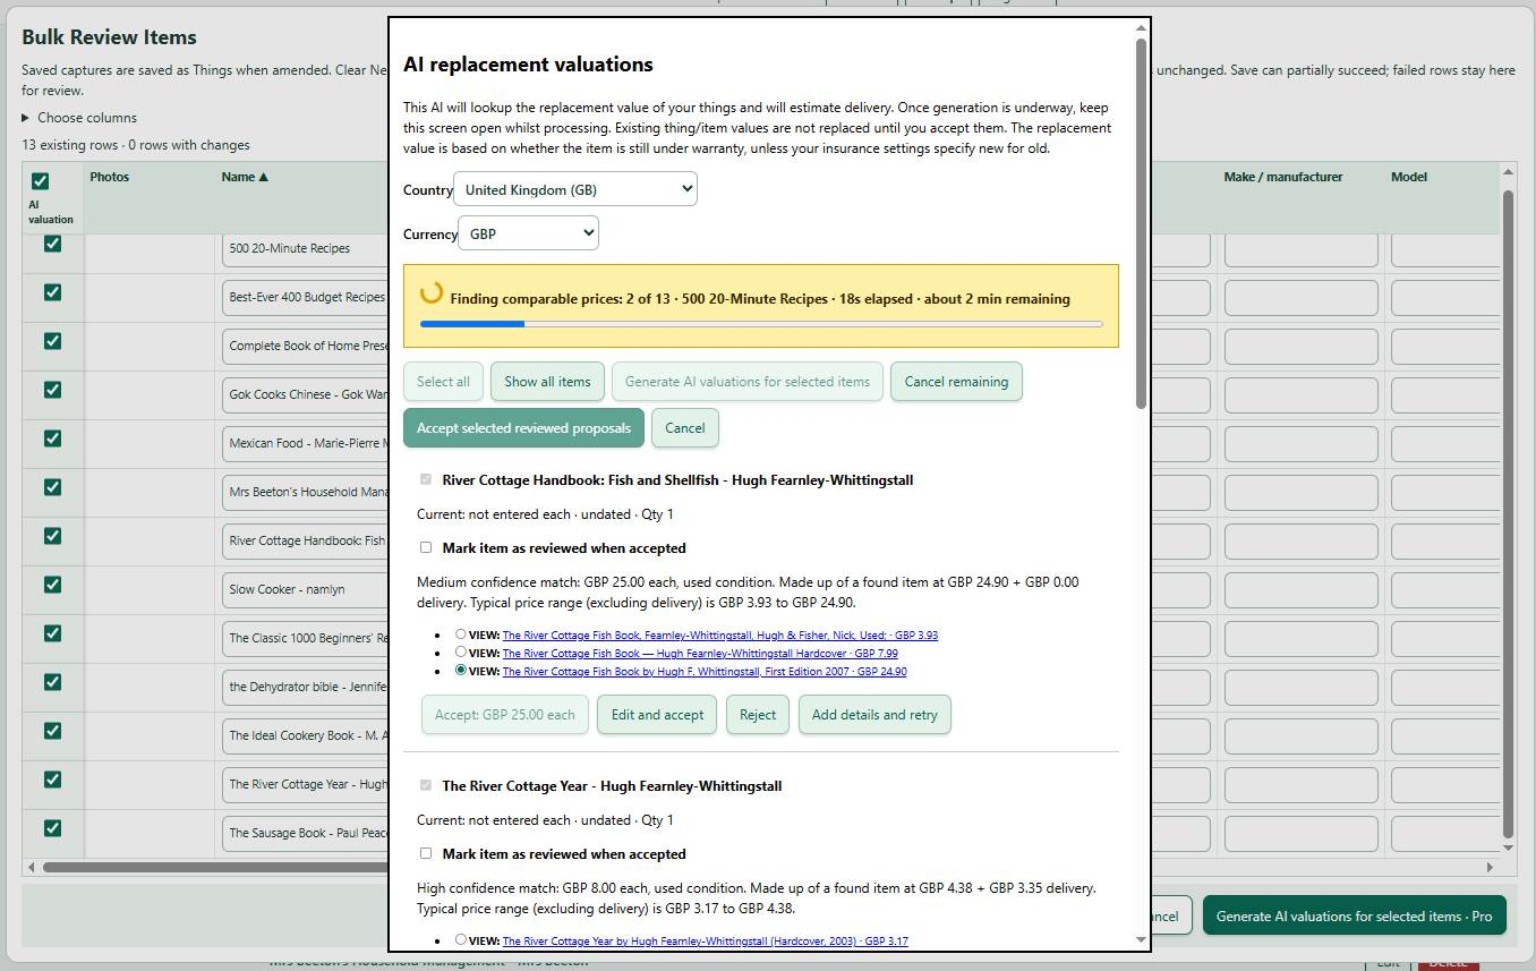
Review and apply
Select a low, middle or high comparable using its radio button, and open the VIEW link to check the listing. The proposed acceptance value updates with your choice. Edit and accept is available when you want a different reviewed amount.
Tick Mark item as reviewed when accepted if you want its Needs review flag cleared too. Accept individual proposals, or use Accept selected reviewed proposals to apply the selected results and close the window. Accepted values return to the current-value fields in the grid.
After generation, acceptance becomes the main action. A second accept action below the stack saves scrolling. Accepted item panels fold down.
Read the full guide to valuation basis, confidence, country, delivery and recovery.
Web portal · Household / Pro
Bulk grid editing
Update several records together in a grid.
Where to start
Web portal: Sites and areas Site Area Bulk Edit Items
Open the grid
- Go to Sites and areas, then a Site and an Area.
- Choose Bulk Edit Items. The grid shows the records you are editing.
- Check that you have the right Site, Area or Things.
- Click a cell to change it. Changed rows are marked.
- Check names, quantities, dates, values and locations before you save.
Good to know: Use the grid's file actions for the row you are on. Adding a file to one row does not add it to the others.
Save and check the results
- Choose the grid's save button and wait for the progress and results.
- Fix any rows marked with errors and save again.
Good to know: If your session ends, copy your unsaved work before you sign in again. A row that was rejected has not necessarily saved, so check its result. Avoid editing the same record on another device during a big batch.
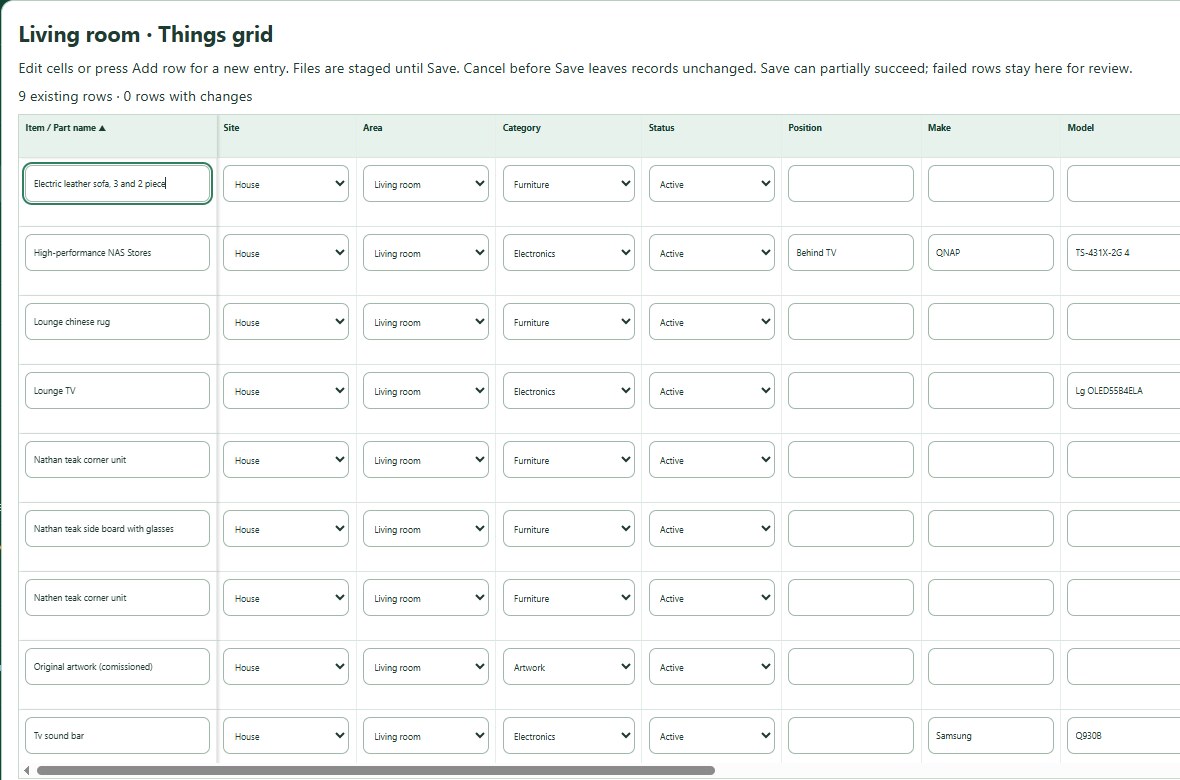
Need more help or have a suggestion? Contact us.
Web portal · Household / Pro
Categories on the web
Group similar items so they are easier to recognise.
Where to start
Web portal: Categories
What are Categories?
- A Category groups similar Things, such as tools, furniture or livestock.
- A Category says what an item is. Sites and Areas say where it is.
Create or edit a Category
- Choose Categories in the menu.
- Choose Add Category, or select a Category's name or its Edit button.
- Enter a name, and a description if you like.
- Choose a colour and an icon so it is easy to spot.
- Tick whether Things in this Category can hold Contents or have Parts.
- Choose Add Category (new) or Save Category (changes).
Good to know
- A freezer is a Thing, and the food inside it is Contents. A fitted component is a Part.
- You cannot delete a Category while Things use it. Move them to another Category first.
- Your Android setup suggested some Categories to start with. See Categories, colours and icons.
Custom fields (Pro)
With a Pro plan you can customise a Category's fields. See Pro category fields and prompts.
Pro category fields and prompts
Need more help or have a suggestion? Contact us.
Web portal · Household / Pro
Contacts on the web
Keep supplier and other contact details with your inventory.
Where to start
Web portal: Contacts
Manage contacts
- Open Contacts. You see names, types and how many Things each is linked to.
- Choose Edit to change a contact.
- Choose Delete to remove one that is not linked to anything. You are asked to confirm.
Good to know: Contacts are for your records, such as shops and engineers. They do not give anyone access to your household. Use People and devices for that.
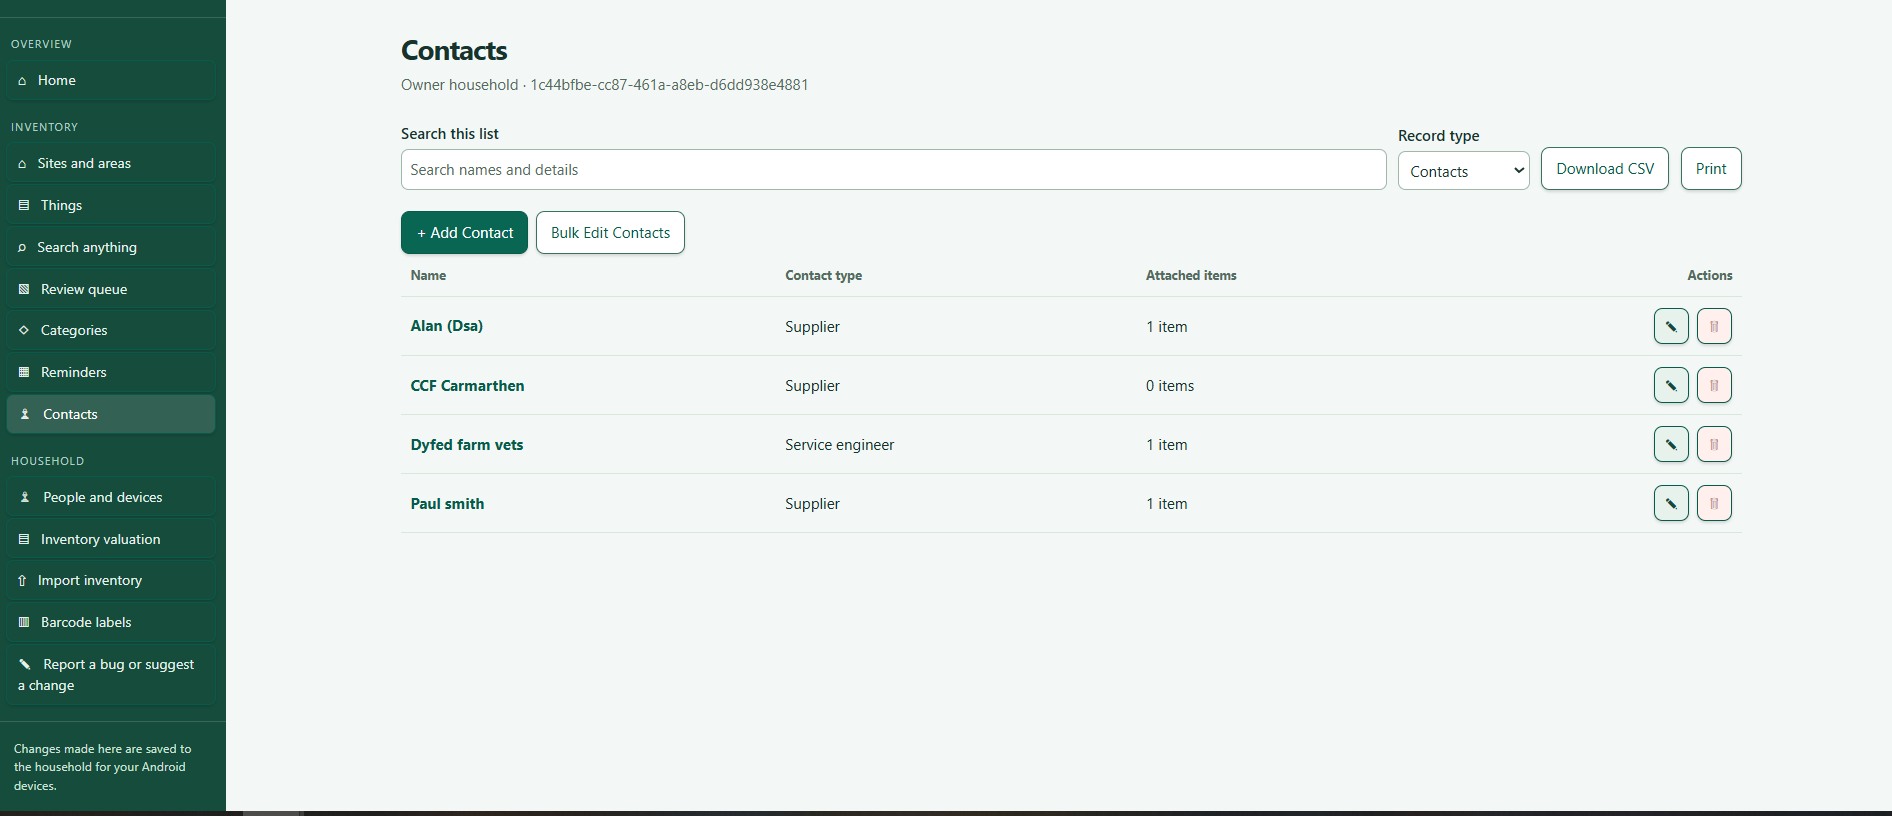
Need more help or have a suggestion? Contact us.
Web portal · Household / Pro
Thing Contents on the web
Track items or supplies stored inside another item.
Where to start
Web portal: Things Thing Contents
What are Contents?
Contents are the individual items stored inside a Thing, such as books on a shelf, tins in a cupboard, building supplies in a workshop store, or CDs in a CD case.
Open and search Contents
- Open the Thing.
- Choose Contents. You see the entries inside it, with their quantities, statuses and values.
- Use Search this list to narrow them down.
Good to know: Each Content belongs to its parent Thing. If it is under the wrong one, open the entry and correct its parent.
Update stock and print labels
- Choose Edit to correct an entry's name or details.
- Use + Increase, − Decrease and the other quantity actions to record stock arriving, being used, moved or counted. Check the changes before you save.
- To print labels for only this Thing's Contents, use Print labels on the Thing. To choose from the whole inventory, use Barcode labels in the menu. See Web valuation, labels and printing.
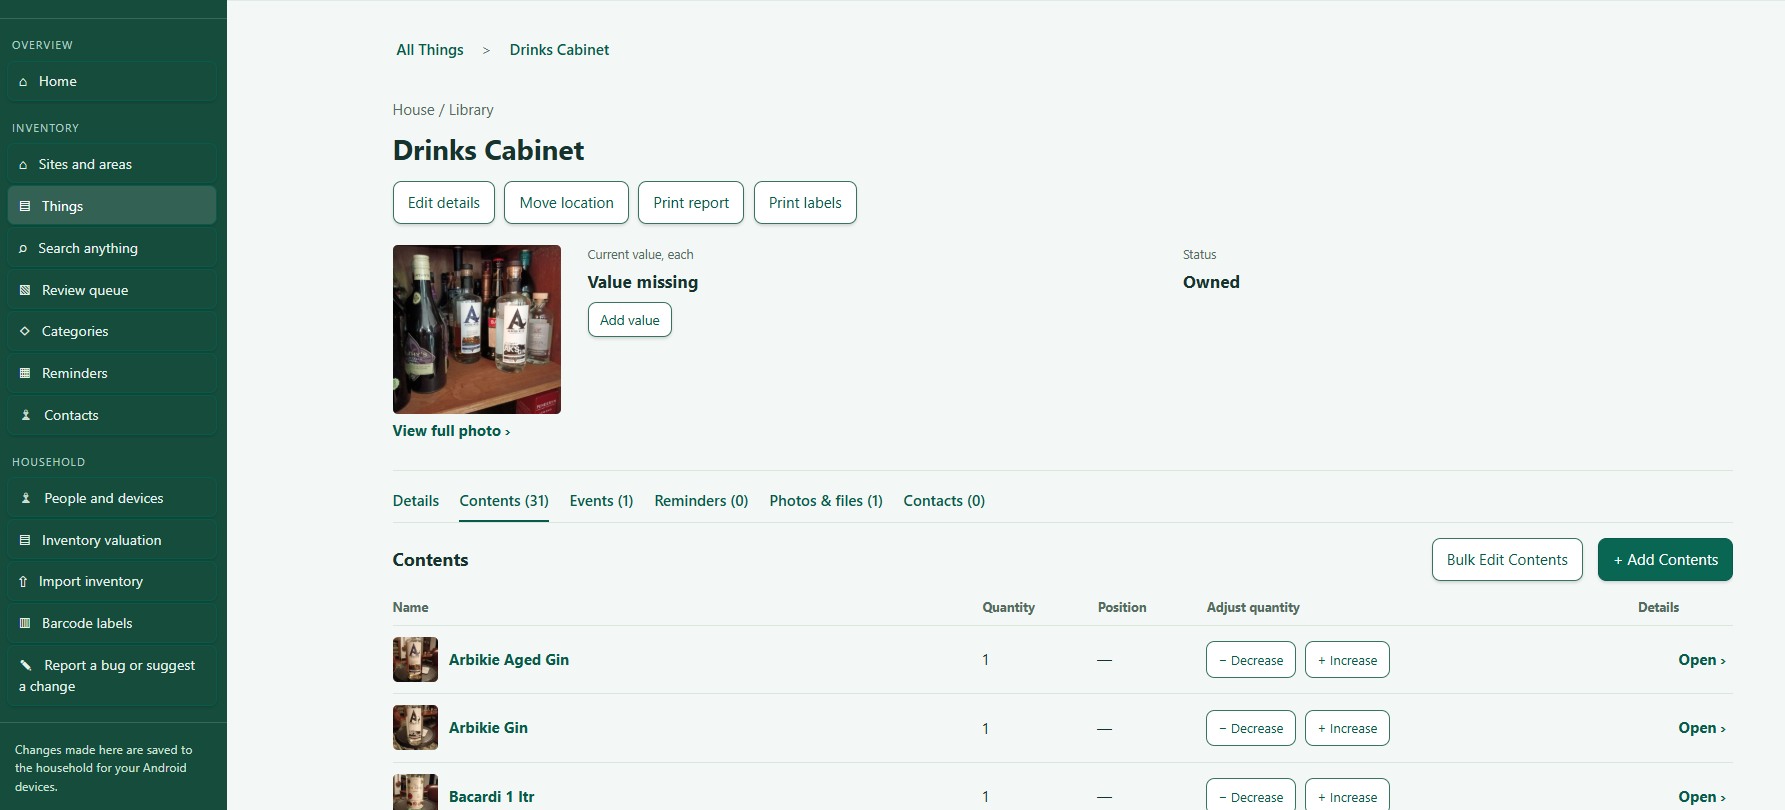
Need more help or have a suggestion? Contact us.
Web portal · Household / Pro
Events and history on the web
Keep a dated history of maintenance and other work.
Where to start
Web portal: Things Thing Events
View an event
Open a Thing and choose Events to see its dated history, such as maintenance, service notes and receipts. The eye button opens an event. The edit button changes it.
Good to know: An event records something that happened. A reminder schedules something to do. See Reminders on the web.
Add or edit an event
- Choose + Add event.
- Enter a clear title and date. Add notes, or attach a receipt, if useful.
- Choose Save, and reopen the event to check it.
If something goes wrong: Deleting an event removes it from the history, so check the row first.
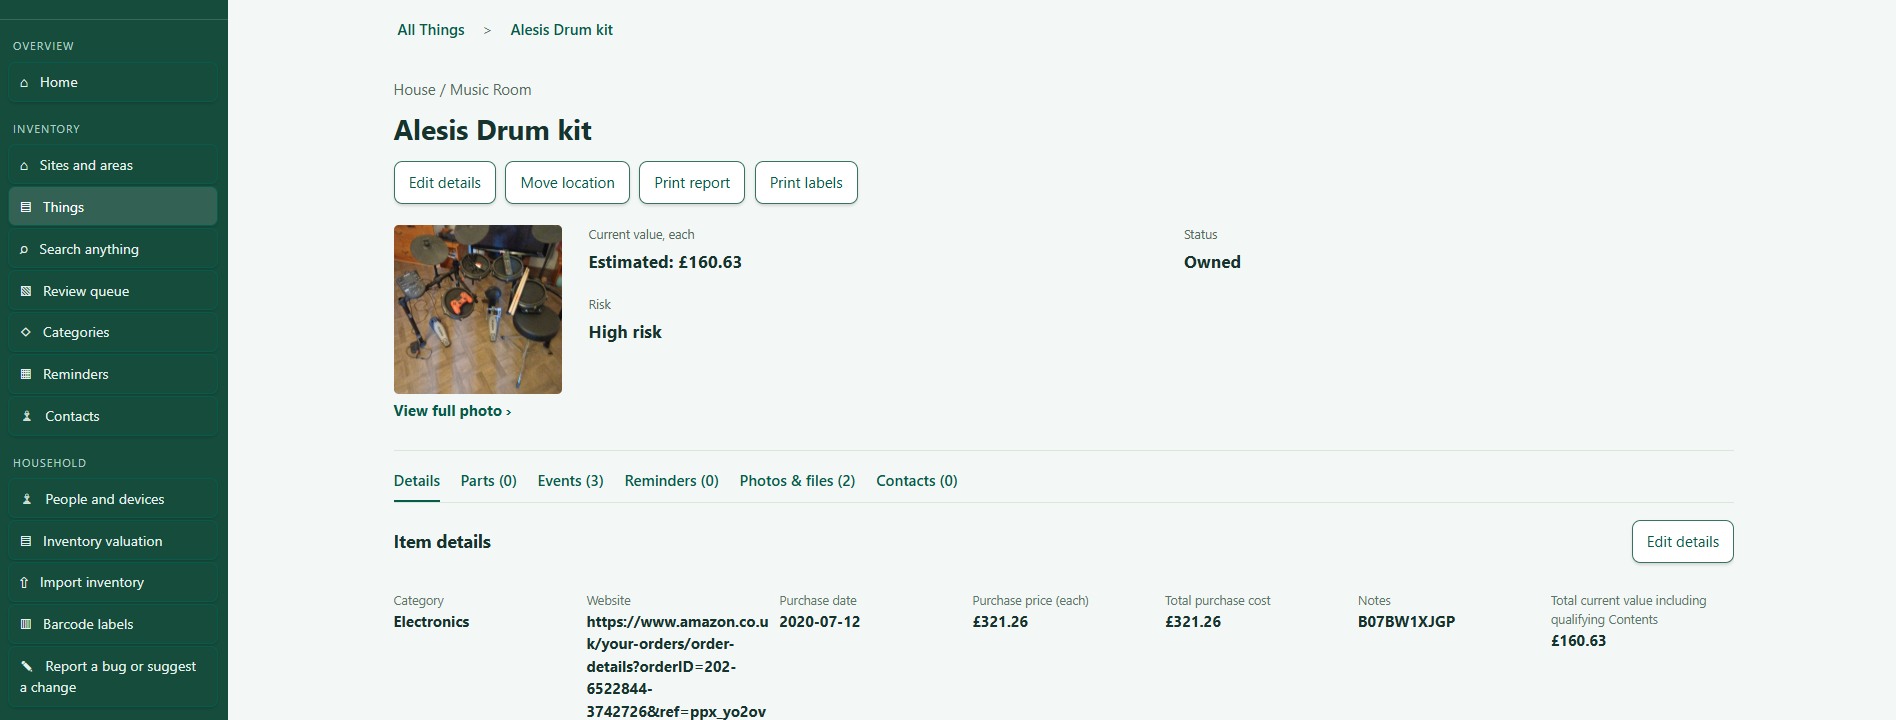
Need more help or have a suggestion? Contact us.
Web portal · Household / Pro
Photos and files on the web
Keep photos and documents with the item they describe.
Where to start
Web portal: Things Thing Photos & files
View and add files
- Open the Thing.
- Choose Photos & files.
- Open a photo to see it larger. Use download to save an original file.
- To add a file, upload it from the Thing it belongs to. Photos and documents can be up to 20 MB each.
Good to know: Files on a Thing are kept apart from files on its Contents, Parts, events and contacts. Check which one you have open before you upload.
Protect private details
Before you send a screenshot to support, hide email addresses, serial numbers, invitation codes and private inventory details.
Need more help or have a suggestion? Contact us.
Web portal · Household / Pro
Import inventory
Bring inventory records in from a supported file.
Where to start
Web portal: Import inventory
Prepare the file
- Open Import inventory and choose a file. The importer reads CSV files and common spreadsheets.
- Use one row for each record, with a clear heading for each column.
- Keep a copy of the original file.
Map, preview and import
- Choose Read file and map fields.
- Match each column to a field, and choose where the items should go.
- Choose Preview import. Check the quantities, dates and values.
- Fix any errors it reports.
- Choose Import valid rows.
- Afterwards, open a few records and compare the counts with what you expected.
Good to know: Tick Mark imported items for review to find them again in the Review queue.
Good to know: Photos and files are not brought in by the importer. Add them to each Thing afterwards. The importer may not work with the export from every other inventory app.
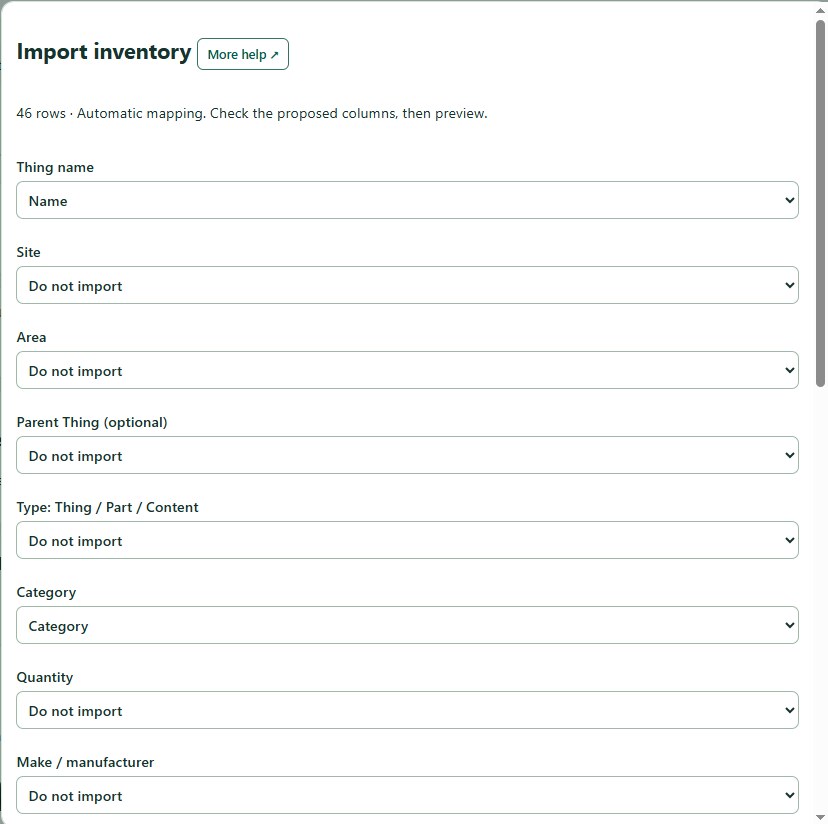
Need more help or have a suggestion? Contact us.
Web portal · Household / Pro
Browse Sites and Areas
Organise items by the places where you keep them.
Where to start
Web portal: Sites and areas
What are Sites and Areas?
- A Site is a whole place, such as your house, workplace or storage unit.
- An Area is a room or section inside a Site, such as a kitchen, workshop or loft.
- A Thing can sit directly in a Site or in one of its Areas. Position is a note to say exactly where, such as "top shelf".
Browse and manage places
- Open Sites and areas.
- Choose a Site, and then an Area.
- Use Edit or Delete beside a Site or Area. You are asked to confirm a deletion, and the place must be empty first.
What the list shows
Each Thing shows its photo, Category, location and position, Make, Model, quantity and total current value. Estimated totals and missing values are labelled. Contents can add to the total if the Category allows it. Parts do not.
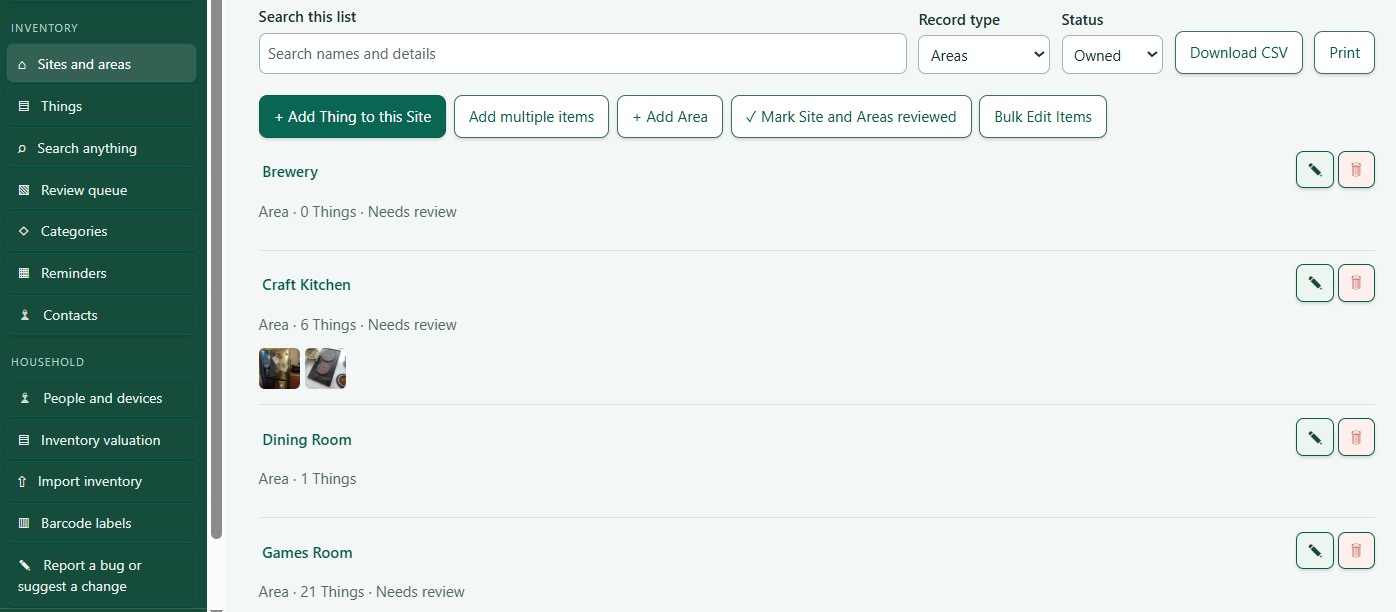
Need more help or have a suggestion? Contact us.
Web portal · Household / Pro
Access the web portal
Open your existing household inventory in a browser.
Where to start
Web portal: Web portal Sign in
Before you sign in
- The web portal is for households on an active Household or Pro plan. It shows the same inventory as your phone.
- Create or join the household in the Android app first, and let the first sync finish. See Create or join a household.
- The web portal can only be used to sign in. You cannot create a new account on it.
Sign in
- Open https://app.thingzsafe.com/ in your browser.
- Choose Sign in.
- Use the same email address as on your phone.
- Follow the prompts. If you are asked for a verification code, use the latest one from your email.
What happens next: Your household inventory opens. The owner can also open People and devices. People who were invited can use the inventory but cannot manage the household.
If something goes wrong: If the sign-in page offers to create a new account, stop. The portal has not been set up correctly. Contact support instead of creating one.
Sign out
- Save any edits you are making.
- Choose Sign out.
Good to know: On a shared computer, close the browser window as well. Never share an invitation code or a verification code with anyone but the person it is meant for.
Need more help or have a suggestion? Contact us.
Web portal · Household / Pro
Navigate the web inventory
Find your way around the shared web inventory.
Where to start
Web portal: Home
Using a phone or tablet
- On smaller screens the menu becomes a strip across the top. Swipe it sideways to see more.
- Forms stack in a single column.
- Wide tables and grids scroll sideways. A computer or large tablet is easier for editing lots of records.
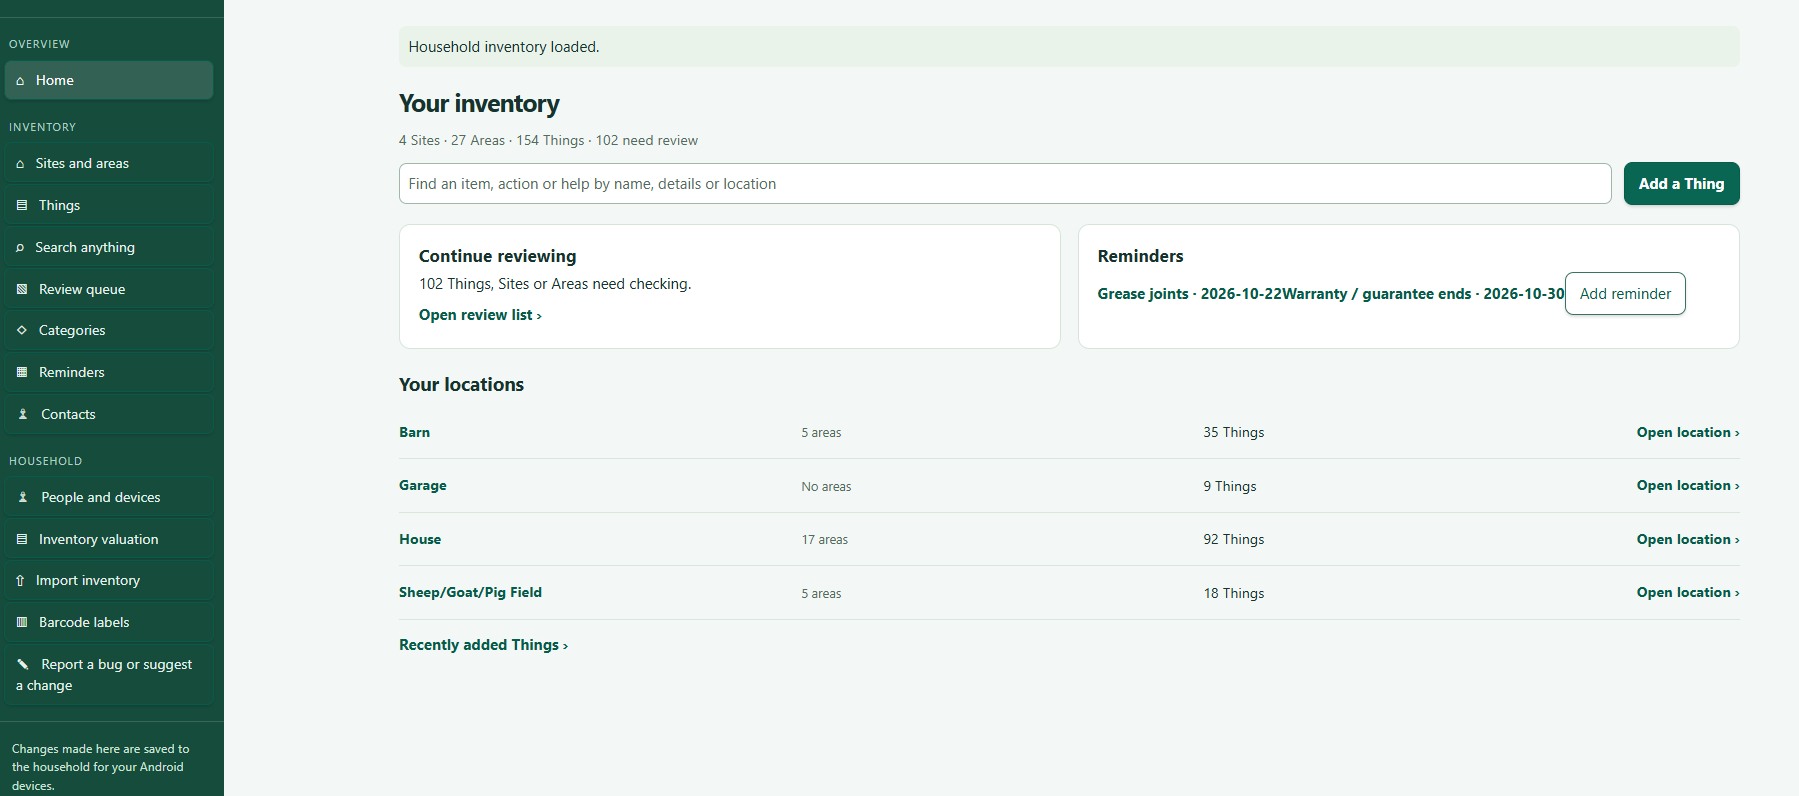
Need more help or have a suggestion? Contact us.
Web portal · Household / Pro
People, invitations and devices
Invite household members and manage their access.
Where to start
Web portal: People and devices
Who can use this screen
People and devices is for the household owner only, who is the person who pays for the plan. The owner can see members, pending invitations and registered devices. Invited members cannot open it.
Invite someone
- Open People and devices.
- In Invite a household member, enter the email address the person will use to sign in.
- Choose Create invitation.
What happens next: The invitation lasts seven days. Tell the person to look for your email and check their Spam or Junk folder. Gmail sometimes filters it.
Good to know: You can also invite people from the Android app. See Create or join a household.
Help the invited person join
- They use the invitation email and code from you. They do not need a plan of their own.
- The app checks the code and that the email matches the invitation.
- Joining replaces what is on their phone with the household's inventory. They should back up anything they want to keep.
Remove a person or a device
- In People, remove a member. In Devices, remove a device that is lost or no longer used.
- Removing access stops their future syncs. It cannot erase information already on their device.
Device limit
A Household plan supports up to ten registered devices, including browsers. Remove unused devices when you reach the limit.
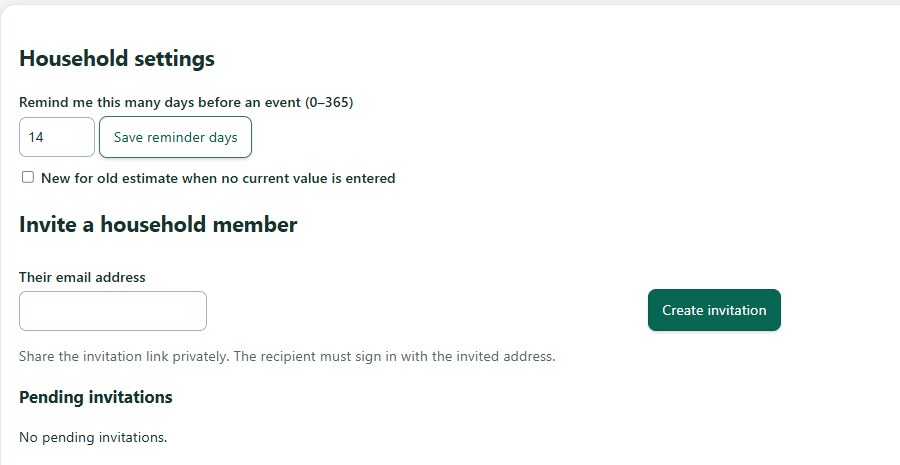
Need more help or have a suggestion? Contact us.
Web portal · Household / Pro
Reminders on the web
Schedule tasks and keep track of their completion.
Where to start
Web portal: Reminders
Upcoming dates
- Home shows upcoming reminders using the reminder window set in the Android app, plus anything overdue. It does not show every future date.
- The Reminders list has its own Period filter, with past, future and all dates. It is separate from the Home window.
Add a reminder
- Open Reminders.
- Choose + Add reminder.
- Pick the Thing, enter a title and date, and a repeat if you want one.
- Choose Save reminder.
Complete a reminder
- Open the reminder and check the Thing it belongs to.
- Choose Mark reminder done.
What happens next: A repeating reminder moves to its next date and keeps its history.
Good to know: Change warranty dates on the Thing itself, using Edit. Use the reminder's edit button for reminders you added yourself.
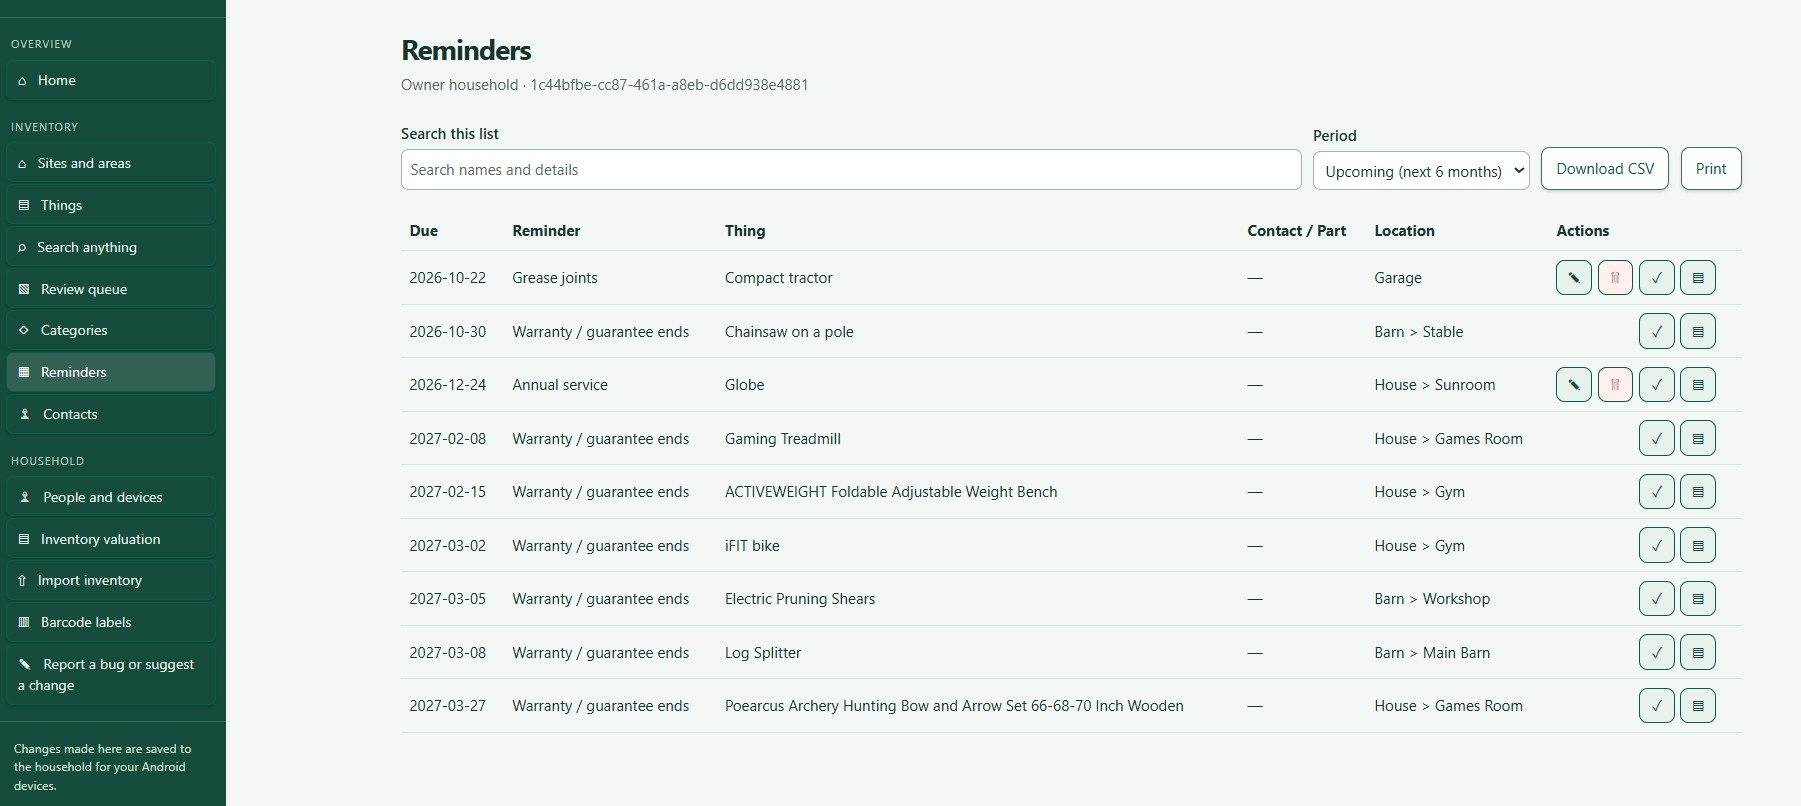
Need more help or have a suggestion? Contact us.
Web portal · Household / Pro
Web valuation, labels and printing
Review values and print reports or labels.
Where to start
Web portal: Inventory valuation
Web portal: Barcode labels
Inventory valuation
- Choose Inventory valuation in the menu.
- Choose the scope and any filters.
- Choose View or print report.
Good to know: Values you enter beat estimates. Missing values are shown. Totals count quantities and any Contents that qualify, but not Parts. See Inventory valuation.
Print barcode labels
- Choose Barcode labels in the menu, or use Print labels on a Thing.
- Tick the items to print. Select all and Deselect all sit above the tick boxes.
- Choose the paper template and the first unused row and column.
- Choose Preview / print labels.
- Print at actual size on the matching paper. Try plain paper first.
Good to know: See Print barcode labels for more on labels.
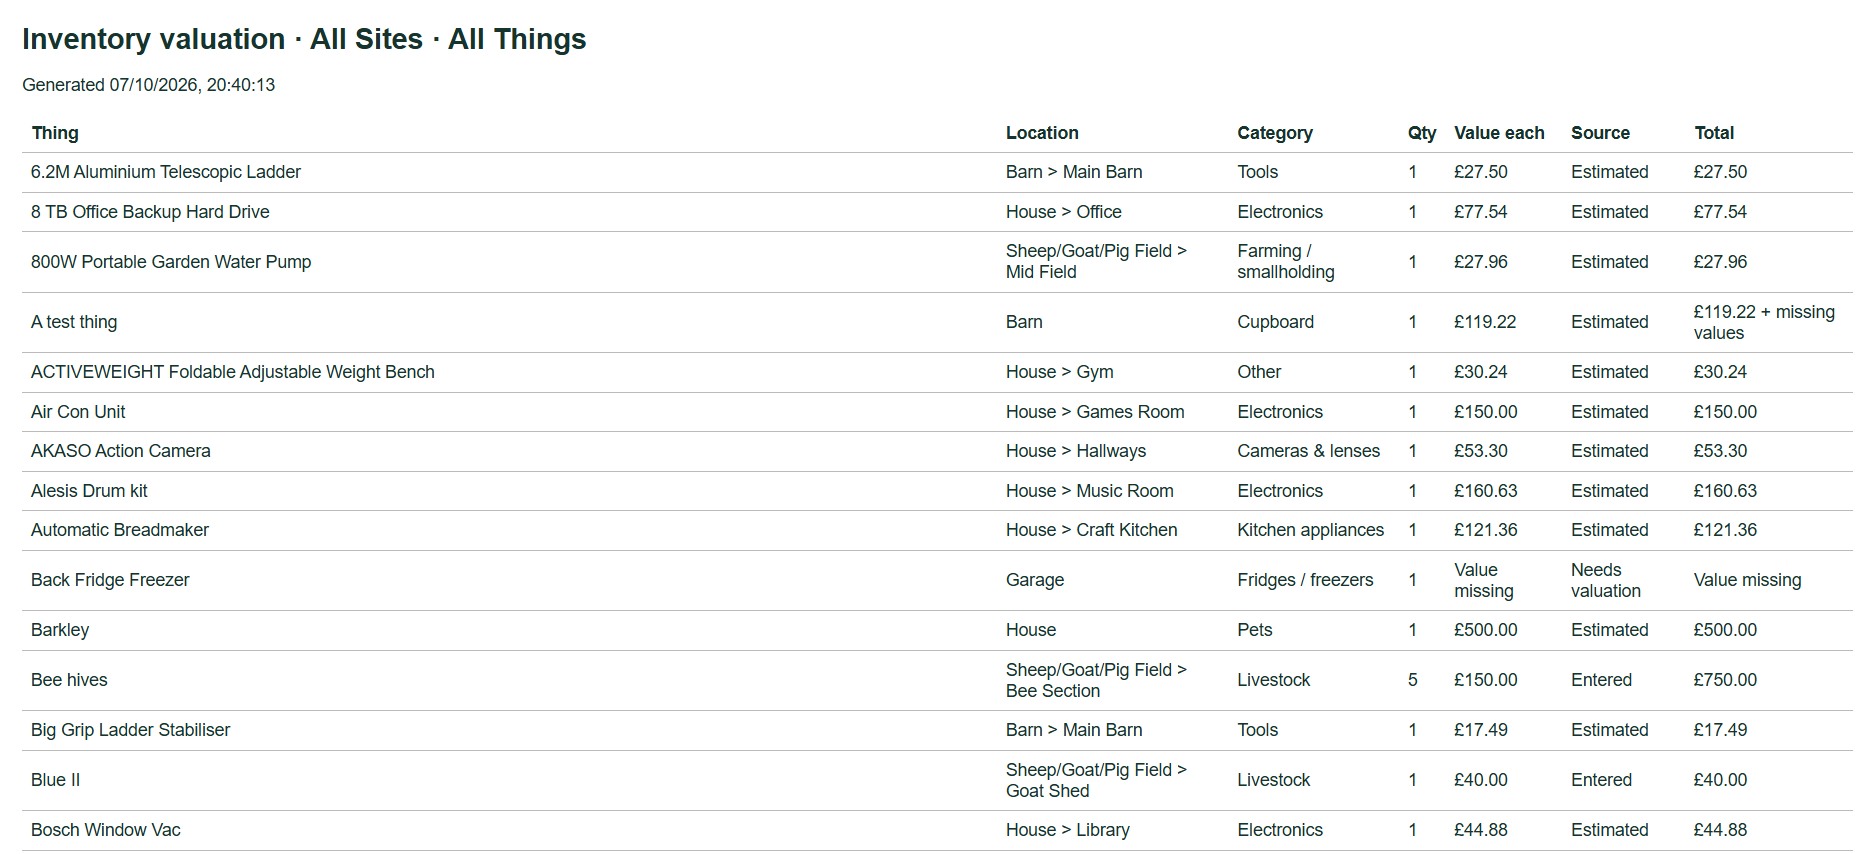
Need more help or have a suggestion? Contact us.
Web portal · Household / Pro
Review queue on the web
Turn unfinished captures into useful inventory records.
Where to start
Web portal: Review queue
Review saved work
- Open Review queue.
- Select the records you want to check.
- Choose Edit to finish a capture or correct a Thing.
- Choose Delete only if you want to remove it for good.
Good to know: Sites and Areas have Edit and Delete buttons too. Check the row before you confirm a deletion.
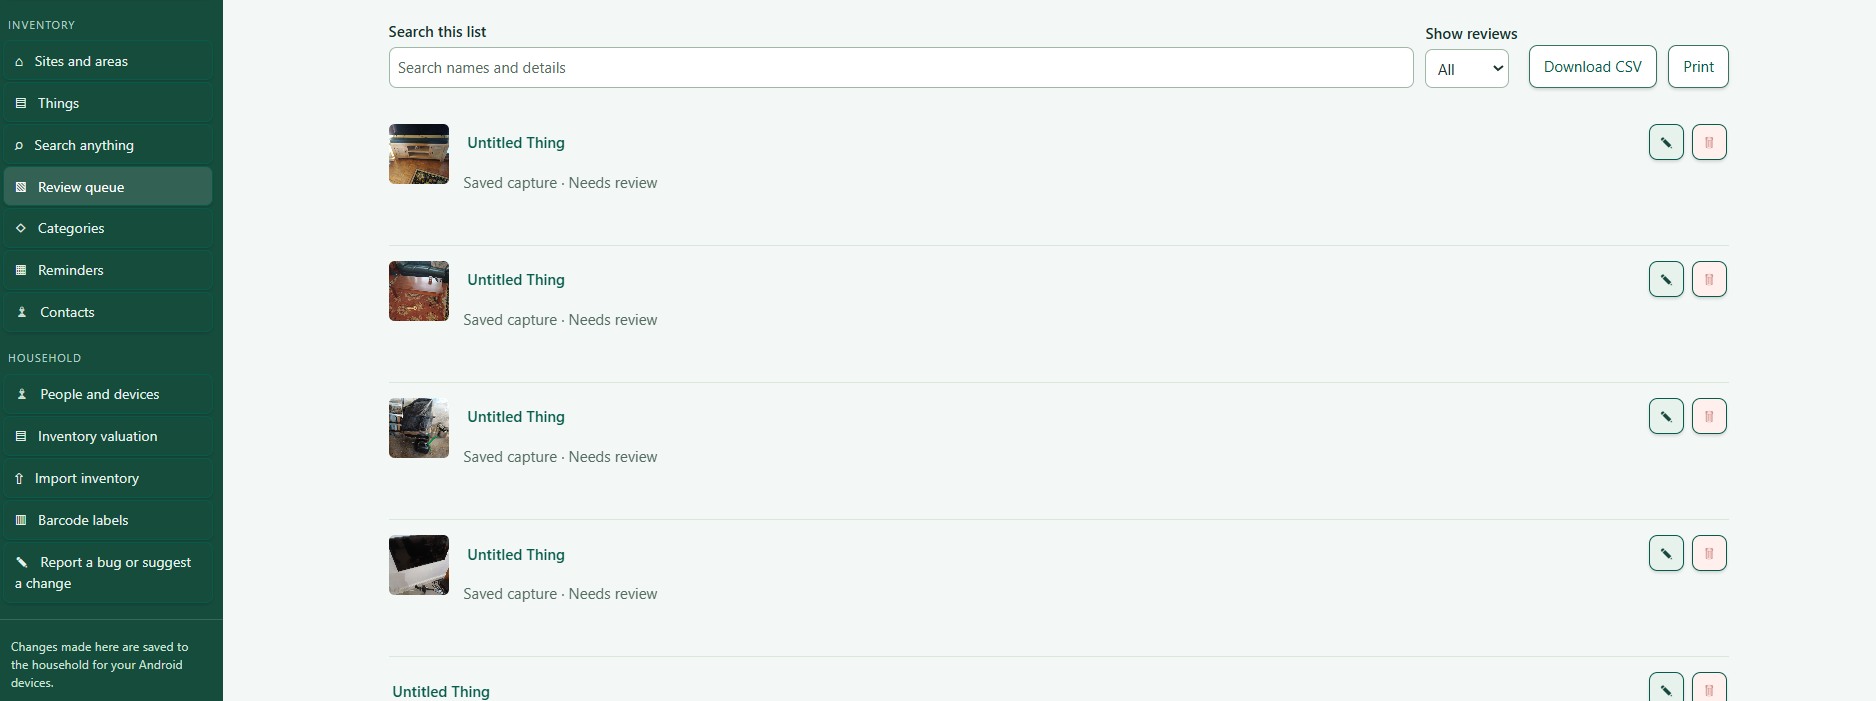
Need more help or have a suggestion? Contact us.
Web portal · Household / Pro
Search and filter records
Find an item without remembering where you put it.
Where to start
Web portal: Search anything
Search everything or one list
- Search anything looks across Things, Sites, Areas, Contents and other records.
- Search this list filters only the list you are looking at.
Type part of a name or description. Clear the box to see everything again. Open a result to see where it is and its details.
Narrow your results
- Status starts on Owned, which shows Active and On loan records and hides Sold and Disposed ones. Choose All to see everything.
- Category narrows Things to one Category.
- Other filters appear depending on the screen, such as High risk only, Search event text, the reminder Period and the review type.
Good to know: Sold and Disposed records have a silver background when they are included.
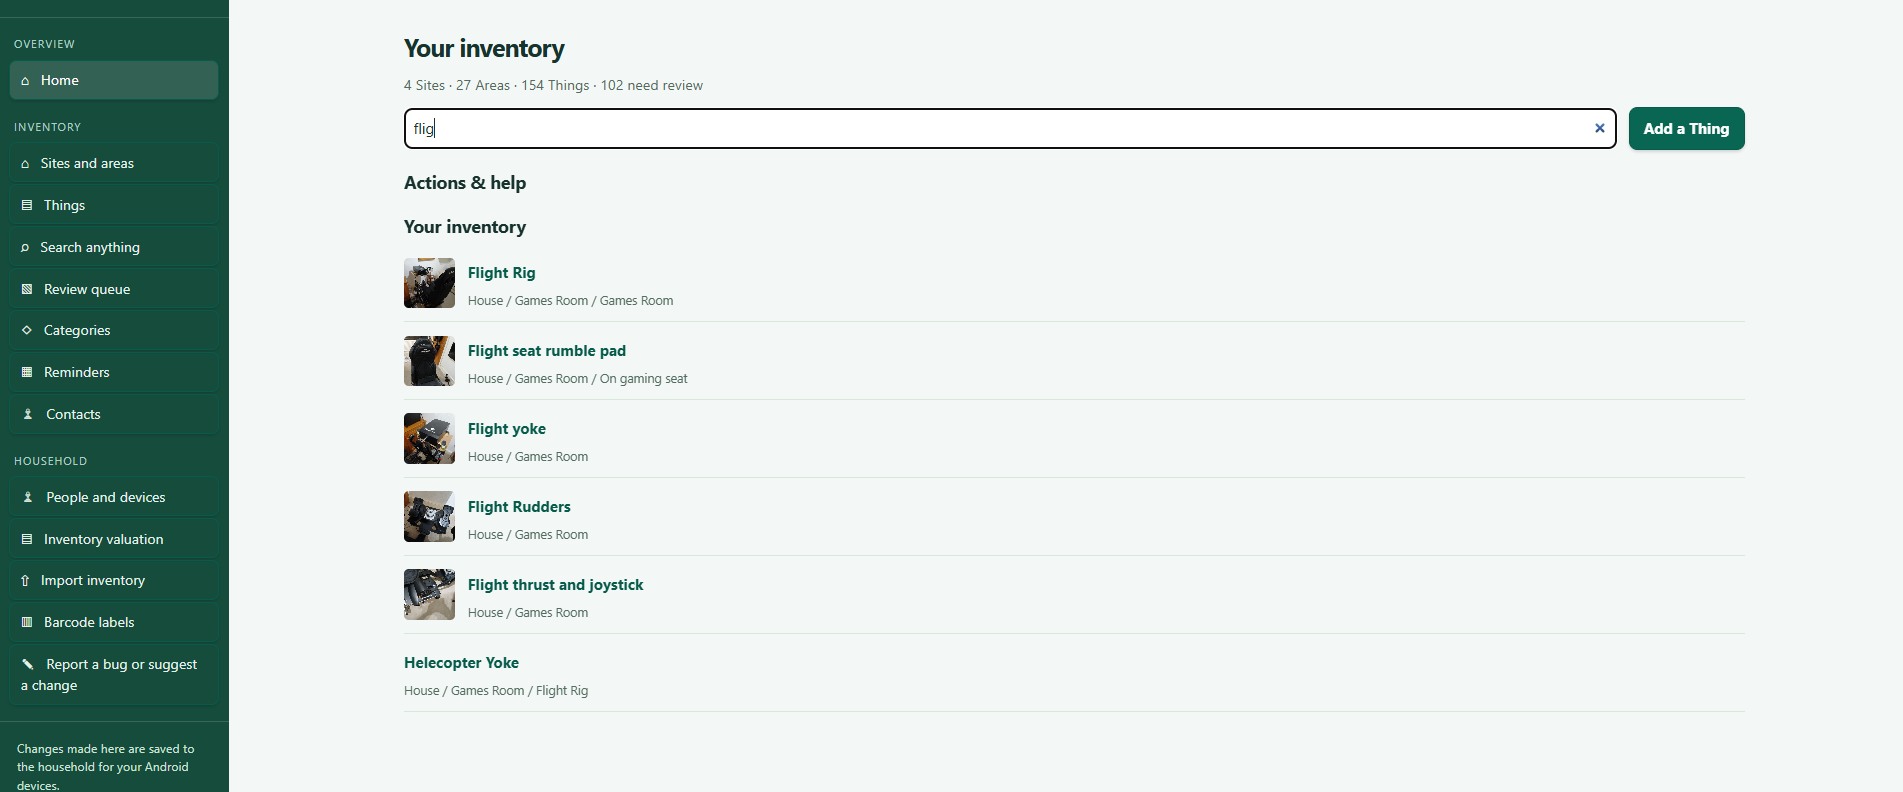
Need more help or have a suggestion? Contact us.
Web portal · Household / Pro
Web sync and session problems
Keep the web inventory and your phone up to date.
Where to start
Web portal: Refresh
Keep the web and your phone up to date
- Save your changes on the web. They are written to the household straight away.
- Choose Refresh to load the latest records.
- Open the Android app and let it sync while it is open.
Good to know: Wait for the result before you close a save window. Refresh does not save a form you have not saved.
If something is not working
- No household appears: create or join one in the Android app first, and let the first sync finish.
- You were invited: you can join for free with the email address and code from the owner.
- A message about household setup after paying: your Google Play purchase and your phone's inventory are safe. Choose Retry household setup in the Android app.
- Access denied on People and devices: that is expected for invited members. Ask the owner.
- Access denied to the inventory: check your account email, that the plan is active, and that you are in the household.
- Your session ran out: copy any unsaved work, sign in again and reload.
Good to know: Never send passwords, verification codes or access details to support.
Need more help or have a suggestion? Contact us.
Web portal · Household / Pro
Link contacts to a Thing
Link an inventory contact to a particular item.
Where to start
Web portal: Things Thing Contacts
Link a contact to a Thing
- Create the contact in Contacts first. See Contacts on the web.
- Open the Thing and choose Contacts.
- Pick a person in Choose an existing contact.
- Choose Link contact.
Good to know: Contacts in your inventory do not give anyone access to the household. Use People and devices for that.
Check or remove a link
The linked contact appears on the Thing. To remove the link, choose Unlink. The person stays in your Contacts and in the household.
Need more help or have a suggestion? Contact us.
Web portal · Household / Pro
Add and edit Things on the web
Record an item, its location and useful details.
Where to start
Web portal: Things
What is a Thing?
A Thing is any item you want to keep track of, such as a car, computer, cupboard or bookcase. Each Thing holds its location, photos, documents and history together.
Add a Thing
- Open Things, or go into a Site or Area first.
- Choose + Add Thing.
- Enter a name, and choose its location and Category.
- Fill in the other details you know.
- Choose Save Thing.
Edit a Thing
- Open the Thing.
- Choose Edit.
- Change the details, such as purchase details, quantity, status, warranty and current value.
- Choose Save.
Good to know: Prices and values are for one item. ThingzSafe works out the total from the quantity.
The Things list
The list starts on Owned, which shows Active and On loan Things. Sold and Disposed ones are hidden. Choose All to see everything. Sold and Disposed Things have a silver background.
Contents and Parts
- Open Contents or Parts on a Thing. They appear only if the Thing's Category allows them. Add and edit entries under the right Thing. See Thing Contents on the web.
- Contents are things stored inside. Parts are pieces fitted to it. A Part's cost is not added to the normal valuation.
Photos, events and contacts
- Photos & files: see Photos and files on the web.
- Events: see Events and history on the web.
- Contacts: see Link contacts to a Thing.
- Change warranty dates on the Thing itself, using Edit.
Need more help or have a suggestion? Contact us.
AI replacement values
With Pro, use AI beside Current value in Edit for one item. To value several, tick their AI valuation cells in Bulk Review Items. Follow the web valuation guide.
Android
Zoom a photo
Enlarge a photo to read small details.
Where to start
Android: Home Site Area (optional) Thing Photos & files
Zoom in on a photo
- Tap a photo to open it full screen.
- Pinch with two fingers to zoom in or out.
- Drag the photo with one finger to move around it when zoomed in. This is handy for reading a receipt or serial number.
- Tap Reset zoom to fit the whole photo on screen again.
- Tap Close to go back to the previous screen.
Save a copy
Tap Download to save the original photo. Android asks where you want to save it.
Need more help or have a suggestion? Contact us.